Love Heart Cupcakes
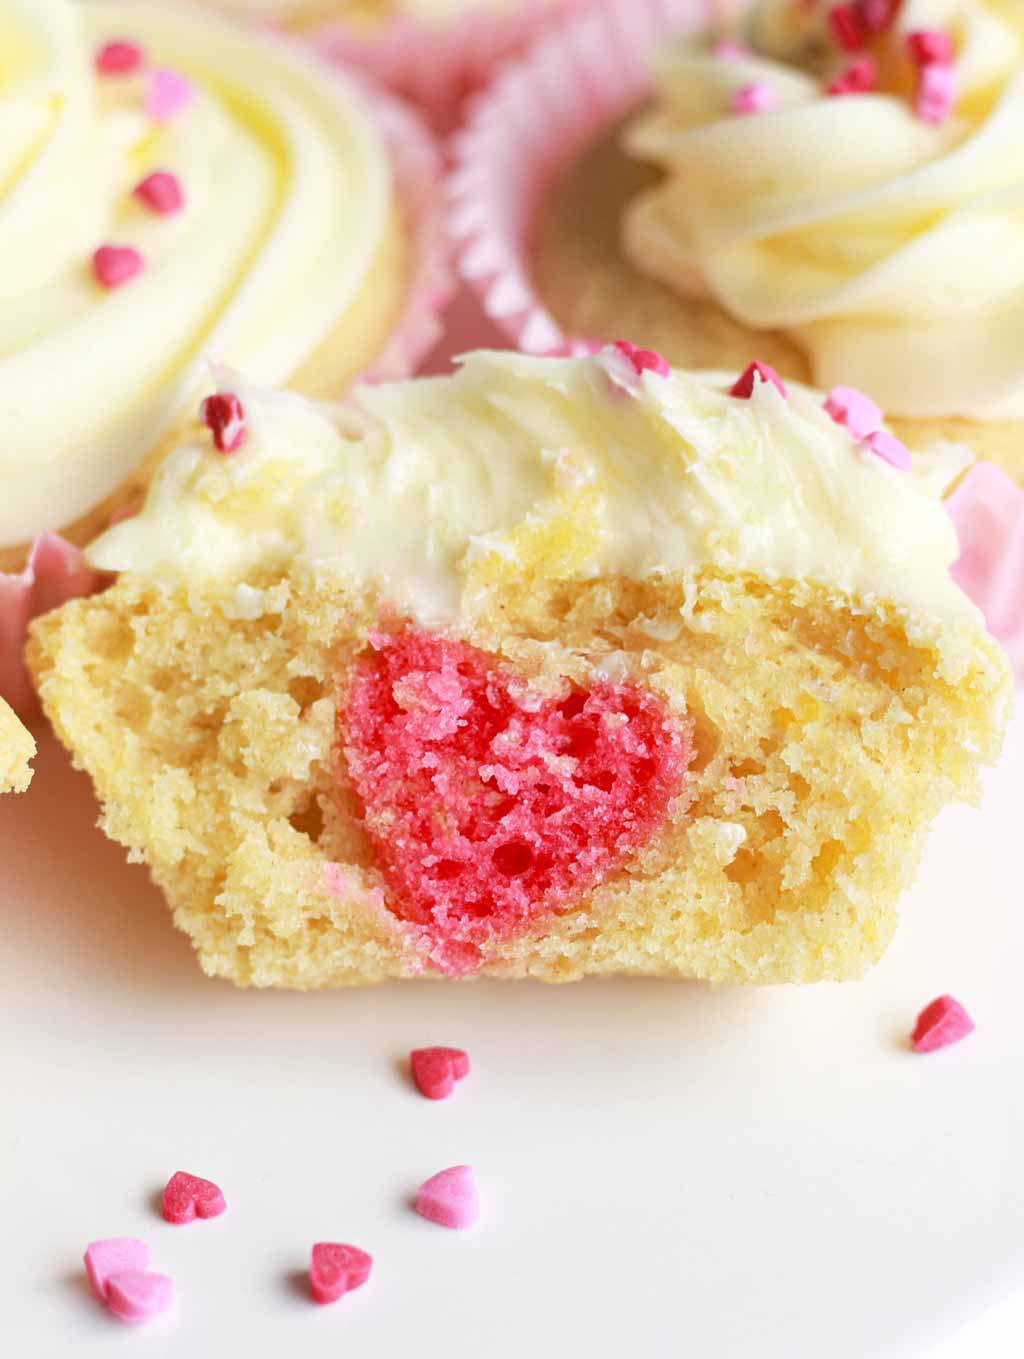
These vegan love heart cupcakes are a super cute bake for Valentine’s Day. On the outside, they look like regular cupcakes but the surprise is that each cupcake has a pink heart hidden inside!
Oh the season of love!
Like the scrooge I am, I don’t really celebrate Valentine’s Day. But I do love a bit of themed baking!
I typically like to show my affection through food so I thought making these Valentine’s Day cupcakes would be a great way to spread some love to my nearest and dearest.
And in my humble opinion, food gifts trump all other gifts. So I highly recommend baking a batch of these instead of spending lots of money on chocolates and flowers!
Vegan Valentine’s cupcakes with hidden hearts inside
I have to admit that this was not my idea AT ALL.
I was watching some baking videos on YouTube the other day and came across this idea from Cupcake Jemma’s video. She is the ultimate baking queen and a huge inspiration to me.
I had a peek at Pinterest and it seems this is actually quite a popular trend, or at least it was at some point. But I noticed that not many people (if any) had created vegan cupcakes with hearts inside. So here I am to save the day… even if I’m 3 years late to the party.
Want more Valentine’s Day recipes? Try these:
I used my vanilla cupcakes recipe to make these cupcakes and topped them with some vanilla buttercream frosting. To decorate, I used some accidentally vegan cupcake heart sprinkles that I found in Tesco.
Because the cupcakes are quite plain on the outside, I think the sprinkles make a super cute addition and make them look a bit more enticing.
Things you’ll need
To make this recipe, you’ll need to have the following equipment to hand:
- Red or pink vegan-friendly food colouring (I use PME pastes/gels)
- 7-inch round cake tin
- 1-inch heart-shaped cookie cutter (available from Amazon)
- 12-hole cupcake tray and cupcake liners
How to make vegan love heart cupcakes
Step 1:
The first step is to make the pink hearts that will go in the middle of the cupcakes.
Preheat your oven to 180°C/350°F (or 160°C/325°F if you’re using a fan or convection oven). Grease, flour and line a 7-inch round cake tin.
Step 2:
In a bowl, mix together 115g of self-raising flour, 1/4 tsp baking soda and 90g of caster sugar.
Step 3:
Add 140ml of soy milk to the bowl along with 1 teaspoon of vanilla extract and 45ml oil. Then add in 1/4 teaspoon of apple cider vinegar and mix everything together really well until you have a smooth cake batter.
If you don’t have apple cider vinegar, you can use an equal amount of white vinegar or lemon juice instead.
Step 4:
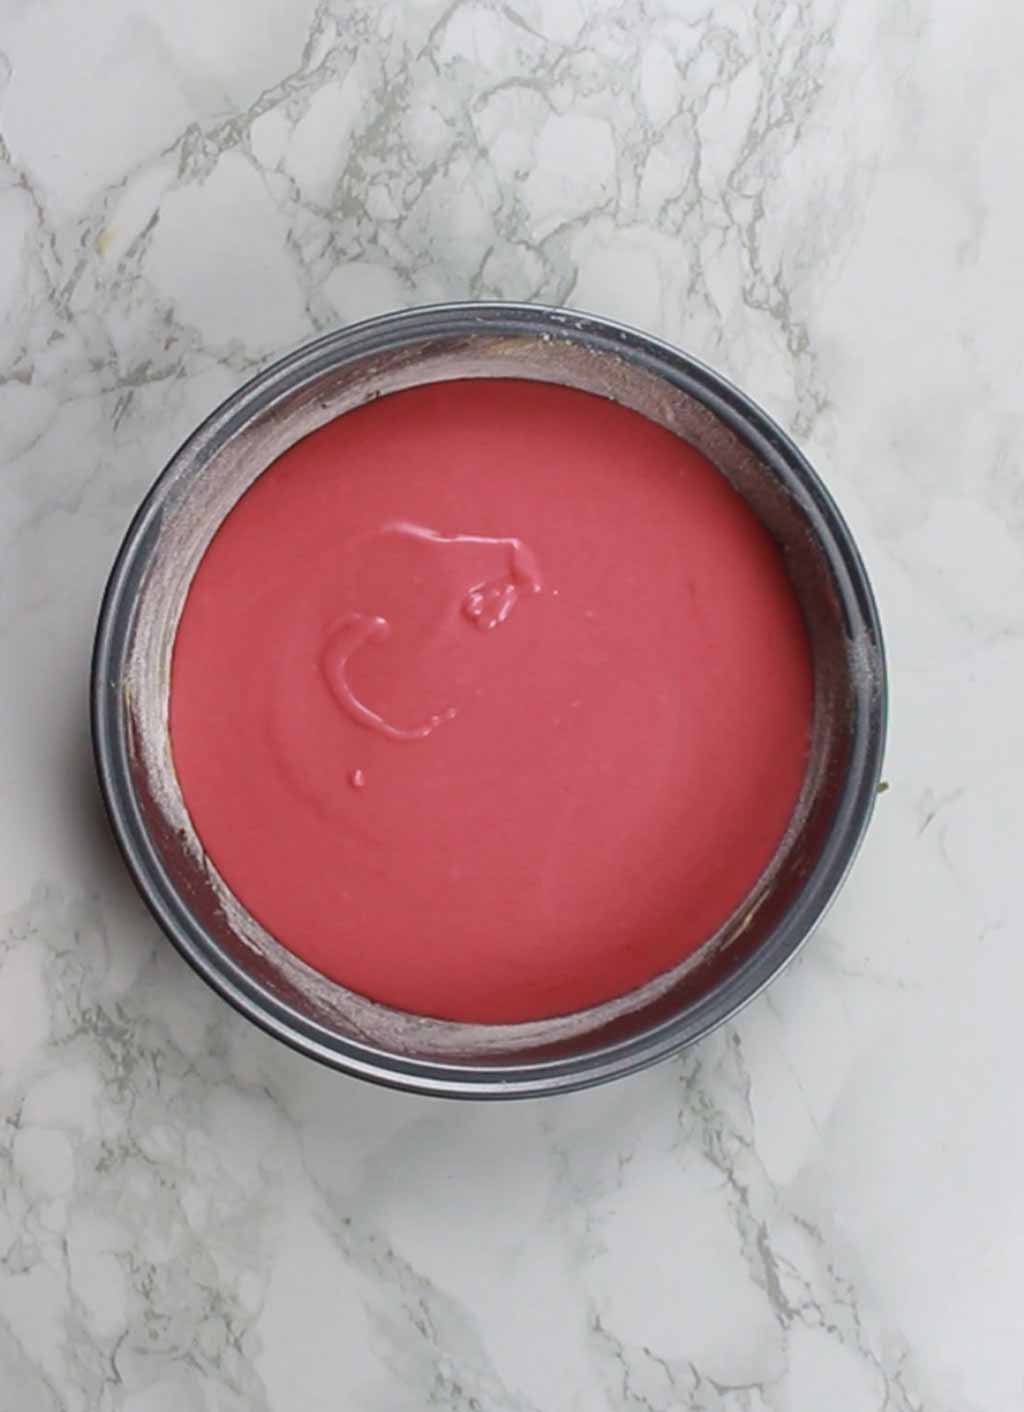
Add a drop of pink or red food colouring and mix it in well. I recommend starting with a small amount and increasing it if you want a more vibrant colour.
Step 5:
Pour the batter into the lined tin and bake for 12-15 minutes, or until a toothpick through the middle comes out clean. Keep the oven running for the next part of the recipe.
Let the cake cool in the tin for 5 minutes, then flip it out onto a wire rack and let it cool completely.
Step 6:
Once the cake is completely cool, use your cutter to cut out 12 heart shapes.
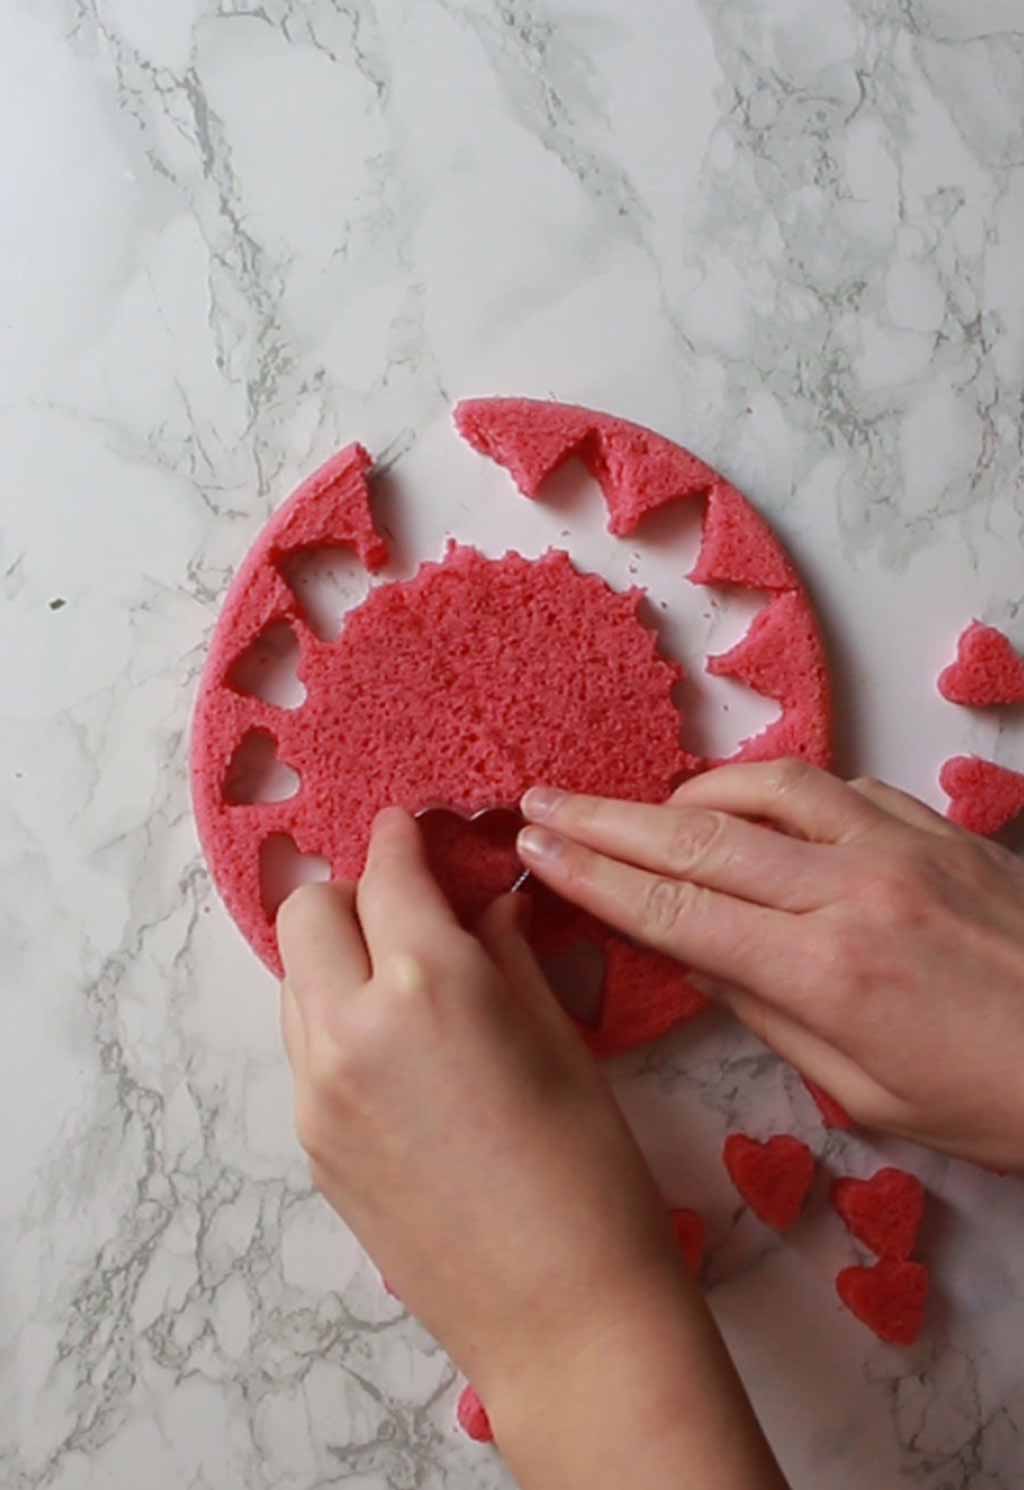
Next, we just need to make the batter for the cupcakes.
Step 7:
Line a cupcake tray with 12 liners.
In a large bowl, mix together 230g self-raising flour, 1/2 teaspoon baking soda and 180g caster sugar. Add in 240ml soy milk, 90ml of oil, 2 teaspoons vanilla extract and 1 teaspoon apple cider vinegar. Mix well until you have a smooth batter.
Step 8:
Place a small amount of cake batter in each cupcake case. Place a pink heart in each one, making sure it stands upright.
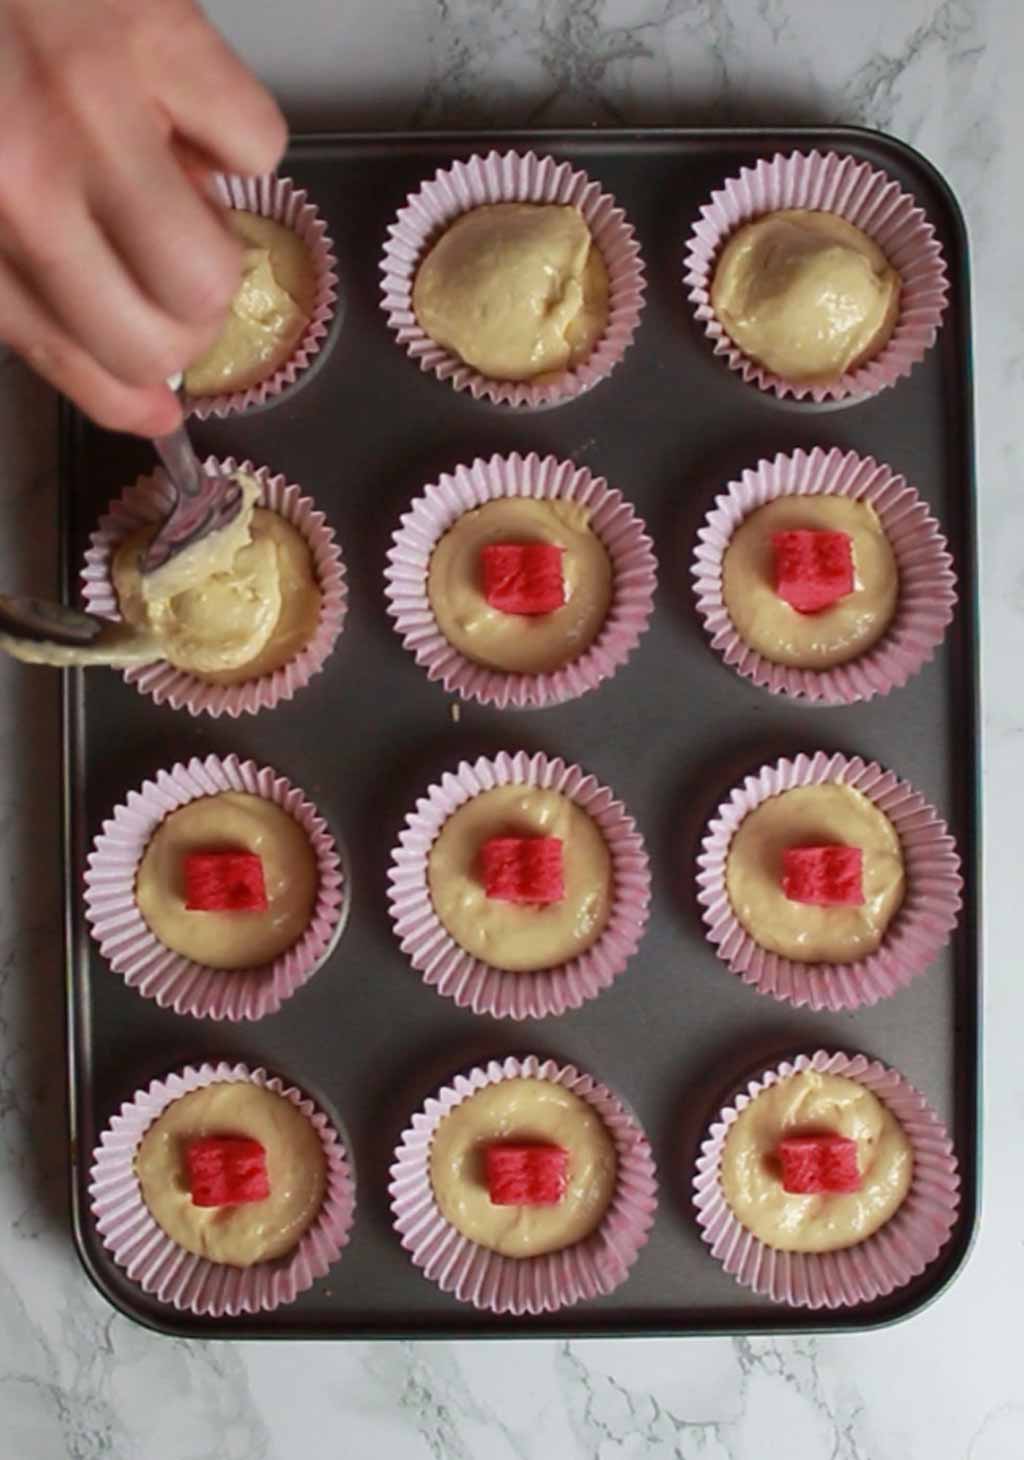
Use the rest of the cake batter to cover the hearts, being careful not to knock them over as you do.
Make sure that the hearts are all facing the same way so that you know which direction you need to cut into them after baking. You could also make a small mark on the cupcake liners so you know.
I typically make them all face me as I’m holding the tray, then I know which way they’re facing as long as I hold the tray that same way after baking.
Step 9:
Bake the cupcakes for 18-20 minutes. You can test if they’re ready by inserting a toothpick just off the centre of the cupcake (otherwise you’ll insert it into the heart which was already baked). When the toothpick comes out clean, the cakes are done.
Transfer the cup to a wire rack to cool, keeping them in the same direction as noted above.
Step 10:
Prepare your buttercream frosting by mixing together 180g of vegan butter, 400g icing sugar, 1 teaspoon of vanilla extract and 3 tablespoons of soy milk. You’ll need extra soy milk if you use the blocky style of vegan butter.
Keeping the cupcakes facing the same direction still, pipe a swirl of buttercream onto each one.
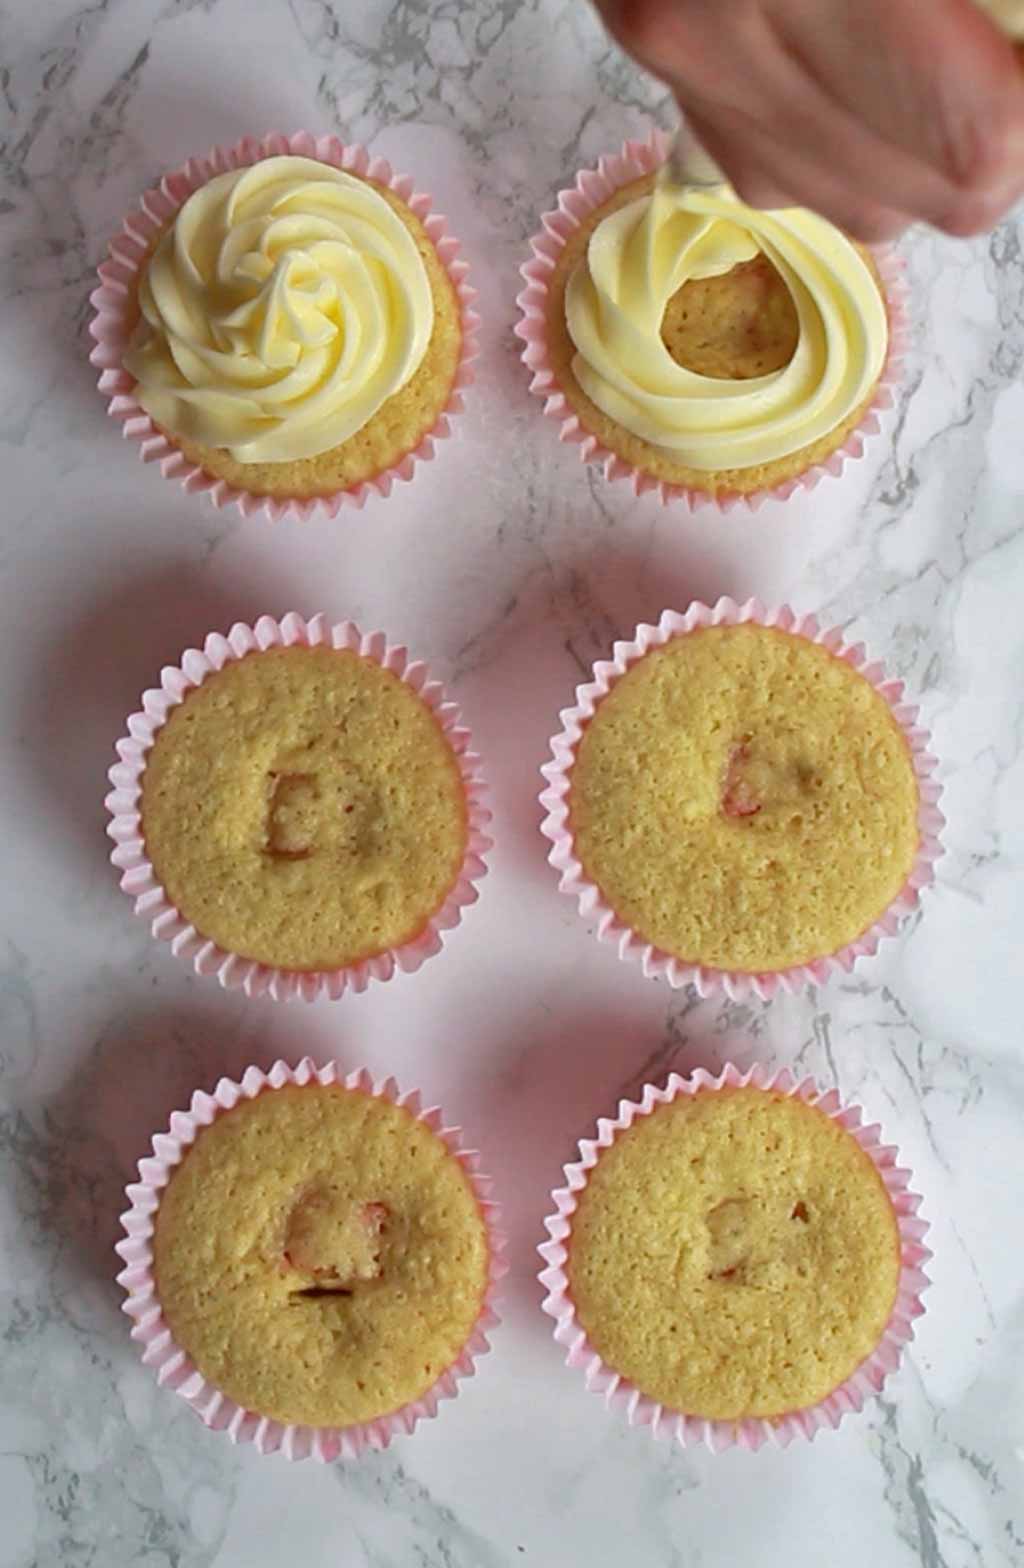
Step 11:
Top with some vegan cupcake heart sprinkles and enjoy!
FAQ:
In an airtight container in a cool, dry place such as a kitchen cupboard.
If stored appropriately, they should last for 3-4 days.
As noted above, I bought the ones in my pictures from Tesco. They’re called red & pink heart sprinkles, cost £1 and they’re accidentally vegan!
Let Them Eat Cakes on Etsy has some vegan Valentine’s cupcake sprinkles available too. I ordered from them at Christmas time and highly recommend.
And of course, there are lots of different styles available on Amazon! Just make sure that the listing states “vegan” on it as non-vegan things can sometimes sneak up in the search results.
As always, I recommend PME food gels because they are so vibrant and last a really long time. They are also one of the few brands I could find locally that don’t use carmine or other animal-derived ingredients in their red colouring.
I purchased mine from Hobbycraft in person. But you can also purchase them online from Amazon (UK and US) and Lakeland.
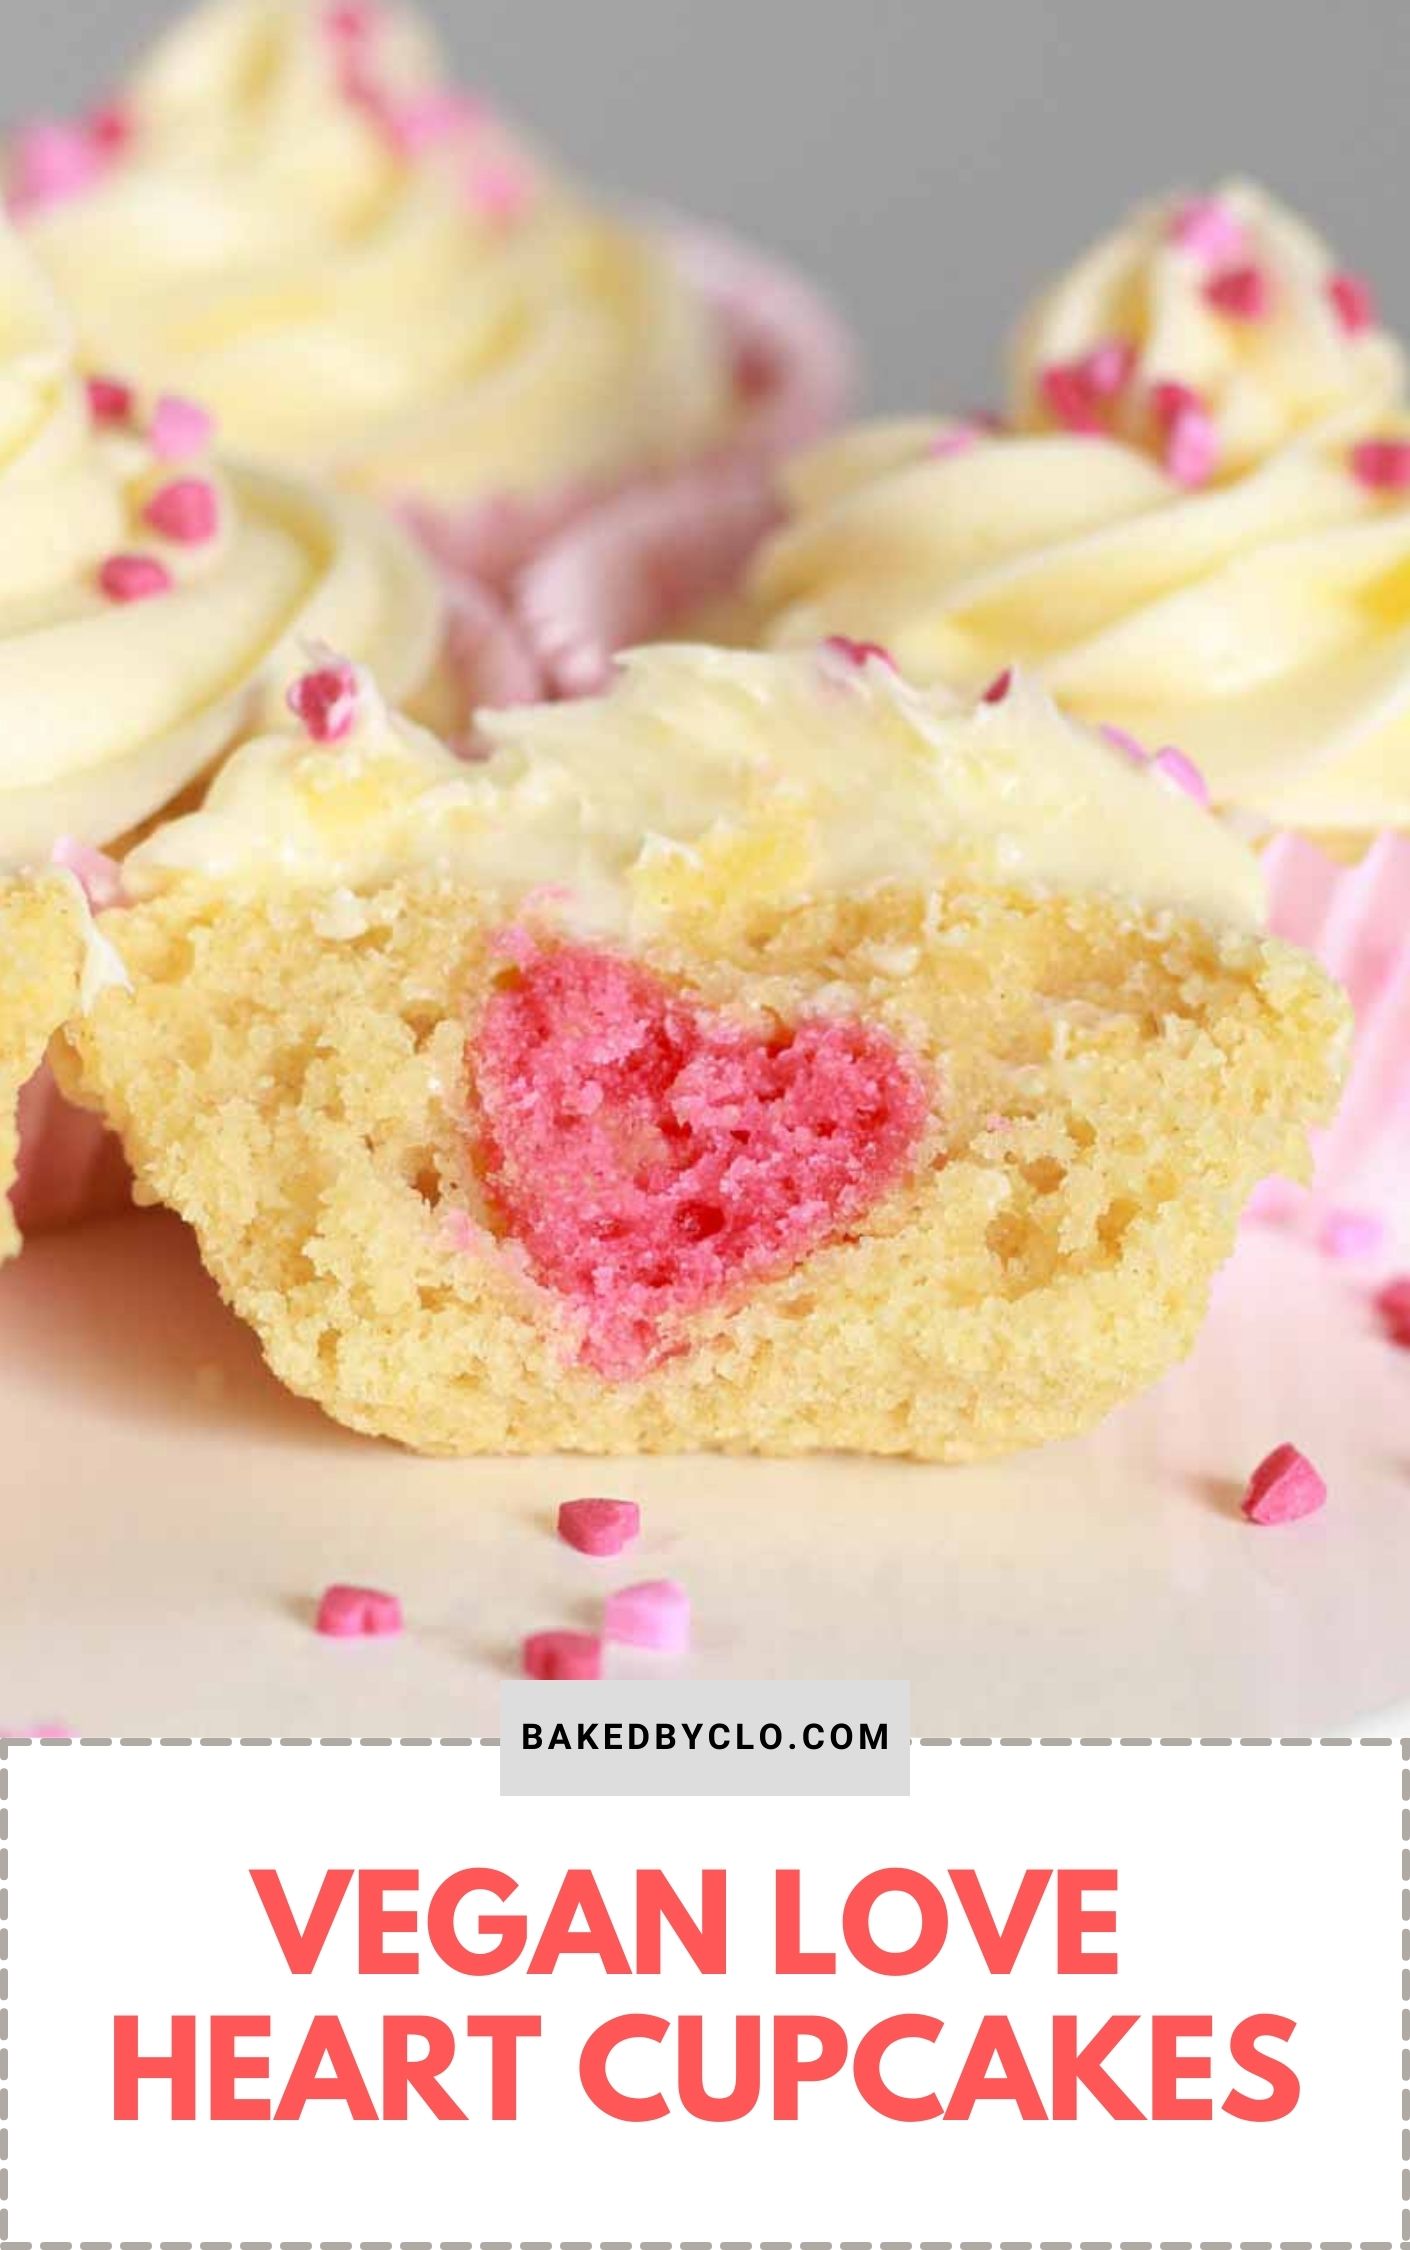
I really hope you like the recipe! Let me know how you get on by leaving a comment and/or rating below. Happy baking! xo

Vegan Valentine’s Love Heart Cupcakes
Vanilla cupcakes with a hidden pink heart inside. Dairy-free and egg-free!
Ingredients
For the hearts (to be hidden inside):
- 115 g Self-raising flour
- ¼ Teaspoon Baking soda
- 90 g Caster sugar
- 140 ml Soy milk
- 45 ml Oil (I used sunflower)
- 1 Teaspoon Vanilla extract
- ¼ Teaspoon Apple cider vinegar (or lemon juice)
- Pink or red food colouring (start with a small amount and increase if needed)
For the cupcakes:
- 230 g Self-raising flour
- ½ Teaspoon Baking soda
- 180 g Caster sugar
- 240 ml Soy milk
- 90 ml Oil
- 2 Teaspoons Vanilla extract
- 1 Teaspoon Apple cider vinegar (or lemon juice)
For the buttercream:
- 180 g Vegan butter (I recommend the soft, spreadable kind)
- 400 g Icing sugar
- 1 Teaspoon Vanilla extract
- 3 Tablespoons Soy milk (you'll need more if you use the blocky style of 'butter')
To top (optional):
- Few Tablespoons Vegan-friendly love heart sprinkles (I used Tesco's brand)
Instructions
For the hidden hearts:
-
Preheat your oven to 180°C (160°C if you're using a fan oven). Grease, flour and line a 7-inch cake tin.
-
In a large bowl, mix together the self-raising flour, baking soda and sugar.
-
Add the soy milk, oil, vanilla and vinegar. Mix well until you have a smooth cake batter.
-
Add the food colouring and stir it in.
-
Transfer the cake batter into the tin and spread out evenly. Bake for 12-15 minutes, or until a toothpick through the centre comes out clean. Leave the oven on so it's ready for the next part of the recipe.
-
Let the cake cool in the tin for 5 minutes then flip it out onto a wire rack. Peel off the baking paper and leave it to cool completely.
-
Once the cake has cooled completely, use a small heart-shaped cookie cutter to cut out 12 hearts.
For the cupcakes:
-
Line a 12-hole cupcake tin with cupcake liners.
-
In a large bowl, mix together the flour, baking soda and sugar. Add the soy milk, oil, vanilla and vinegar. Mix well until smooth.
-
Fill each cupcake case around halfway with the batter.
-
Take your pink hearts from earlier and place one into the batter in each case. Keep them all upright and facing the same way, so you remember which way to cut into them after they're baked.
-
Use the rest of your cake mix to cover the hearts, being careful not to knock them over as you do this.
-
Bake for 18-20 minutes. You can check they're ready by inserting a toothpick just off the centre of the cupcake. If it comes out clean, they're ready.
-
Transfer the cupcakes to a wire rack, keeping them facing the same direction again, and leave them to cool completely.
For the buttercream:
-
Mix the butter, icing sugar, vanilla and soy milk together.
-
Use an electric whisk or stand mixer to make it smooth and fluffy. If the icing is too thick, add more soy milk. If it's too runny, add more icing sugar.
-
Place the icing into a piping bag with a large star nozzle and pipe a swirl onto each cupcake.
-
Decorate with heart sprinkles if using and enjoy!
Recipe Video
Recipe Notes
- Store in an airtight container at room temperature for up to 5 days.

