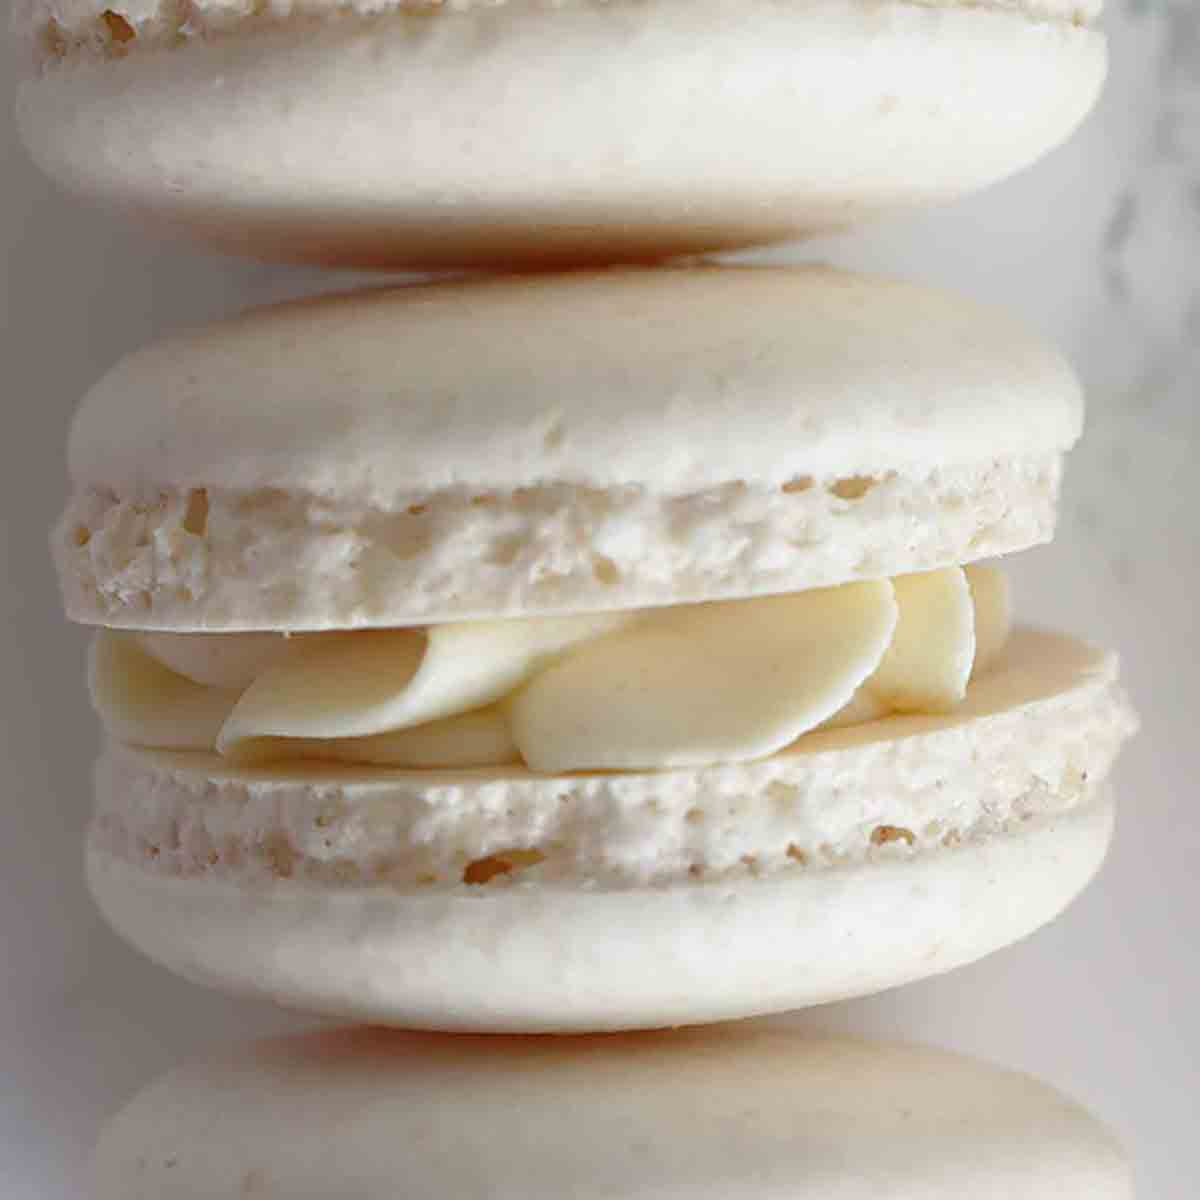
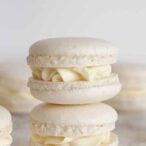
Soft and chewy with a sweet crunch, these French vegan macarons are a delicious, eggless alternative to the traditional version! Filled with soft buttercream which can be flavoured or coloured to your preference for a pretty afternoon treat or dessert!
Macarons were one thing I was a huge sucker for before I went vegan. It didn’t matter how ridiculously overpriced I thought they were at the time, I just had to try every flavour available at whichever stall or market I was at.
But after making my own macarons, I realised that they were in fact very reasonably priced for the amount of effort that goes into making them.
Now I don’t want to scare you, but making eggless macarons is not for the faint-hearted! Unless you’ve made them before, it’s probably not going to be a walk in the park.
It’s really important that you follow the instructions to a tee and even then, it may take a few tries before you get them right.
BUT saying that, it definitely is possible, and I want to help you do so. I’ve written as much detail as I can in the instructions below to help you get them right the very first time!
The French Method
I always make sure to say here on my blog that I’m not a professional, I’m just a regular gal who likes to bake! I’ve never had any training or schooling. I’m always trying to learn more about baking and find ways to get better at it.
2019 was the first time I ever made vegan macarons. The most popular ways to make them are by using either the Italian method or the French method.
I took one look at the Italian macaron method and immediately wrote it off. It seemed way too complicated for a macaron beginner like I was! So I decided to go with the French method.
Related post: 30 vegan aquafaba desserts
I had originally adapted a recipe I found online last year and it worked OK but I didn’t quite have my technique down. I wasn’t happy with how they looked so decided to redo this post.
So I had a look at LOADS of non-vegan recipes online this time and found one that used almost equal amounts of ingredients. After working out the aquafaba equivalent of the egg whites, I took a chance at adding equal amounts of the rest of the ingredients.
Shockingly, it worked first time! I found this really exciting because the last time I tried to make egg-free macarons, it took at LEAST 3 attempts.
These vegan macarons came out beautiful with tall feet, peeled easily off of the tray and were filled nicely inside. Hurrah! I tested the same recipe a few more times and I think it is pretty foolproof if you follow my top tips.
How To Make Vegan Macarons
If you’re new to vegan baking, or you’ve never heard of aquafaba, let me enlighten you.
You know that gloopy, yellowish water that comes out of canned white beans (such as chickpeas or broad beans)? Yeah… that’s the main ingredient for this recipe.
But don’t be alarmed. As odd as it looks (and smells) at first, you’ll soon be amazed at how perfectly it mimics egg whites. It fluffs up and makes soft meringue peaks just the same!
The most important thing to know about aquafaba though, is that you need to reduce it before you start trying to whip it up. When attempting meringues in the past, I learned the hard way that if you don’t reduce it beforehand, the meringue is very likely to deflate into a puddle while it bakes. Sad times.
Related post: best vegan desserts
Step 1: Reducing the Aquafaba
To reduce aquafaba simply means to chuck it in a pot and simmer it until it reduces in volume (i.e. getting rid of the excess water content).
I used the liquid from two 400g (14oz) cans which gave me around 250g of aquafaba. Which brings me to my next point…
I would HIGHLY recommend using a digital scale for this recipe as it’s super important that all the ingredients are accurately measured. One little mistake can destroy all of your hard work (yes, I am speaking from personal experience).
Whatever your beginning weight of aquafaba is, you want to reduce it by half. I placed 250g of aquafaba into a pot over high heat and weighed it periodically until it reached 125g. This can take around 5-10 minutes.
Note that while it’s reducing, the aquafaba will let off a weird aroma- sort of like soup. But don’t worry, your eggless macarons won’t taste like that AT ALL.
Once you’ve reduced it sufficiently, allow it to cool then cover and place it in the fridge overnight, or at least for a few hours. You’ll notice that it becomes sort of gelatinous, like egg whites.
Step 2: Whisk It Up!
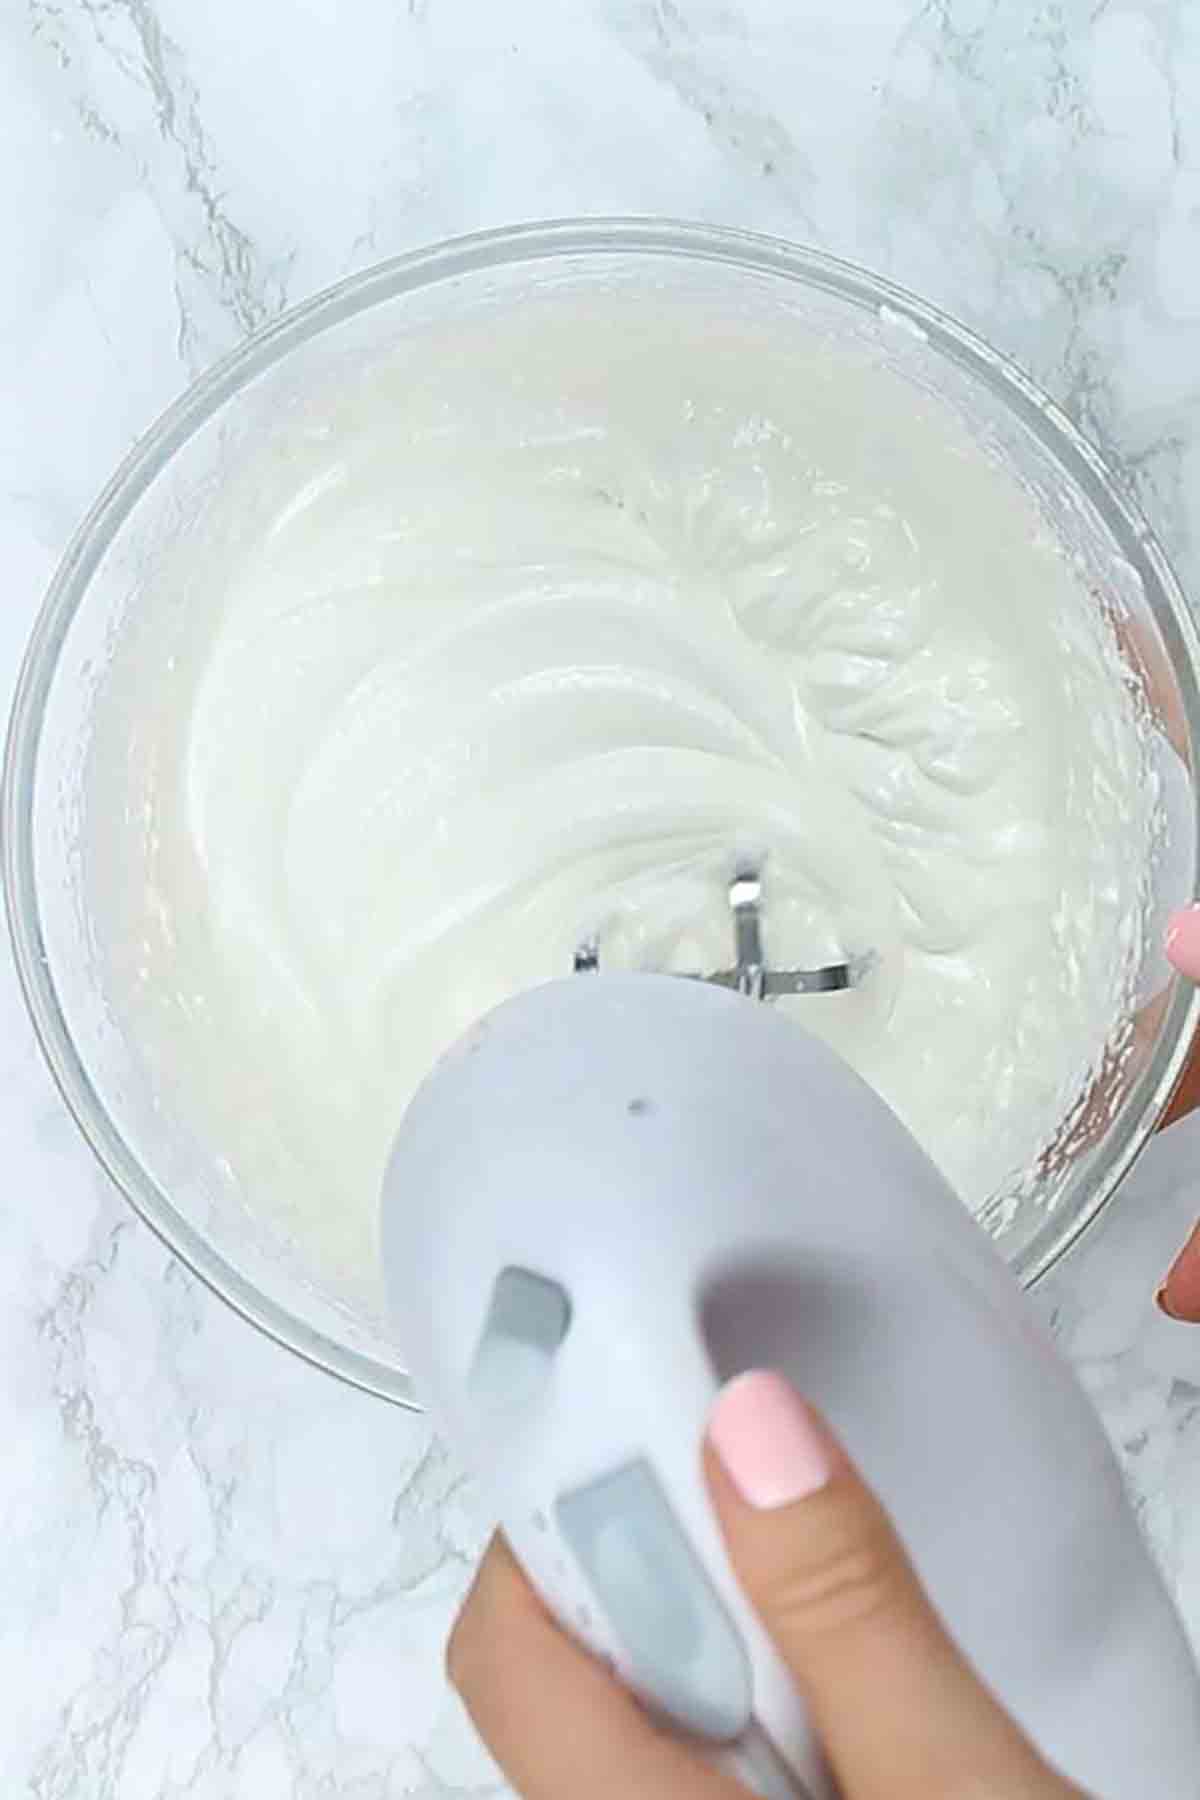
Measure out 100g of your reduced aquafaba then place it in a clean, dry glass bowl along with ¼ teaspoon of cream of tartar. Whisk on high speed until it all becomes frothy and pale.
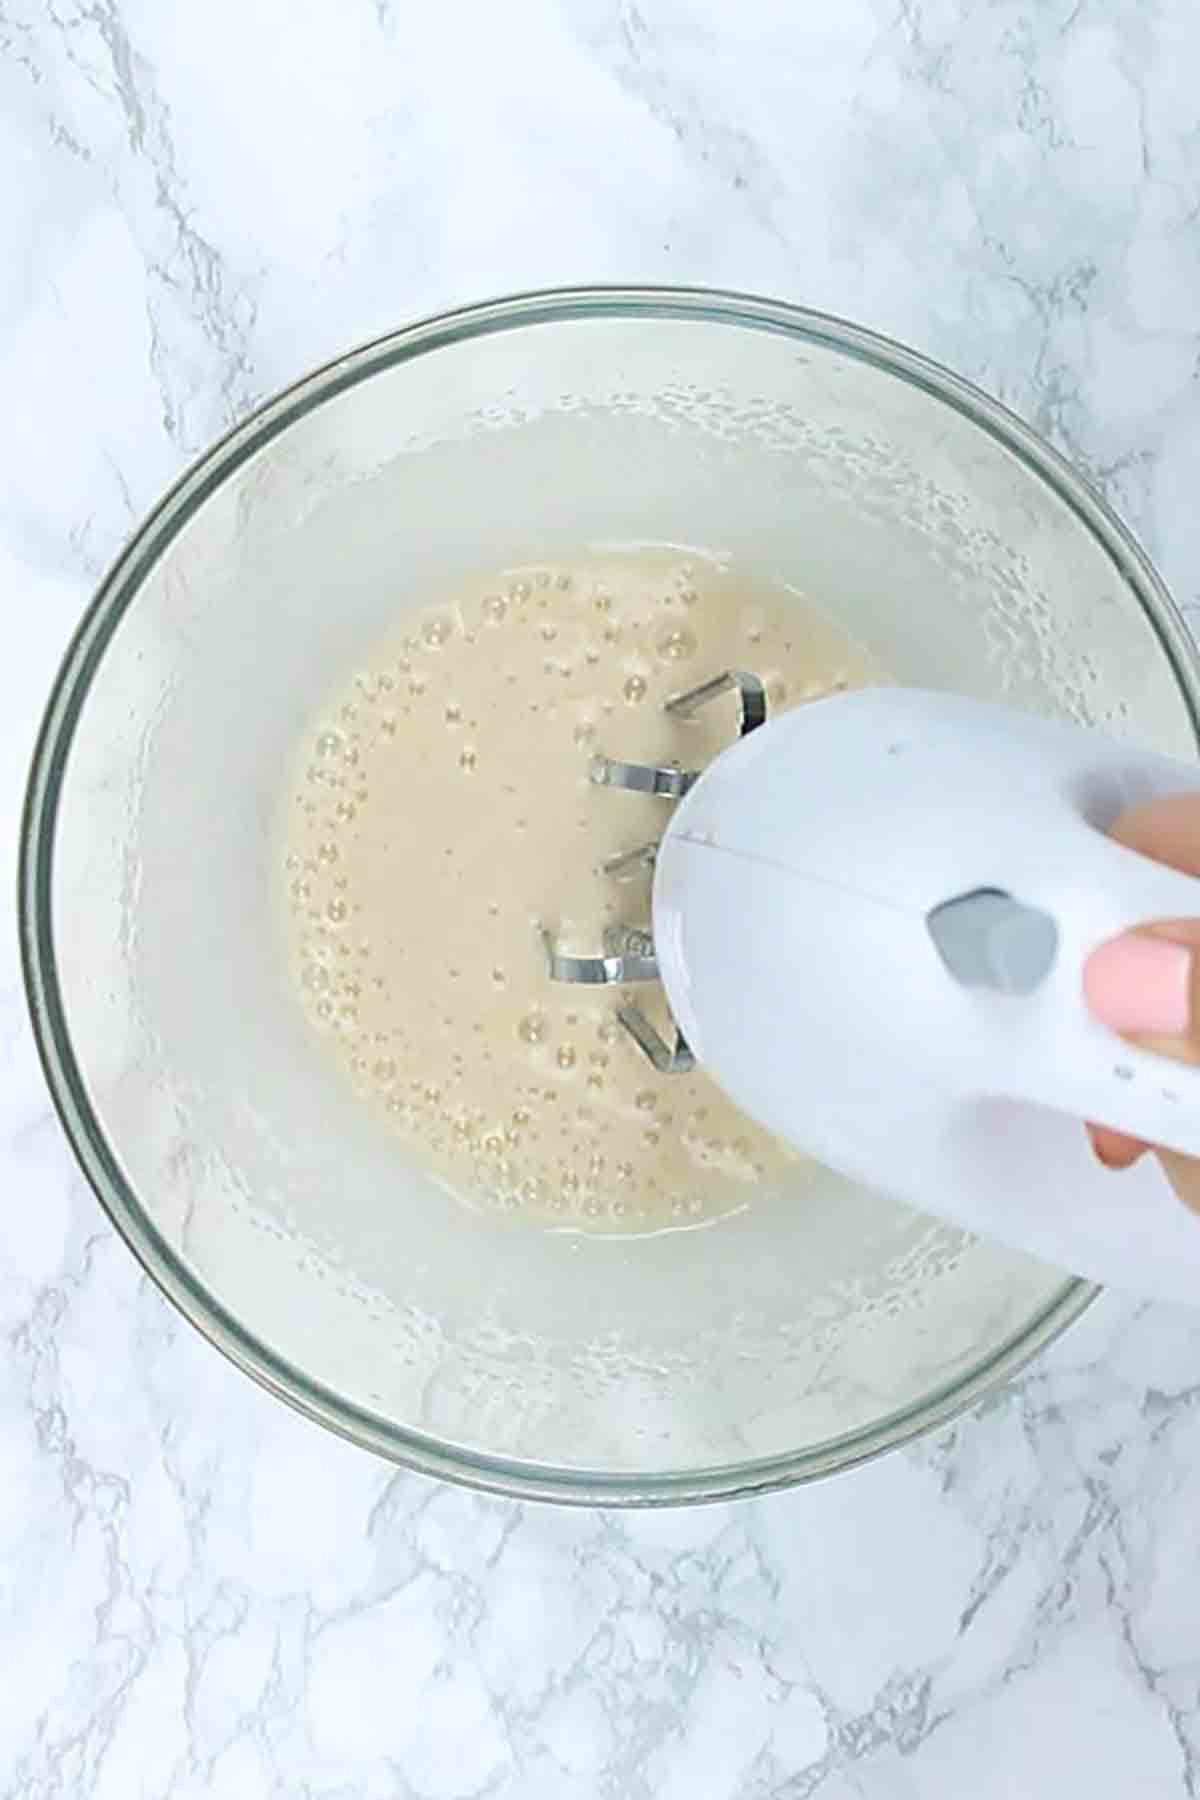
Keep whisking and little by little, add in 100g of caster sugar and keep whisking until your the mixture forms stiff peaks. It should be similar to a meringue mixture and you should be able to tip the bowl upside down without it moving. This can take quite a while compared to egg whites but don’t give up! Just keep whisking!
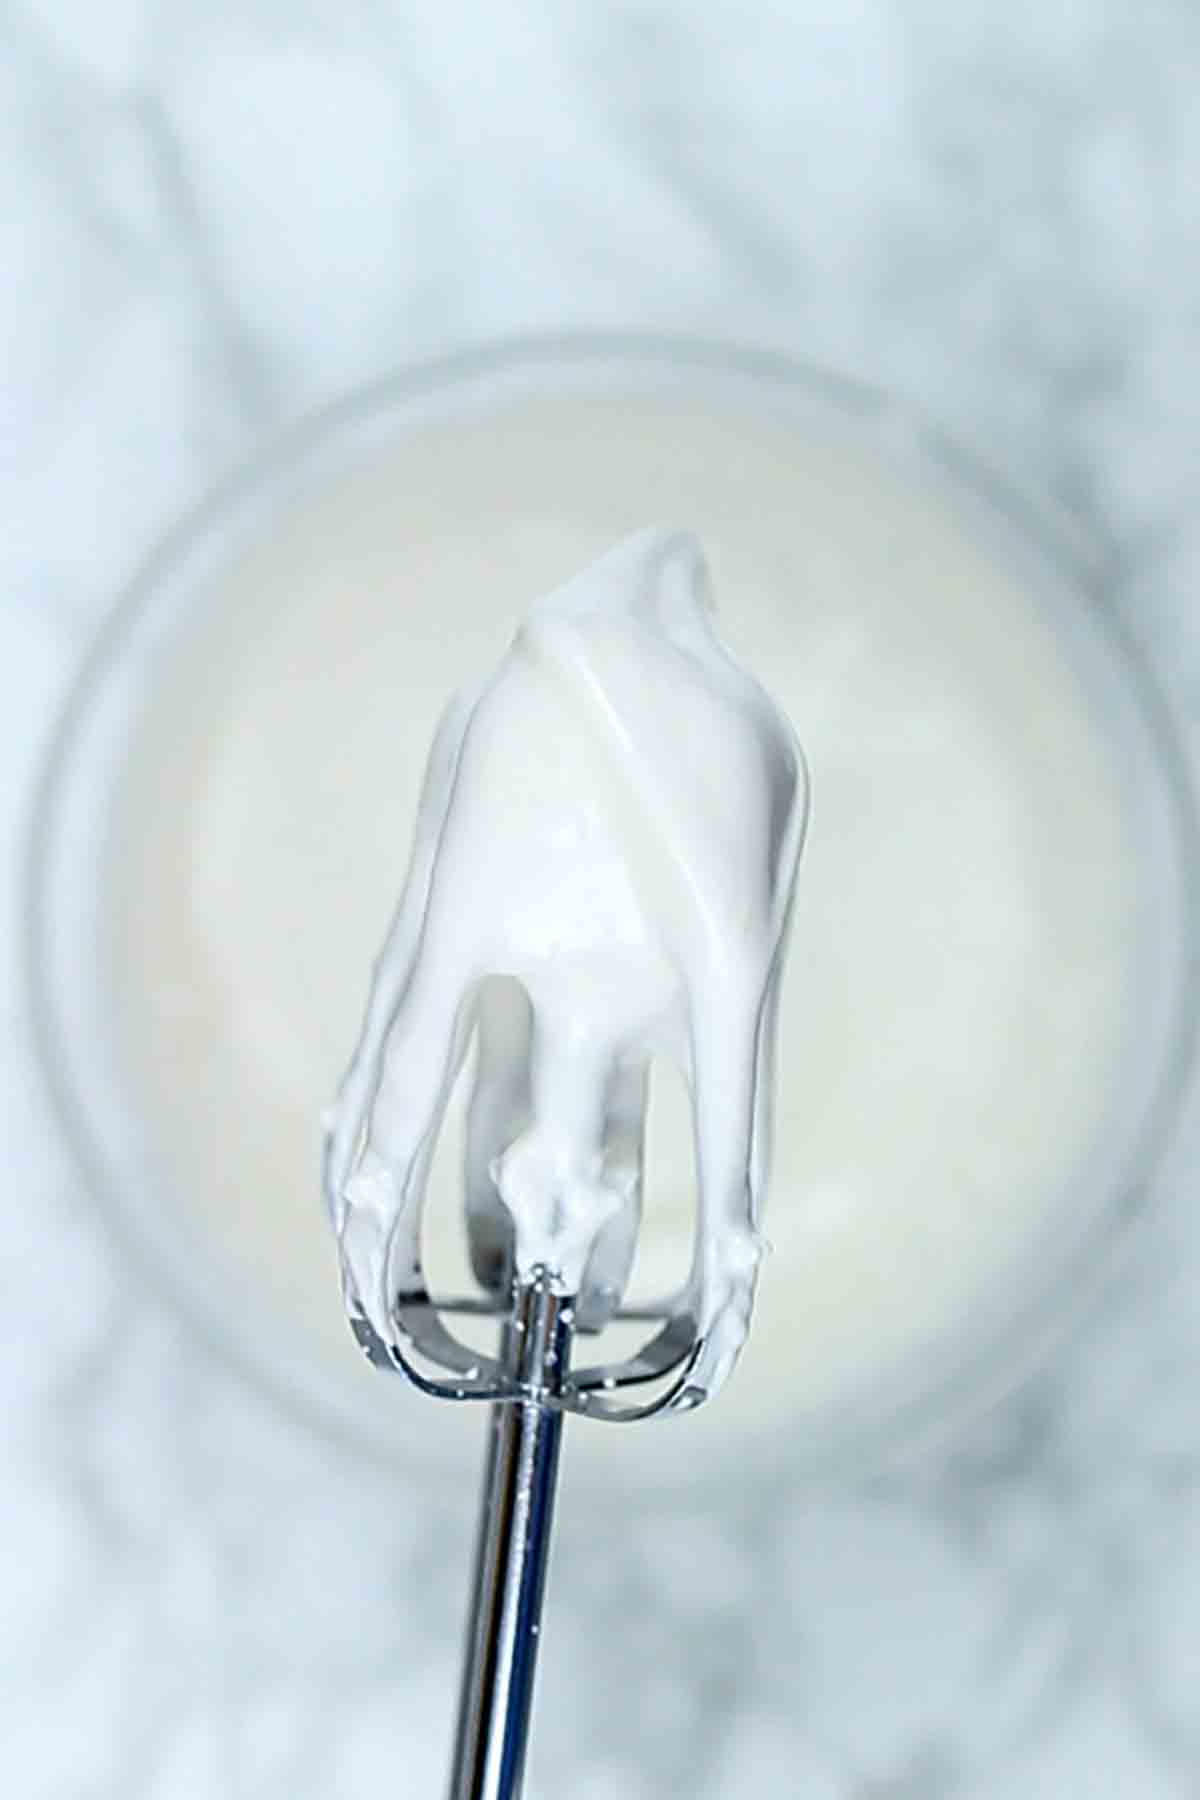
Note that it’s very important that you use a very clean bowl when whipping your aquafaba. As with traditional macarons, one little speck of food or grease in the bowl can prevent the meringue from forming properly.
Step 3:
Next, sieve in 100g of ground almonds and 100g of icing sugar into a bowl. You may need to use the back of a spoon to get any stubborn lumps of almonds through the sieve.
Tip half of it into the bowl with your meringue mixture. Using a spatula, fold it into the meringue mixture, then add the other half. Keep gently folding until everything is well combined and there are no traces of almonds or sugar at the bottom of the bowl.
You can test if the mixture is ready by lifting some up with your spatula and drawing a figure of 8. When it’s mixed enough, you should be able to draw the figure of 8 without it breaking.
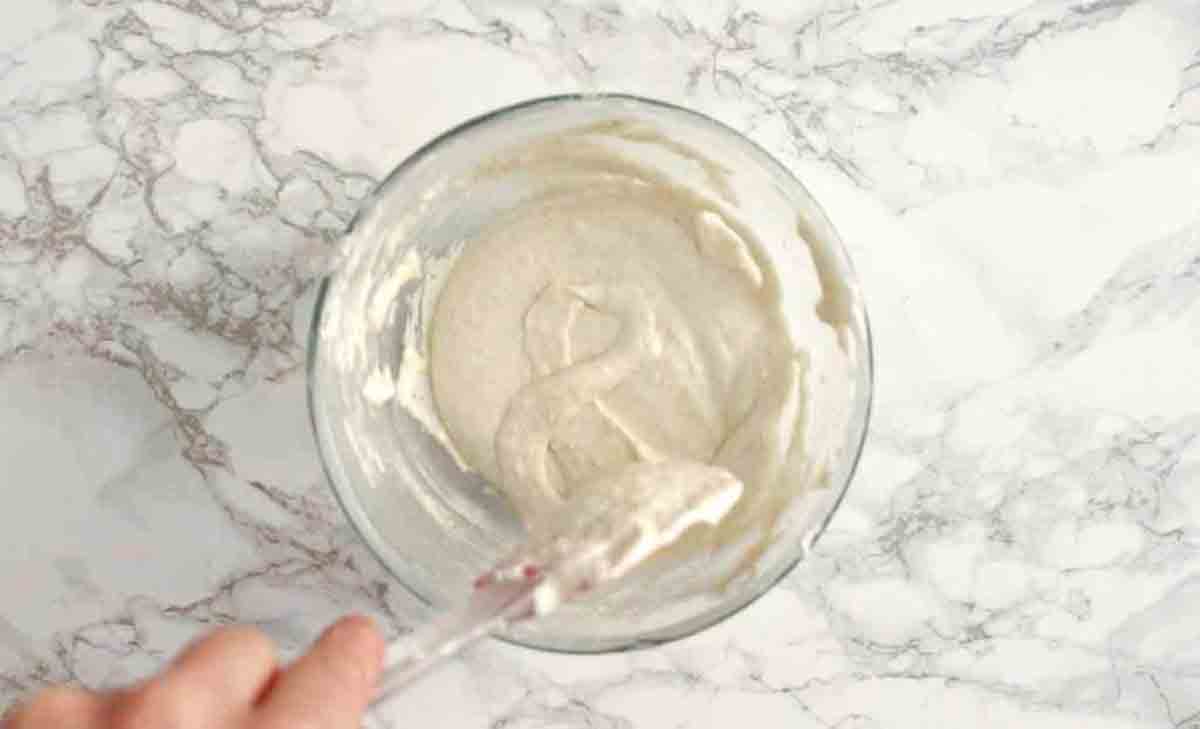
Another easy way to test is by spooning a small amount onto a plate or piece of baking paper. If it flattens out slightly and becomes smooth, it’s ready. If it has lumps or bumps, or sticks up in the middle then you need to keep mixing. Be careful not to overmix it as it’s hard to fix once you reach that stage. Test every so often to avoid overmixing.
Step 4:
Using a piping bag with a round nozzle, pipe the macaron mixture in 2-inch circles onto a dark non-stick cookie sheet.
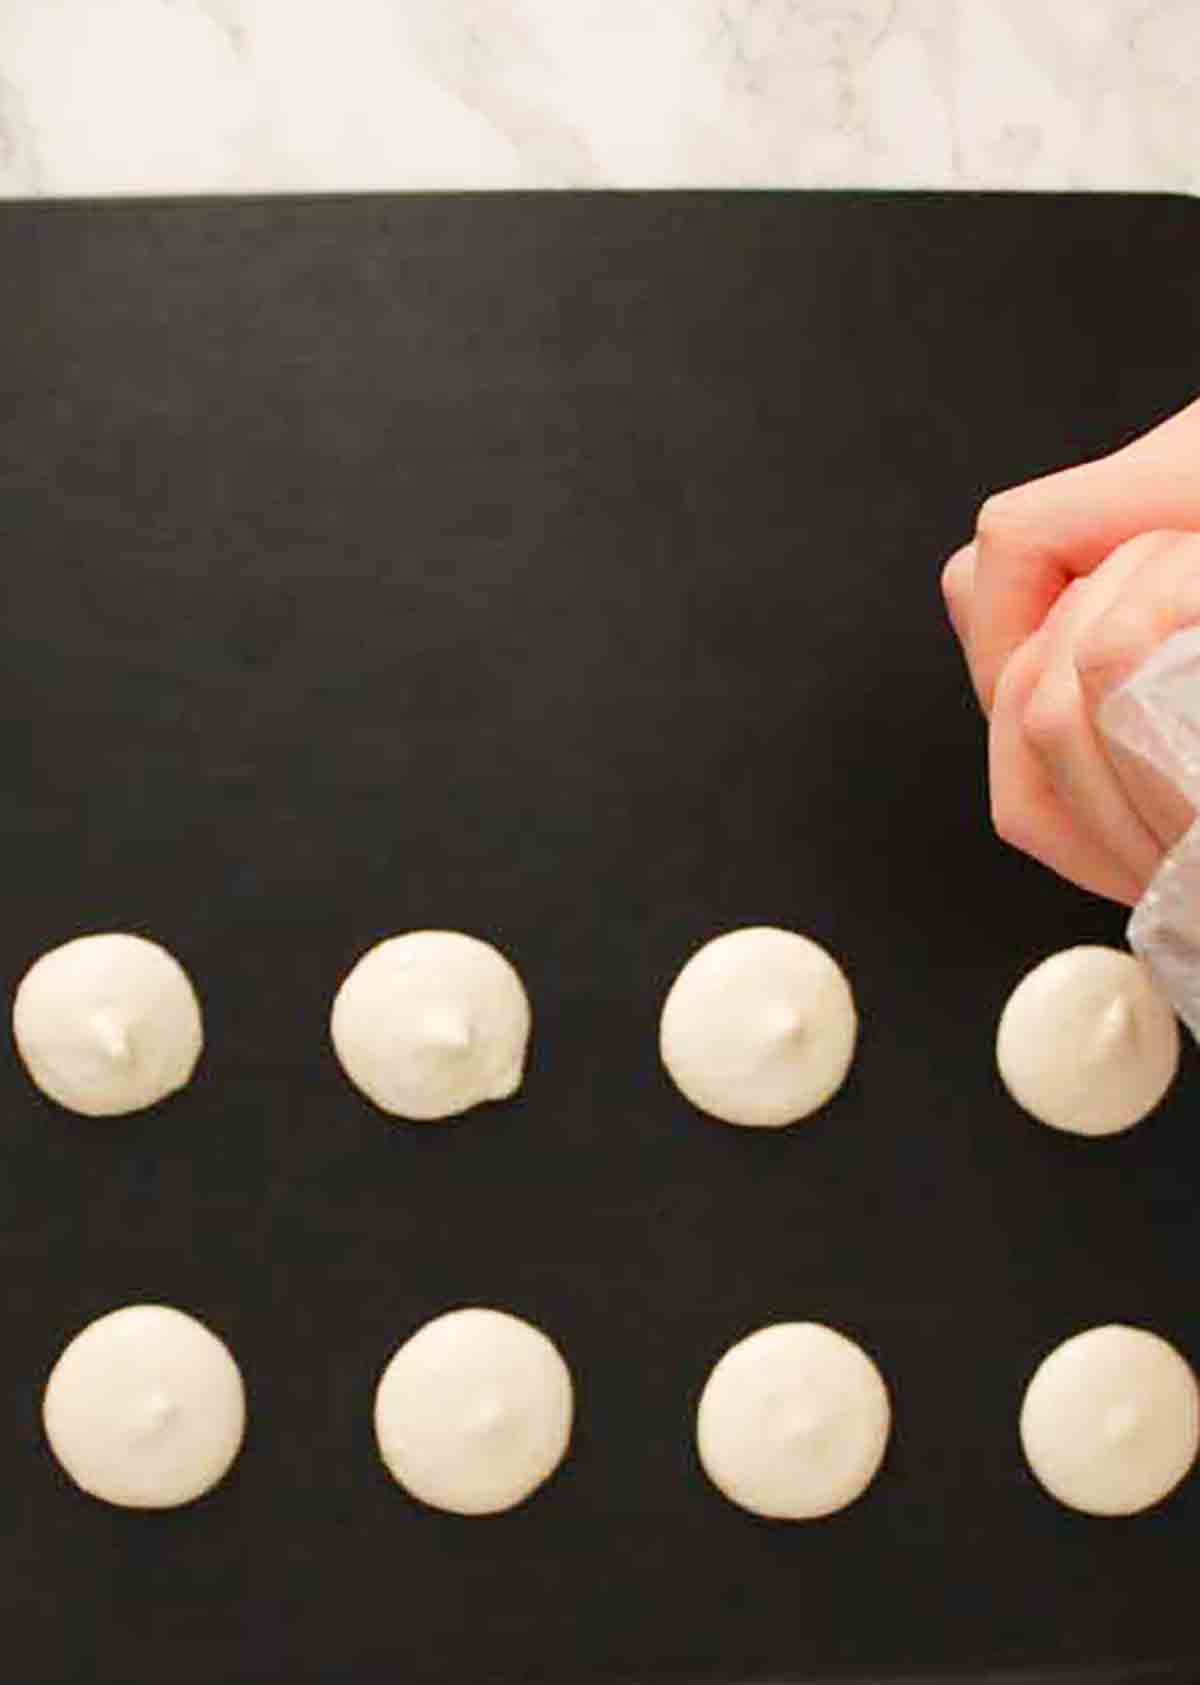
Slam the trays onto the worktop a few times to release any air bubbles then leave your vegan macarons to sit out in a cool area for around 20-30 minutes. It might take a bit longer but you’ll know they’re ready to be baked when they are matte and you can touch them without getting any residue on your fingers.
Step 5:
Bake the macarons, one tray at a time, at 150°C (130°C for fan ovens) for 18 minutes.
You can test if they’re ready by trying to move the top of one with your finger. If it wobbles around, it needs a few more minutes in the oven. It should be firm without much movement.
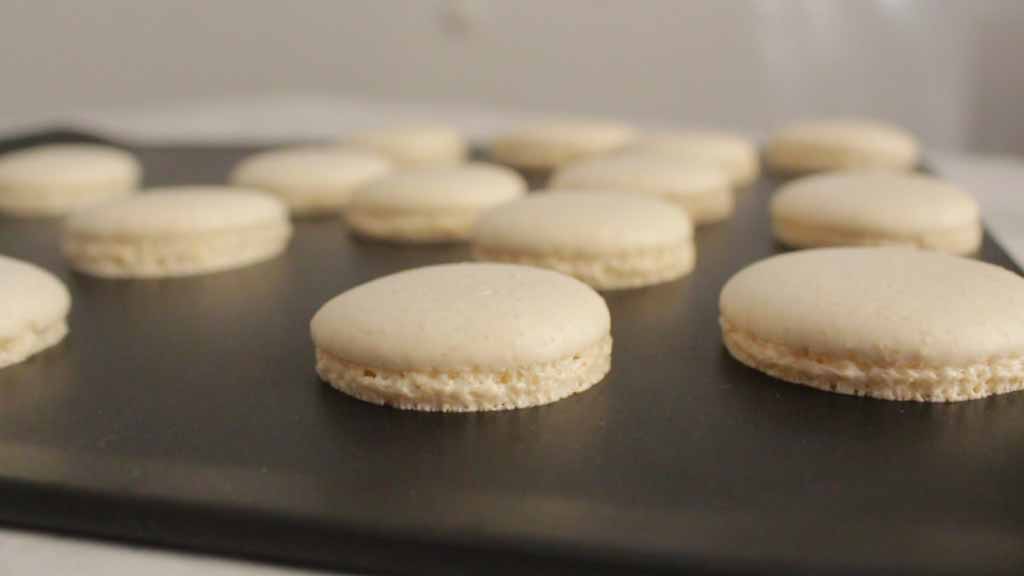
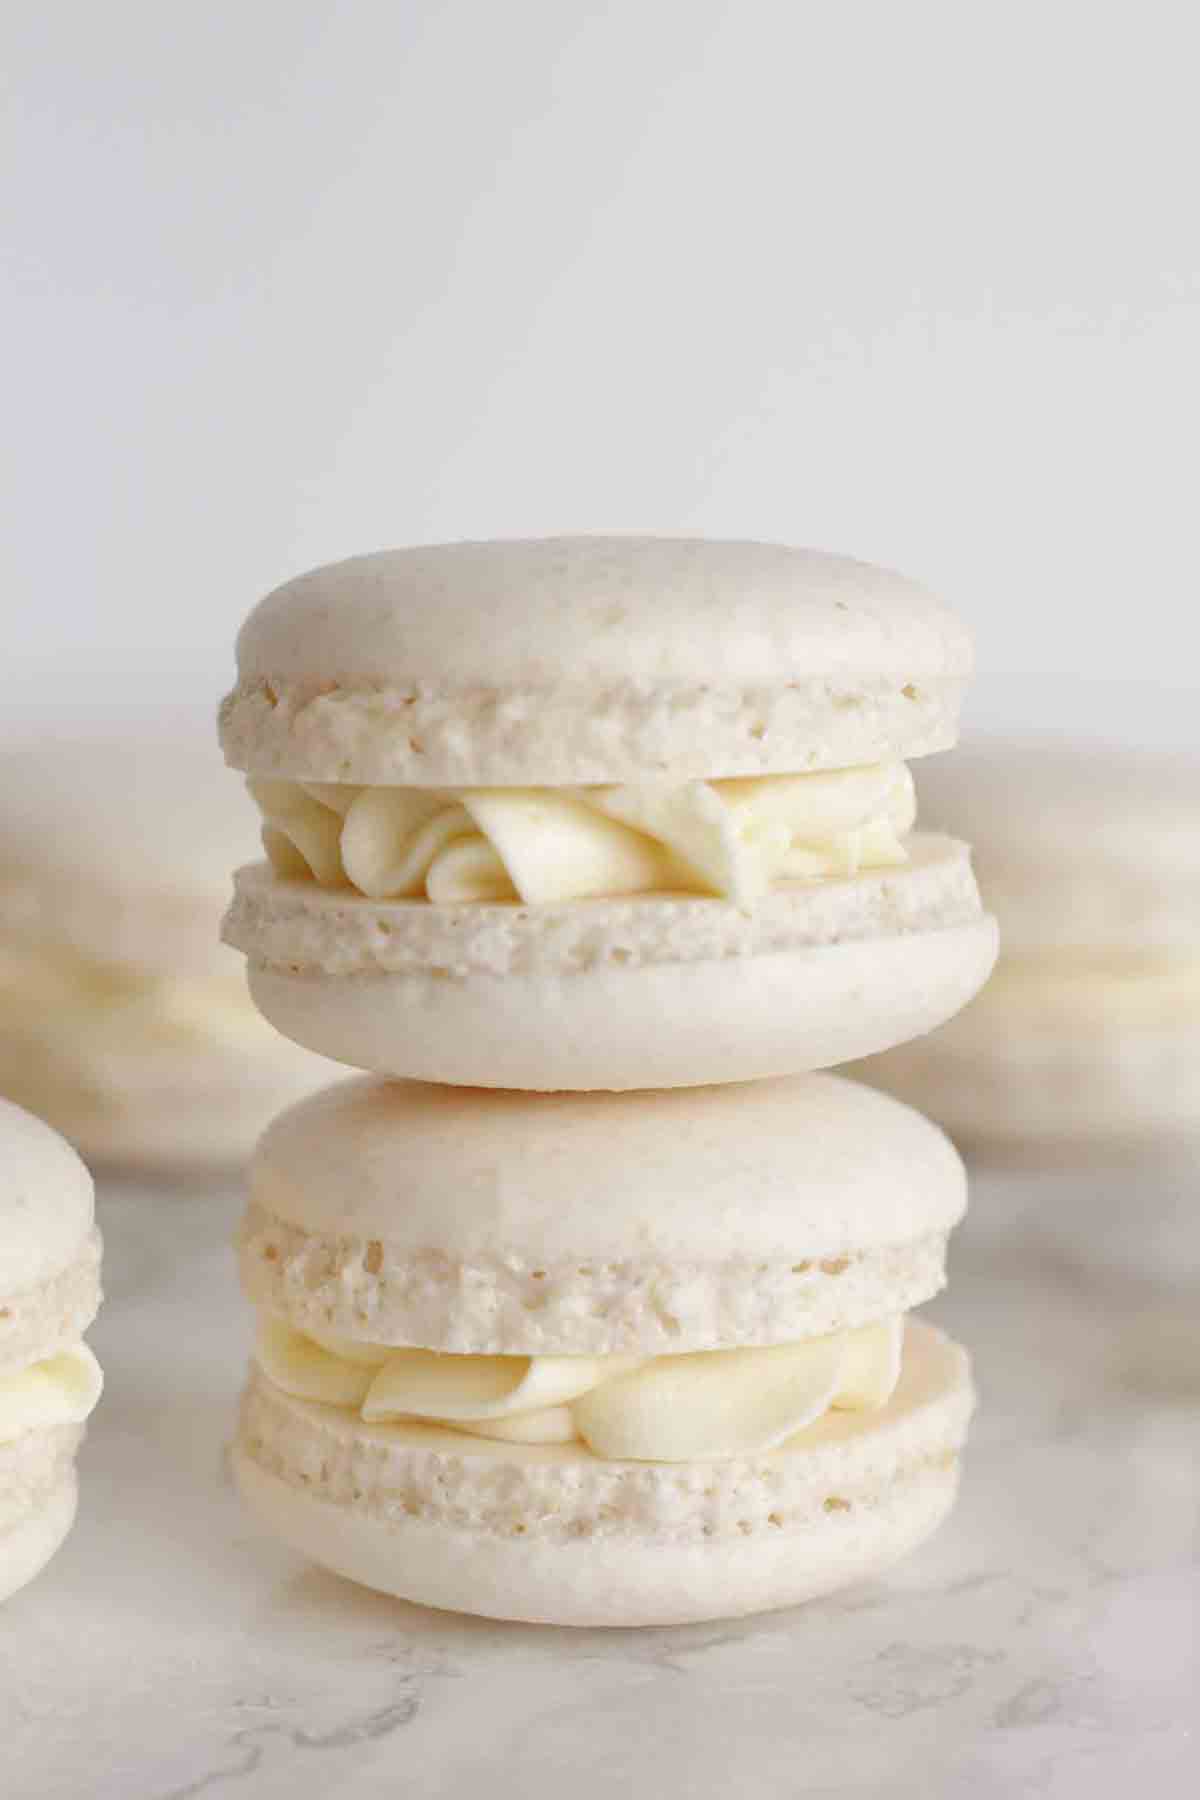
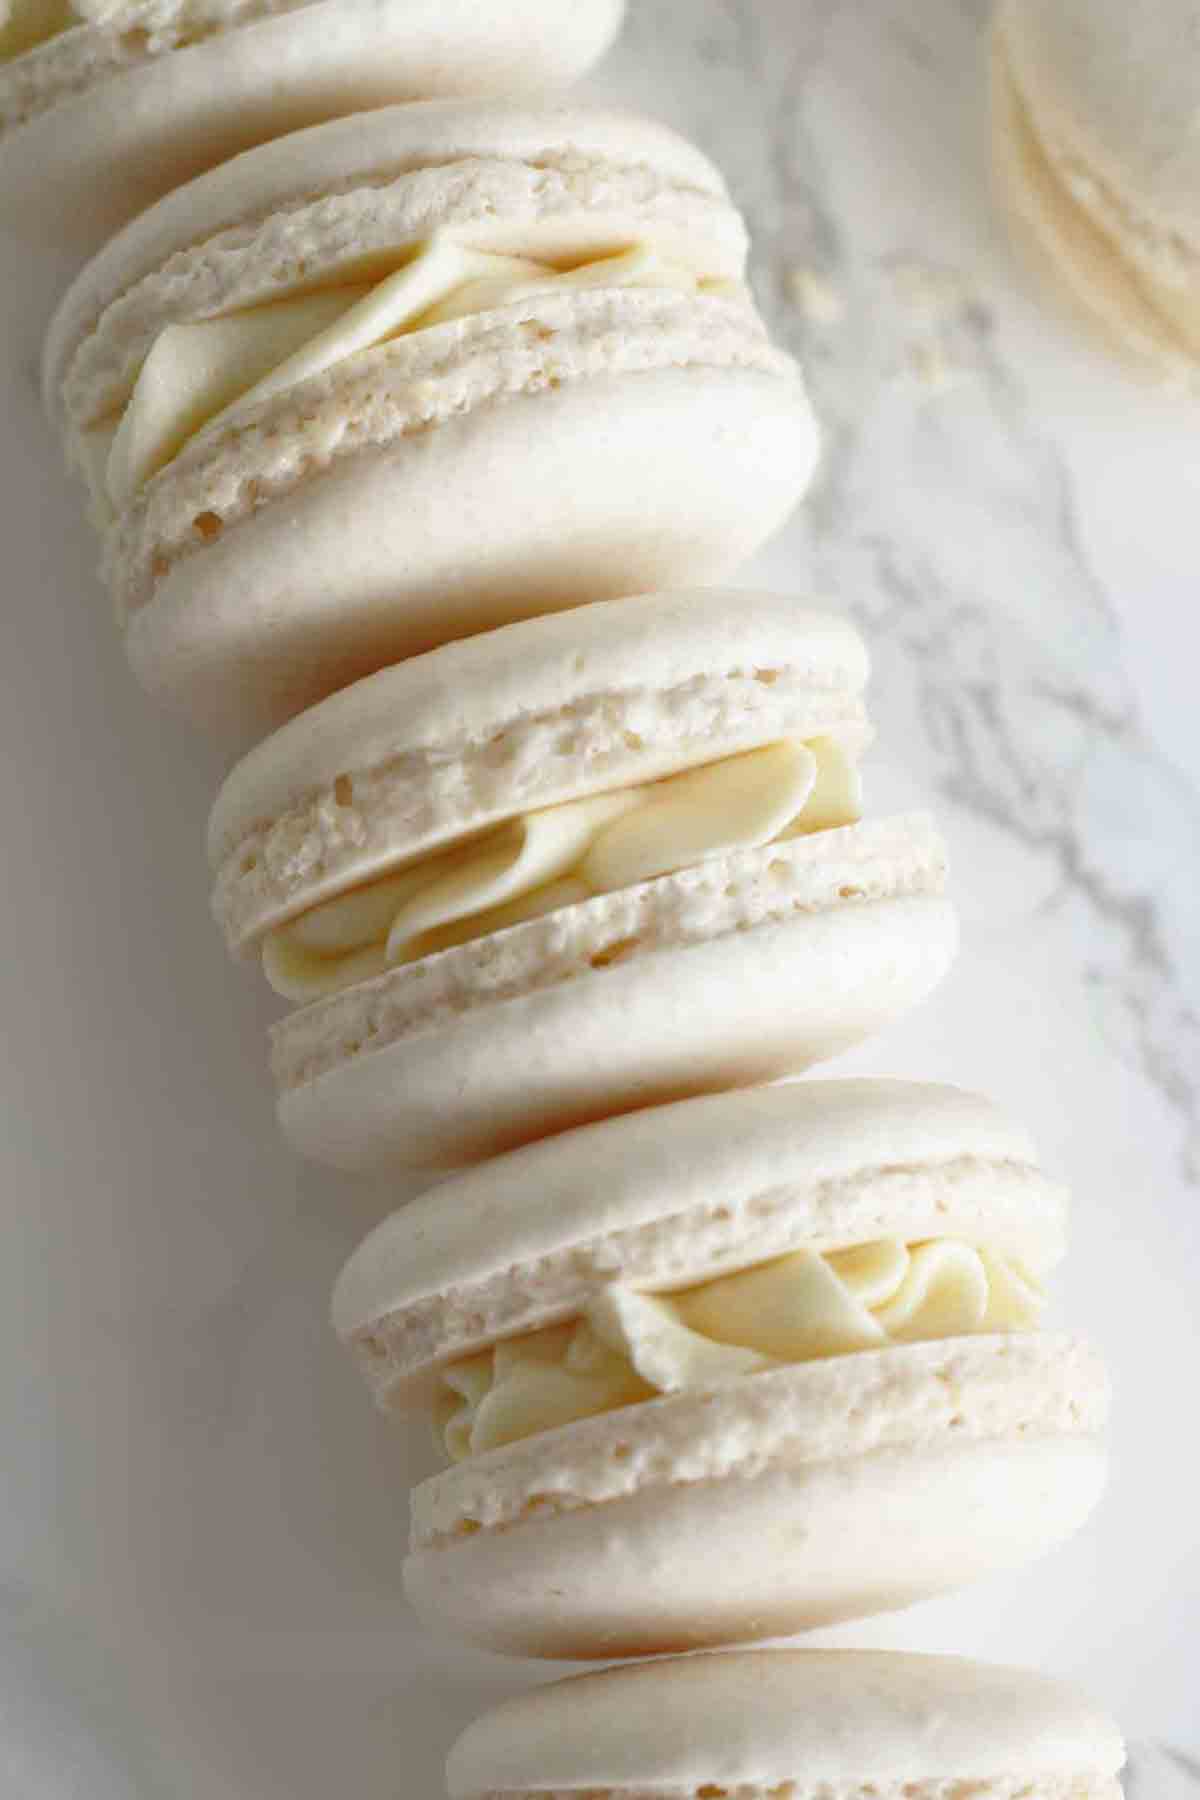
When the eggless macarons are completely cool, peel them off of the tray and find pairs of similar-sized circles.
Step 6:
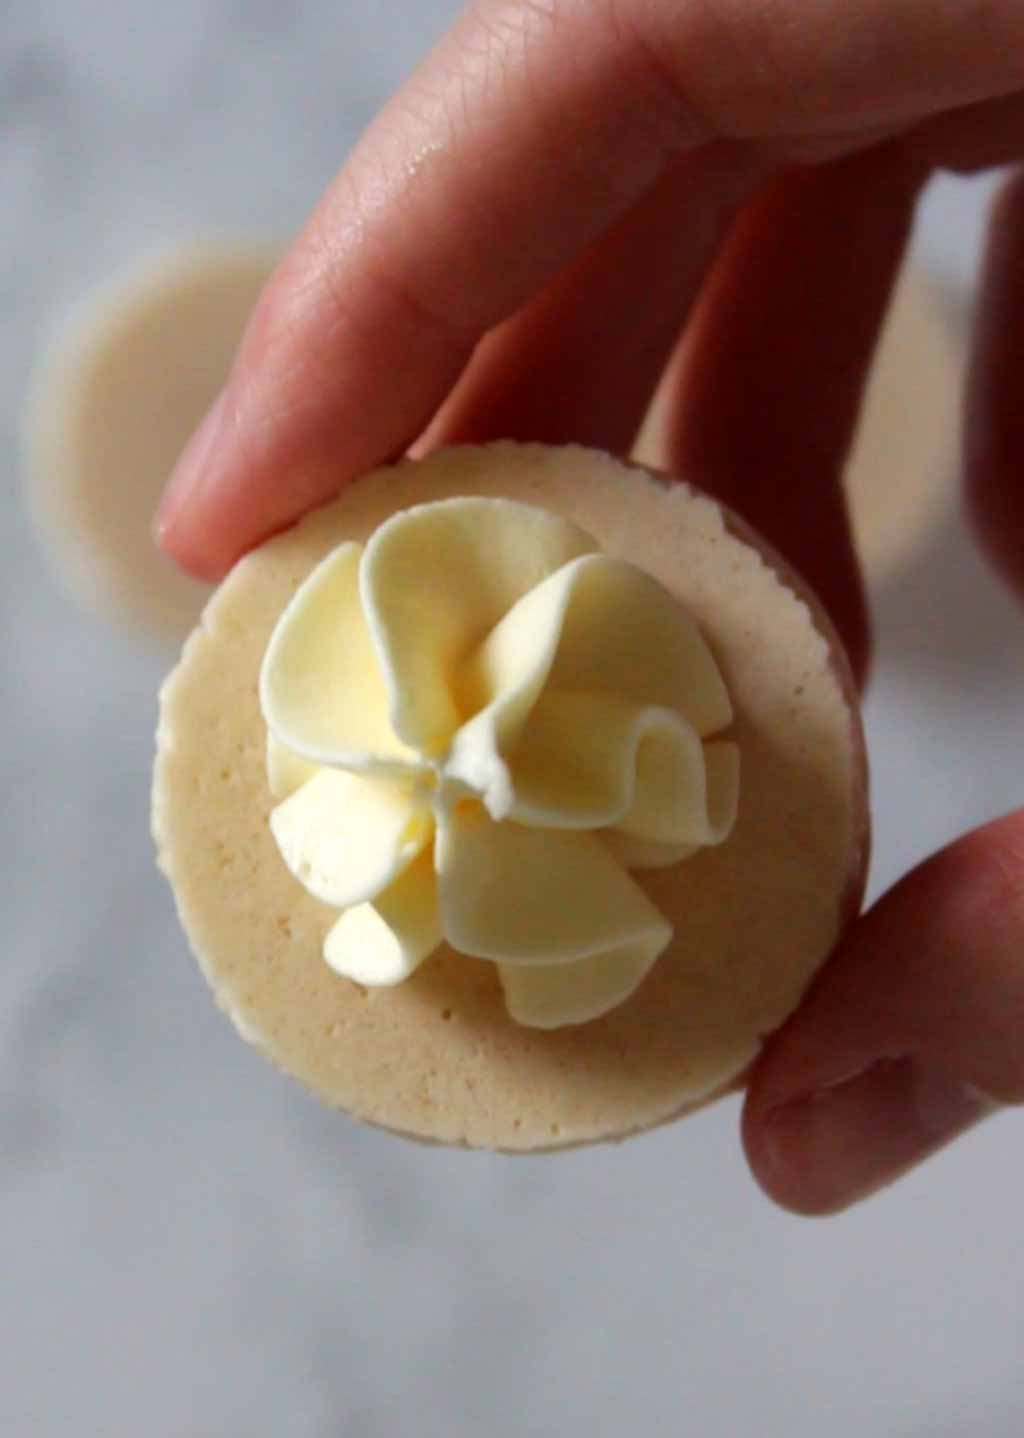
Make your vegan buttercream filling by mixing 250g of icing sugar with 75g of vegan margarine and 1 teaspoon of vanilla extract. If you need to loosen it, you can add a splash of plant-based milk.
Whisk it all together using an electric whisk so that is becomes pale and fluffy.
Step 7:
Pipe a small amount of buttercream into the centre of one macaron, then place another on top using a gentle twisting motion. This will prevent the buttercream from spilling out of the edges.
Step 8:
Place your vegan macarons in an airtight container and pop them in the fridge. You can store them there for up to 2 days.
Tips for Foolproof macarons
- Use a dark, flat, non-stick baking sheet. This is not an affiliate or promotion- it is just really important for recipe success! Different trays will give wildly different results with the same recipe when it comes to macarons. Light trays do not absorb heat the same way as dark ones and using a flat tray will let the air flow better than one with edges. I tested this same recipe on various trays but have had the most consistent results with a dark, non-stick baking sheet. Using a tray lined with baking paper didn’t work as well as the non-stick one. I got my baking sheet from Dunlem and they have similar ones on Amazon.
- Get an oven thermometer. The slightest difference in temperature can make a huge difference here. It’s really important to make sure your oven is at the exact temperature needed.
- Use an extremely clean bowl and whisk. Any speck of dirt, food or grease in the bowl or on your utensils might negatively affect your aquafaba as you try to whip it up. Make sure to wipe the bowl and utensils with some white vinegar and a paper towel to make sure they’re perfectly clean. I also recommend using a smaller bowl. If you use a bowl that’s too large for the amount of aquafaba you have, it will take much longer to whip it into stiff peaks.
- Reduce the aquafaba in advance. It’s really important to reduce the aquafaba and let it cool before attempting this recipe. This will get rid of the excess water and concentrate the protein, helping your meringue mixture whip up better and prevent deflating when baking. I recommend reducing the aquafaba the night before and storing it in the fridge overnight. After that, it can be whipped cold or at room temperature.
- Colouring. I have not tested this recipe with food colouring in it so cannot guarantee it won’t affect the final result. If you want to try it, I recommend using a powder food colouring over liquid. Buttercream can be coloured or flavoured easily with no issue.
- Let the macarons rest. Don’t just put the macarons straight into the oven as soon as you pipe them onto the tray. You need to leave them for a while to become matt and firm to avoid cracking. I recommend resting them for 20-30 minutes but leave them longer if needed. When you touch them with your finger and no mixture gets onto your fingers, then you’ll know they are ready to bake.
I hope this post helps you get tasty egg-free macarons on your first try. If you give the recipe a go, please let me know how it goes by leaving a rating and/or comment below. Happy baking! xo
Vegan Macarons
An eggless alternative to the traditional French dessert!
Ingredients
For the macaron shells:
- Liquid from 2 x 400g cans of supermarket chickpeas
- ¼ Teaspoon Cream of tartar
- 100 g Caster sugar (superfine sugar)
- 100 g Ground almonds (I use Tesco's)
- 100 g Icing sugar
For the buttercream filling:
- 250 g Icing sugar
- 75 g Vegan margarine
- 1 Teaspoon Vanilla extract
- Splash Plant-based milk (to loosen the buttercream if needed)
Instructions
-
Vegan macarons are very tricky to get right the first time. Please read the recipe notes beforehand for best results.
Reducing the aquafaba (do this at least 12 hours in advance):
-
Weigh the liquid from the 2 cans of chickpeas and place it in a medium-sized pot. Place it over the heat and let it simmer. Weigh it periodically until it reaches half the weight you started with. You should start with roughly 250g of liquid and finish with roughly 125g.
-
When you've reduced the chickpea liquid, let it cool and place it in the fridge in an airtight container overnight.
For the macaron shells:
-
Preheat your oven to 150°C/300°F (130°C/275°F if using a fan or convection oven). I highly recommend using an oven thermometer for accuracy.
-
Weigh out 100g of your reduced aquafaba and place it in a scrupulously clean, medium-sized bowl along with the cream of tartar. Using a very clean electric whisk or stand mixer, whisk on high speed until the mixture becomes frothy and goes pale in colour.
-
With the mixer still going, start adding your caster sugar a little at a time. Keep whisking until the mixture becomes white and glossy and forms stiff peaks, until you can tip the bowl upside-down without it moving. This takes a bit longer than it would with egg whites so be patient and keep whisking!
-
Sift the ground almonds and icing sugar into a separate bowl. Use the back of a spoon to push any lumps of almonds through the sieve.
-
Add half of the icing sugar & ground almonds to your aquafaba mixture and gently fold it in using a spatula. Then fold in the other half.
-
Keep folding gently until the mixture begins to get a little softer, but be careful not to over-mix. You'll know you're done mixing when you can place a spoonful of the mixture on a flat surface and it slowly flattens out without any lumps or bumps on top. Another way to test is by lifting up a bit of the mixture and drawing a figure of 8 with it. It's ready when you can do this without it breaking.
-
Place the mixture into a piping bag with a round nozzle and pipe 2-inch circles onto your cookie sheet*. You may need 2 trays to do this.
-
Slam the tray(s) on a work surface to get rid of any air bubbles, then let them sit at room temperature for 20-30 minutes, or until you can touch them without getting any mixture on your fingers.
-
Place your macarons on the middle shelf and bake for ~18 minutes. You can check they're ready by wiggling the top of one with your finger. If it moves out of place, it needs to be baked a little longer. I recommend that you only bake one tray at a time unless you can fit the trays on the same shelf.
-
Once baked, remove them from the oven. When they are fully cooled, gently pull them off of the tray and find matching pairs of similar shape and size. If they stick to the tray once cooled, they are probably underbaked and you can pop them back into a preheated oven for a few more minutes.
For the buttercream filling:
-
Mix the icing sugar, vegan margarine and vanilla extract in a large bowl until smooth. If necessary, add the plant-based milk to help loosen it a little. Once mixed, use an electric whisk to mix until pale and fluffy.
-
Pipe a small amount of buttercream onto the centre of a macaron. Sandwich it together with another macaron, using a gentle twisting motion to prevent it from overflowing.
-
Repeat until all of the macarons have been paired.
-
Store macarons in the fridge, in an airtight container, for up to 2 days after baking. When ready to eat, let them sit at room temperature for around 10 minutes (they taste better this way), then enjoy.
Recipe Video
Recipe Notes
- Measure in grams with a scale rather than converting to cups. Accuracy matters for this recipe.
- Use an oven thermometer to make sure the temperature is exact.
- Make sure your bowl and mixers are very clean and free from grease.
- *Use a dark, non-stick cookie sheet. This is very important because of how it absorbs the heat and lets the airflow. Do not use baking paper or a silicone mat/tray. I got my non-stick sheet from Dunlem.
- Macarons can be stored in an airtight container in the fridge for up to 48 hours.
Nicole Marie
Monday 9th of March 2026
Could you use egg replacer, like Bob's Reds?
Chloe
Monday 16th of March 2026
I've never tried, sorry!
Makayla
Monday 9th of February 2026
honestly this was an amazing recipe and i just messed it up and accidentally made 5 massive macarons instead of 20 because i didn’t have a piping bag and just decided to wing it. my monster macarons taste fantastic though so thank you! I’ll remake them at some point and actually follow the recipe better :)
Chloe
Monday 9th of February 2026
Giant macarons sound delicious! ;) Thanks for your review, glad you enjoyed the recipe!
Barb Nakagawa
Sunday 21st of December 2025
Hello, I used your recipe to make the aquafaba into egg whites - amazing; however, I used my other recipe for the macarons, only becuz it took me 7 times to get the “mostly perfect macaron” and I didn’t want to change recipes. So, the final outcome was that the mixture was a bit thicker than if I used egg whites so the tips didn’t come down when I smacked the tray. Some looked good, some were lopsided and the inside was hollow and crisp as opposed to filled and chewy - saying that, I think your recipe is pretty good. Once the filling is added they will taste fine and my vegan friend will like them even if they were a bit chewy. Thank you so much. If you have a hint to make the mixture less thick, pls let me know.
Merlene
Friday 9th of January 2026
@Barb Nakagawa, This person was kind enough to share her recipe. You chose to use the aquafab portion only, now you are asking her to fix an issue with your recipe? Her hint is to use her recipe, then she can offer a tip/fix if you didn't achieve the same results.
Chloe
Monday 22nd of December 2025
Hi, I wouldn't be able to say without seeing the other recipe, sorry. Let me know if you give this one a go and I can help troubleshoot if needed :)
Poonam
Tuesday 9th of December 2025
Can’t thank you enough for this amazing recipe!! Beautifully described, I got the best batch of Eggless macrons with your recipe after 3-4 failed attempts!! Got lovely feet,nice and tall Macrons!! Base was good too. Macrons were hollow from inside.everything else was perfect. Which step do I need to improve in order to get fuller macrons? Thank you so much!!
Poonam
Friday 12th of December 2025
@Chloe, Thank you for your response. Yes, I bought over thermometer for this recipe. I will try to tap it. I did see a lot of bubbles in the mixture but was not too sure what to do about it. Thanks once again!
Chloe
Tuesday 9th of December 2025
Thank you, so glad to hear! Have you got an oven thermometer? Your oven might just be a tad bit too cool. If it's not that, it could be overmixing or too many air bubbles in the mixture (try doing a few more taps on the counter before letting them rest).
Amy
Thursday 20th of November 2025
Hi hi! Would I ruin the macarons if I wanted to add drops of liquid flavour/colour?
Chloe
Thursday 20th of November 2025
I'm not sure as I've never tried it, sorry, but I think powder colours would work the best.