Best Ever Vegan Pavlova
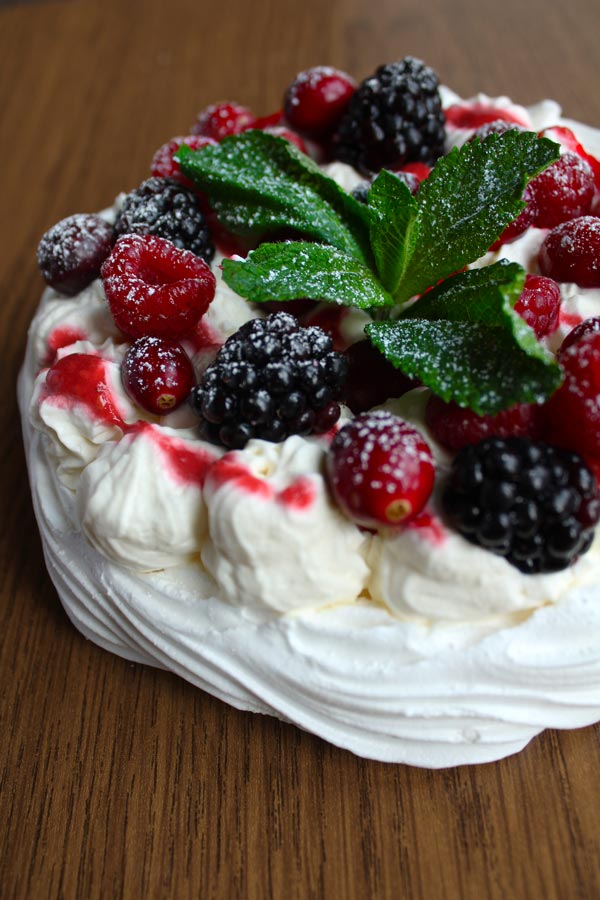
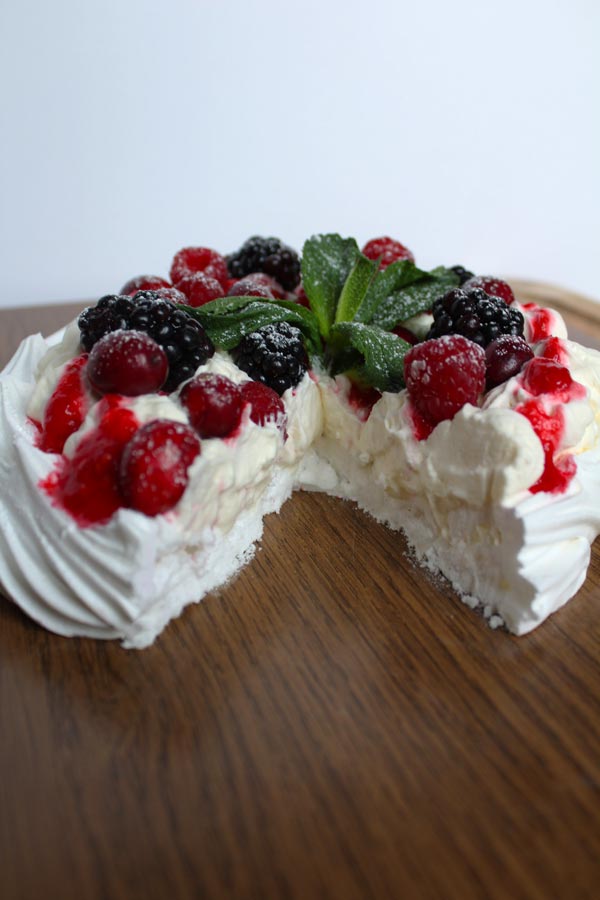
This vegan pavlova tastes exactly like the traditional version. It’s sweet, light and crispy with a soft, marshmallow-y centre. Top it with vegan whipped cream and berries for a super impressive dessert!
I must start this post by saying that I first made this vegan pavlova last December. However, that post was very brief and didn’t contain a lot of information.
I decided to update it this year with step by step pictures and a video to help you get your pavlova right the very first time you try. Because pavlovas can be super tricky if you’ve never made one before. Especially if you’re making one without eggs!
I think this is a great dessert to take to a party because it looks so impressive. It may seem like a hard and complicated thing to make but with a little time and care, it can totally be straight-forward and easy!
So… what’s the secret to making a pavlova without eggs?
Are you ready?
The magic ingredient is aqua faba!
Otherwise known as the water leftover from cooked chickpeas.
Now, I know what you’re thinking… That sounds disgusting.
But trust me, you’ll never know the difference once it’s baked. It’s just as crispy, chewy and sweet as the original, with a fluffy, marshmallow-like centre. Your pavlova will not taste like chickpeas, promise.
I also added both cream of tartar and xanthan gum to my pavlova. The cream of tartar helps the aqua faba whip into stiff peaks very easily, and the xanthan gum helps give it some structure, so it will hold its shape better.
Vegan Pavlova Topping Suggestions
Pavlova is traditionally an Australian dessert but it’s quite popular in Britain too, especially around Christmas time, hence why mine looks quite festive.
I recently tried topping my vegan pavlova with this new whipped (dairy-free) double cream by Elmlea which was lovely! In the past, I’ve used whipped coconut cream which is equally as nice.
Feel free to use any other dairy-free cream you like. There are lots of good plant-based creams out there now.
I also added a mix of raspberries, blackberries and cranberries on top. I then realised that unsweetened cranberries are disgusting so I’d highly recommend using sweetened ones if possible!
I’ve heard really great things about passion fruit on pavlovas too.
Want more Vegan Christmas Recipes?
- Candy cane cupcakes
- Royal icing
- Christmas pudding donuts
- Shortbread cookies
- Gingerbread cookies
- See also: 68 best vegan desserts
Reducing aqua faba for vegan pavlova
The first step of making a pavlova is to make the meringue mix. Since we’re not using egg whites in this case, you’ll need the liquid from a can of chickpeas instead (a.k.a aqua faba).
A super important part of this recipe is to reduce your aqua faba before whipping it up. That is, to gently simmer it on the stove until the volume (or weight) has reduced by around half. This gets rid of the excess water and leaves a more concentrated protein which will help to stiffen up the meringue mixture.
Reducing aqua faba will help your pavlova hold its shape in the oven and will prevent it from deflating or seeping water out of the bottom. Plus, it takes much less time to whip up into stiff peaks after you’ve reduced it.
I tested this recipe around 6 or 7 times before I got it just the way I wanted it. I tried it both with reduced aqua faba and non-reduced aqua faba, and although the non-reduced one did whip into stiff peaks, it took a lot longer and the pavlova completely lost its shape in the oven. It looked more like a pancake, and you couldn’t see the piping detail at all.
It also took a lot longer to cook inside when I didn’t reduce the aqua faba first, which meant the outside turned that pinkish-brown colour pavlovas sometimes have. I much prefer to have it bright white if possible- it looks so much nicer that way in my opinion!
To reduce the aqua faba…
Place the liquid from 1 regular-sized can of chickpeas in a small pot over a medium-low heat. Pour it into a bowl to weigh it every so often and keep simmering it until it weighs 80 grams. If you’re using cups to measure, keep reducing it until you’re left with 1/3 cup of aqua faba.
If you’re using the water from chickpeas that you’ve cooked yourself, weigh or measure the aqua faba before you begin reducing it. You want to just make sure you reduce it by half, whether that’s in weight or volume.
After you’ve successfully reduced it, allow it to cool completely. When cold, it will start to congeal, a bit like egg whites would.
How to make vegan pavlova
Step 1:
Preheat your oven to 130°C (110°C fan) / 265°F and line a large baking tray with parchment paper.
It’s also useful to have your caster sugar measured out at this point too. You’ll need 150 grams or 3/4 cup.
Step 2:
Before you begin, you’ll need to make sure your mixing bowl is scrupulously clean and dry, the same as it would be when making traditional pavlova.
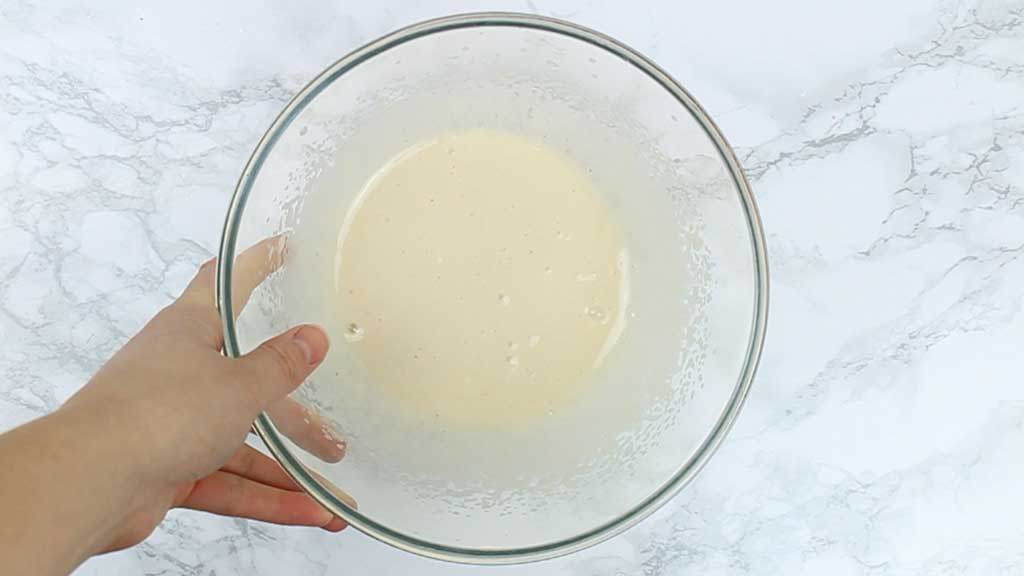
Place your reduced, cooled aqua faba into your large mixing bowl along with 1/4 of a teaspoon of cream of tartar, 1/8 of a teaspoon of xanthan gum and 1 teaspoon of vanilla extract.
Using an electric whisk or stand mixer, whisk it up until it becomes thick, frothy and super pale. This should only take a minute or two.
Step 3:
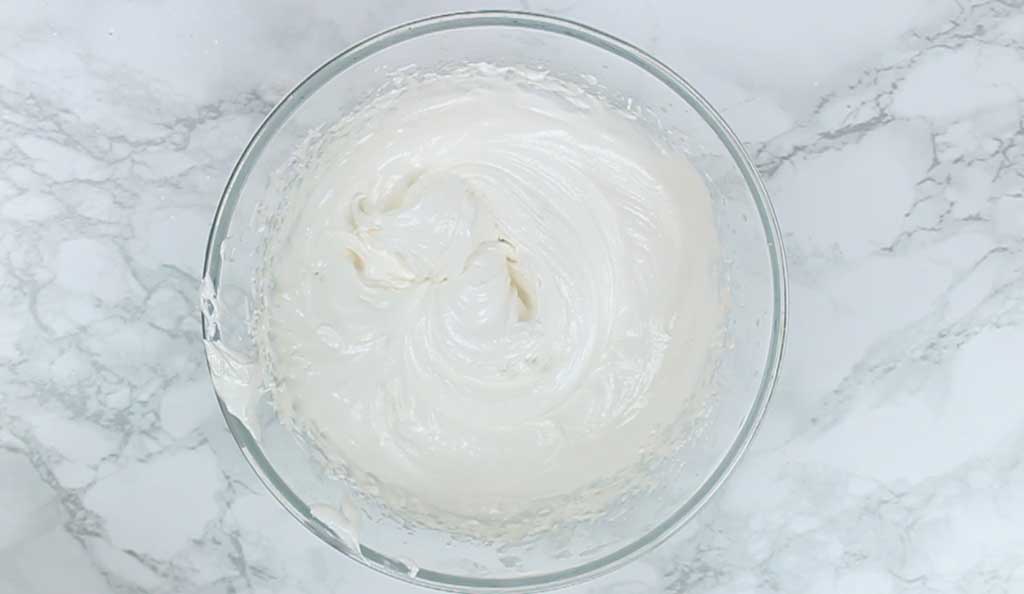
As you’re still whisking, begin adding in the caster sugar a little at a time. I would suggest adding around 2 tablespoons at a time, and fully whisking them into the mixture before adding the next 2.
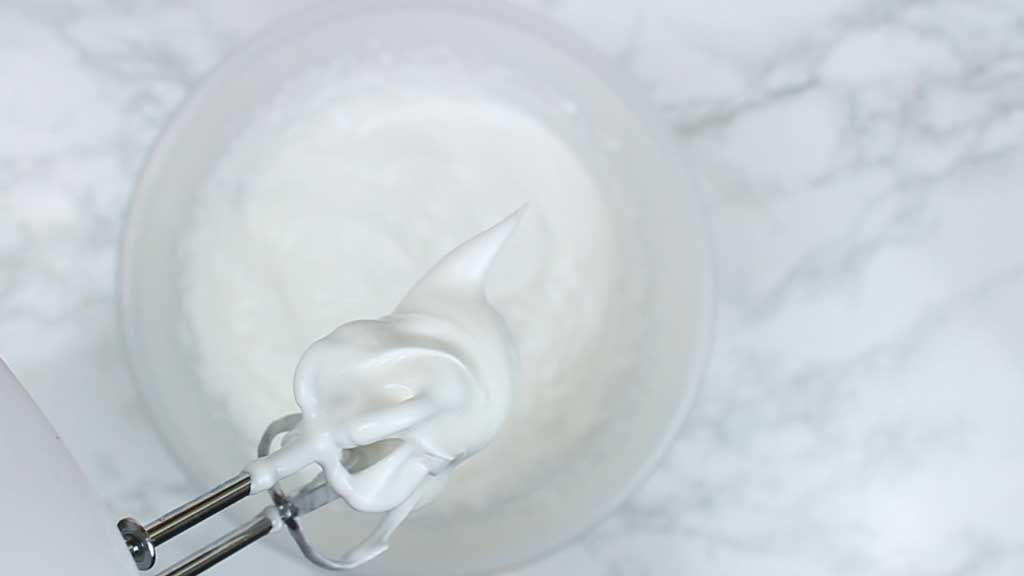
Keep whisking for a few more minutes until the mixture has formed stiff peaks. You’ll know it’s stiff enough when you can tip the bowl upside down without it moving.
Step 4:
Spoon half of the mixture onto your lined baking tray in a small circle shape and gently spread it outwards and upwards.
Transfer the other half of the meringue mixture into a piping bag with a large star nozzle. Now pipe the mixture around the edges of your circle shape to give it a little extra texture.
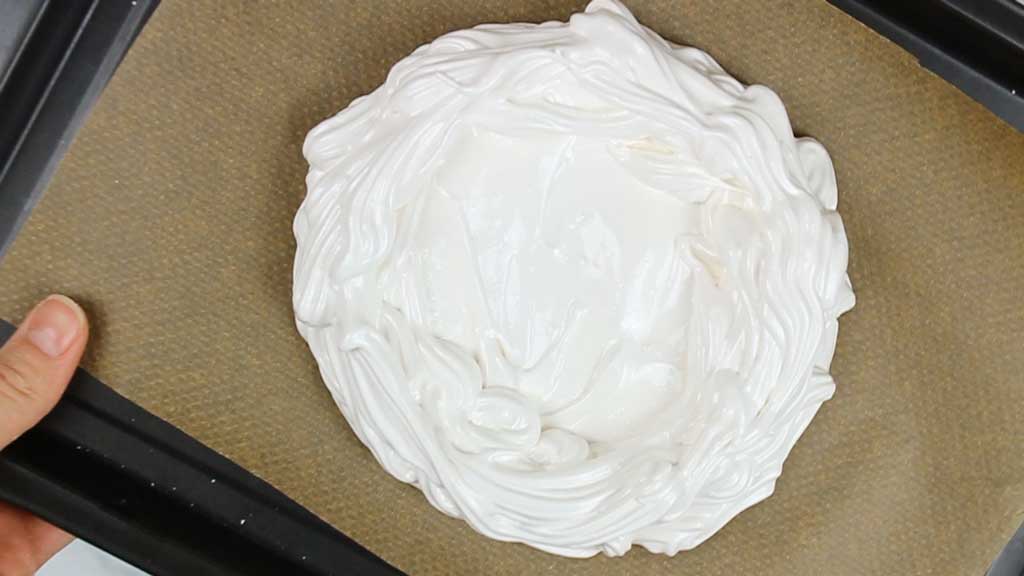
This part is pretty hard for me to explain well in writing so feel free to watch the video on this page for clarity if need be!
You can also, of course, skip the piping part altogether if you’re not too worried about your vegan pavlova looking super fancy.
Note that in the video I didn’t use xanthan gum. You can see it still works nicely but doesn’t hold the shape quite as well.
Step 5:
Place it into the oven for 2 hours.
After the time is up, turn off your oven without opening the door and leave it in there overnight, or for at least 4 hours, to cool completely.
Step 6:
Gently remove your pavlova from the parchment paper. It should peel straight off but be gentle so it doesn’t start crumbling. Don’t worry about any cracks as you can cover them up with the cream.
Step 7:
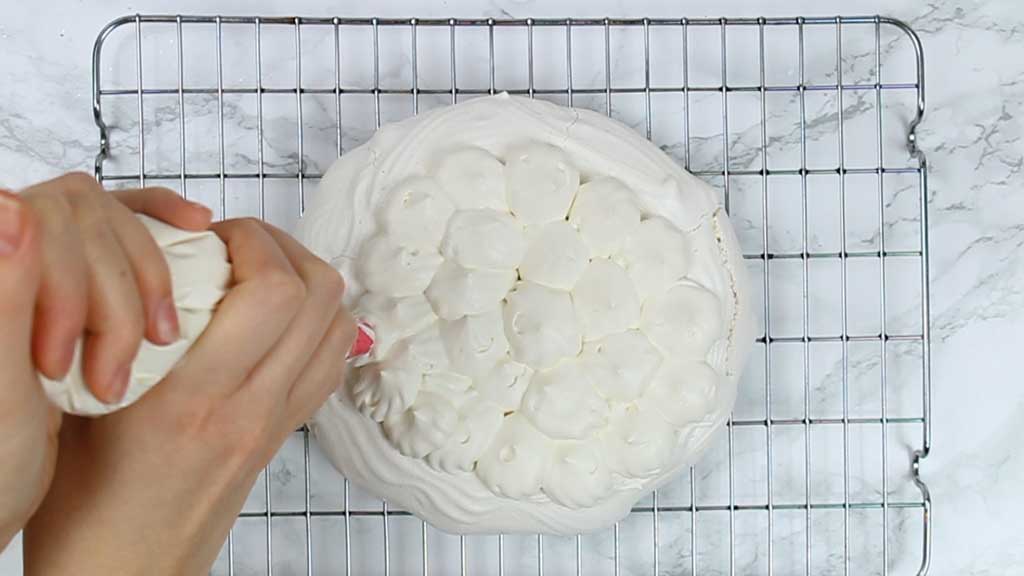
Shortly before you want to serve the pavlova, whip up your vegan cream of choice and spoon or pipe it into the centre.
Step 8:
Decorate with some chopped fresh fruit of your choice and serve.
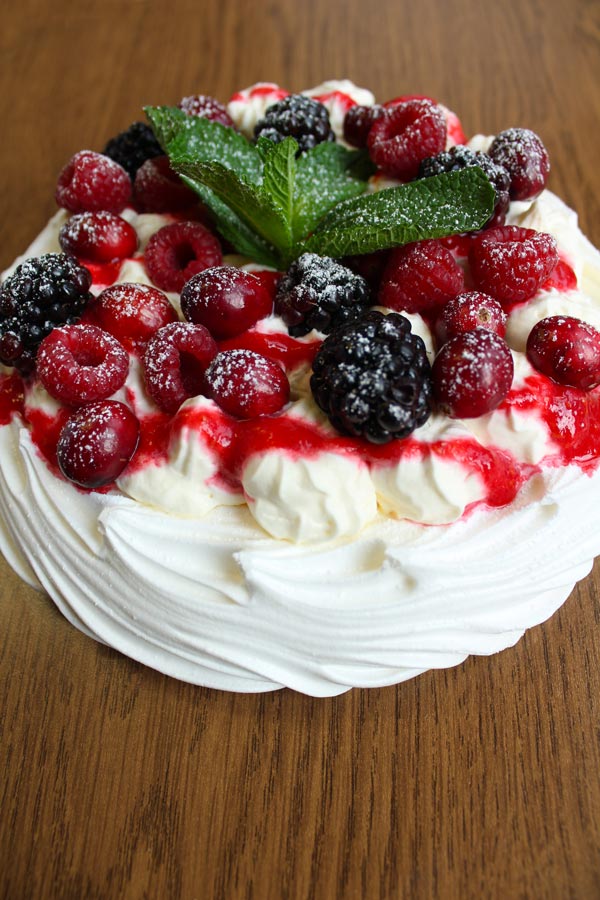
And now you have the best ever vegan pavlova!
I hope you enjoy this recipe and I hope my more detailed instructions will help you get it right first time.
If you make this at home, I’d love to know how you get on! Please leave a comment and/or rating below.
Happy baking!xo

Vegan Pavlova
A light, eggless meringue with a fluffy, marshmallow centre. Topped with vegan whipped cream and fresh fruit.
Ingredients
- 80 g Reduced aqua faba (⅓ cup (see post above for how to reduce))
- ¼ Teaspoon Cream of tartar
- 1 Teaspoon Vanilla extract
- ⅛ Teaspoon Xanthan gum (optional)*
- 150 g Caster/ superfine sugar (¾ cup)
- Vegan whipped cream of choice (I used Elmlea plant-based double cream)
- 2 Handfuls Berries of choice
Instructions
-
Preheat your oven to 130°C/265°F (110°C/240°F if using a fan or convection oven) and line a large tray with baking paper. I strongly recommend using an oven thermometer for the most accurate results.
-
Measure out your caster sugar and set aside.
-
Place the reduced aqua faba into a large, clean bowl along with the cream of tartar, vanilla and xanthan gum (if using). Use an electric whisk or stand mixer to mix until it becomes thick, pale and frothy.
-
Keep the mixer on and slowly start adding in the sugar, around 2 tablespoons at a time. Make sure the first 2 tablespoons of sugar are completely mixed in before adding the next 2.
-
Keep whisking until the mixture forms very stiff peaks. If you're using xanthan gum, it will whip a lot quicker so just whisk for as long as you can before it starts sticking to the mixers. You should be able to hold the bowl upside down for a few seconds without the mixture moving around.
-
Spoon or pipe the mixture onto your lined baking tray and bake for 2 hours.
-
After this time, turn off the oven completely and do not open the door. Keep it in there with the door closed for at least 4 hours before removing it (leaving it overnight is ideal). This will give it time to firm up and prevent excess cracks. Don't worry too much about any cracks though- they can be covered up with the cream.
-
Whip up your cream of choice and spoon or pipe it onto the pavlova just before serving.
-
Top with fresh fruit of your choice and enjoy!
Recipe Video
Recipe Notes
- For best results, weigh the aqua faba and sugar with a scale & use measuring spoons for the other ingredients.
- *Xanthan gum is not required for this recipe but helps the pavlova to hold its shape slightly better which is ideal if you’re piping it.
- *Pavlova can be stored for at least 2 days in an airtight container without any toppings. After the cream is added, store in the fridge for up to 12 hours.



Jesssicca
Tuesday 24th of December 2024
Has anyone doubled this recipe.? If so how long would the cooking time be?
Jo
Monday 16th of December 2024
I made mini pavlovas so each one was a large portion, this recipe created about 12 mini meringues. Baked at same temperature as instructions but cut time to 1h20min. Worked really well and I got loads of compliments.
Chloe
Monday 16th of December 2024
Thanks Jo, glad you liked the recipe!
Jenifer
Sunday 27th of October 2024
I was always known for making lovely pavlova before I became a vegan - thank you for this great recipe. Now I can make them again.
Chloe
Sunday 27th of October 2024
Hope you enjoy!
JB
Friday 25th of October 2024
This is the best vegan meringue recipe I’ve used. I’ve made the pavlova twice now. The first time, I doubled the recipe and it was perfect! (Serves 8.) The second time, I made it as the recipe, with the reduced aquafaba of one tin of chick peas (serves 4), and it was almost perfect…would make the bottom layer a bit deeper next time…needs to be about 2cm deep, then with the edges piped up to make the ‘bowl’. Piled up with whipped Elmlea and raspberries etc it’s pretty much impossible to tell it’s not egg. (And easy enough to knock up a hummus with the chickpeas.) Thank you!
Chloe
Sunday 27th of October 2024
Thanks so much for your feedback😊
Sigrid
Tuesday 6th of August 2024
It's a lovely recipe, I recommend leaving the oven door open after the baking. Mine came out crispy and fluffy at the borders but sticky in the centre of the cake.