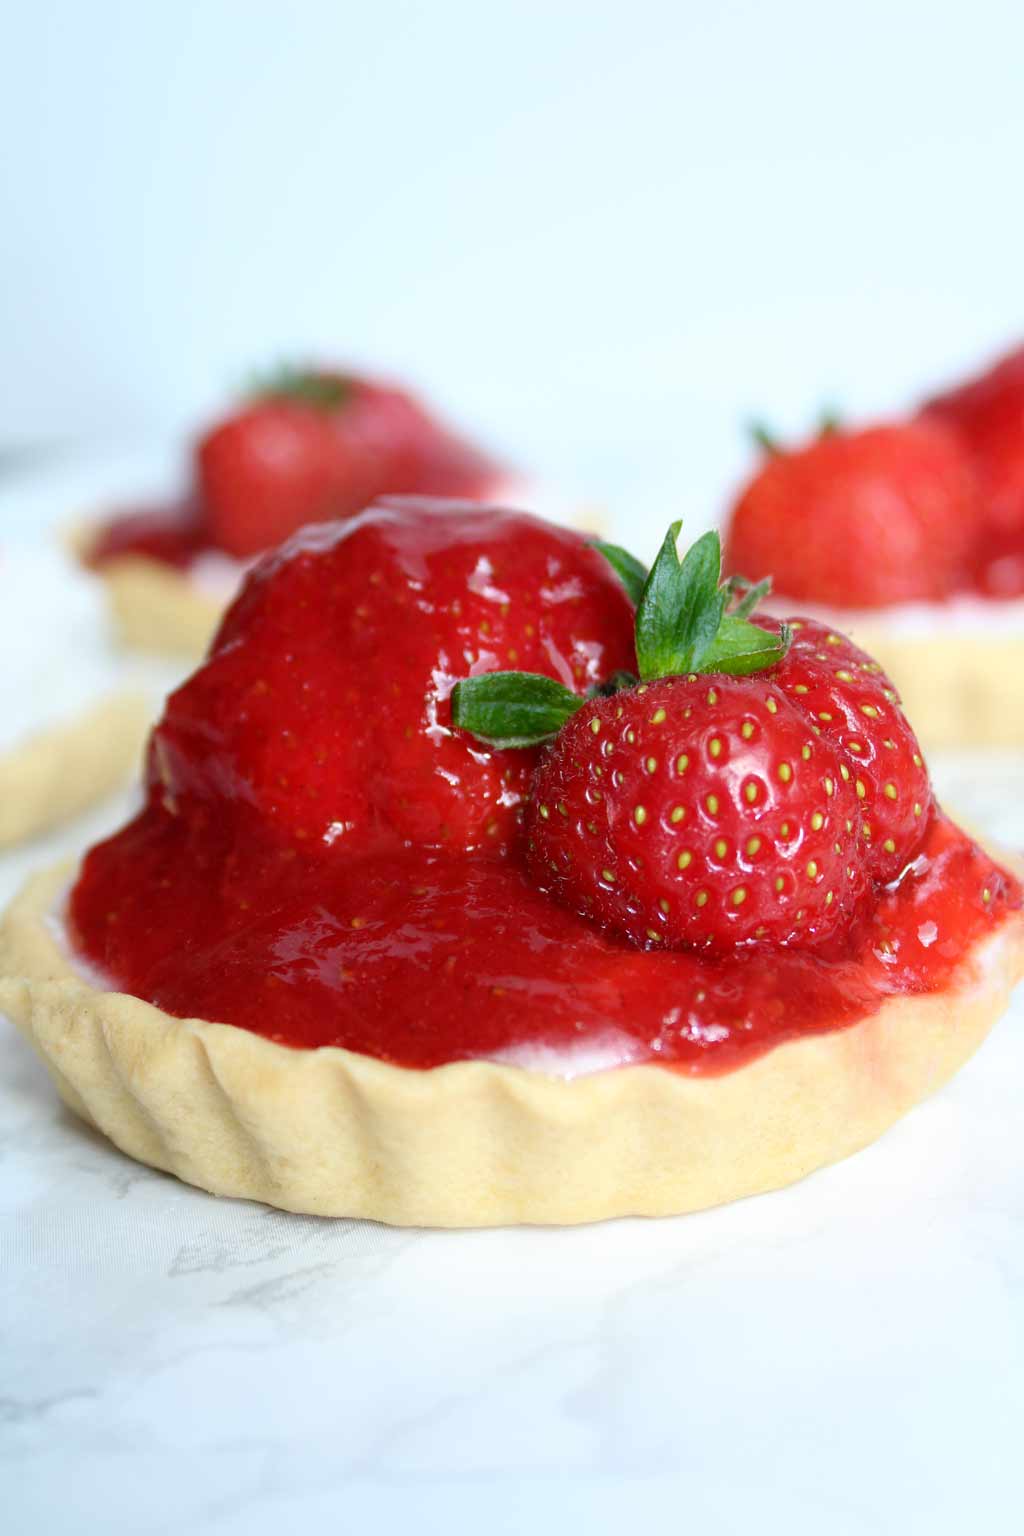
Mini Strawberry Tarts
Bold and bright, these mini strawberry tarts are a super cute addition to any tea party! A homemade pastry tartlet that’s filled with sweet, soft coconut whipped cream and topped with a thick, sticky strawberry sauce and fresh fruit.
These mini fruit tarts are a popular bakery item here in Scotland.
I used to love eating them as a child. Every time we’d visit the bakery, I’d either have a mini strawberry tart or a mini trifle (yes, everything had to be mini for mini-me).
But in the end, my mum stopped buying me trifles because every time she got me one, I’d stir it up to make a big purple sludge then refuse to eat it because it looked so disgusting.
So strawberry tarts became my new favourite.
Mini Scottish Strawberry Tarts
If you’ve never had Scottish strawberry tarts, allow me to introduce you to this delicious dessert.
You start with a shortcrust pastry base then you fill it with some rich, heavy whipped cream.
Traditionally, they’re filled with whipped dairy cream but aside from that, I’ve kept everything else the same! I switched the dairy cream for whipped coconut cream to make it dairy-free and of course, vegan-friendly.
After the cream, you place a large strawberry in the middle, then you cover it in some sticky strawberry glaze.
Oh, they are fabulous. I think they would look so cute as part of a birthday party spread or as part of an afternoon tea with some other baked goods.
Want more vegan afternoon tea ideas?
How to Make Mini Strawberry Tarts
The first step to making the best Scottish strawberry tarts is to make sure you have 6 mini pastry cases to hand.
I used some fluted ones from Asda and these were super convenient to use because the bottoms pop out, meaning the pastry won’t stick to the tin. You can purchase some similar ones from Amazon seller KitchenCraft if you’re in the UK and from WeBake if you’re in the US.
If you don’t want to go through the process of making your own pastry or want a quicker recipe with less mess, you can just purchase ready-made pastry cases. A lot of the store-bought ones are accidentally vegan, but obviously, you’ll have to check to make sure as it varies from brand to brand. I like JusRoll.
Step 1:
Once you’ve got the mini pastry tins ready, you can begin preparing your pastry dough.
In a medium-sized bow, add 215g of plain flour and 135g of vegan margarine. Rub the margarine into the flour to until you have a mixture that resembles breadcrumbs. Then stir in 15g of icing sugar.
*Note that it’s important here to make sure the margarine is cold and not at room temperature as you don’t want it to melt into the flour.
Step 2:
Add 1 tablespoon of ice cold water into the bowl and stir it until a dough begins to form. Use your (clean and cold!) hands to gently press it into a ball.
Wrap the dough in plastic wrap then place it in the fridge for around 30 minutes to chill. This will give time for the gluten in the flour to relax a bit and make it easier for you to roll the pastry dough out. (It will also prevent the dough from cracking when you roll it.)
Step 3:
While you wait for the dough to chill, preheat your oven to 200°C.
Step 4:
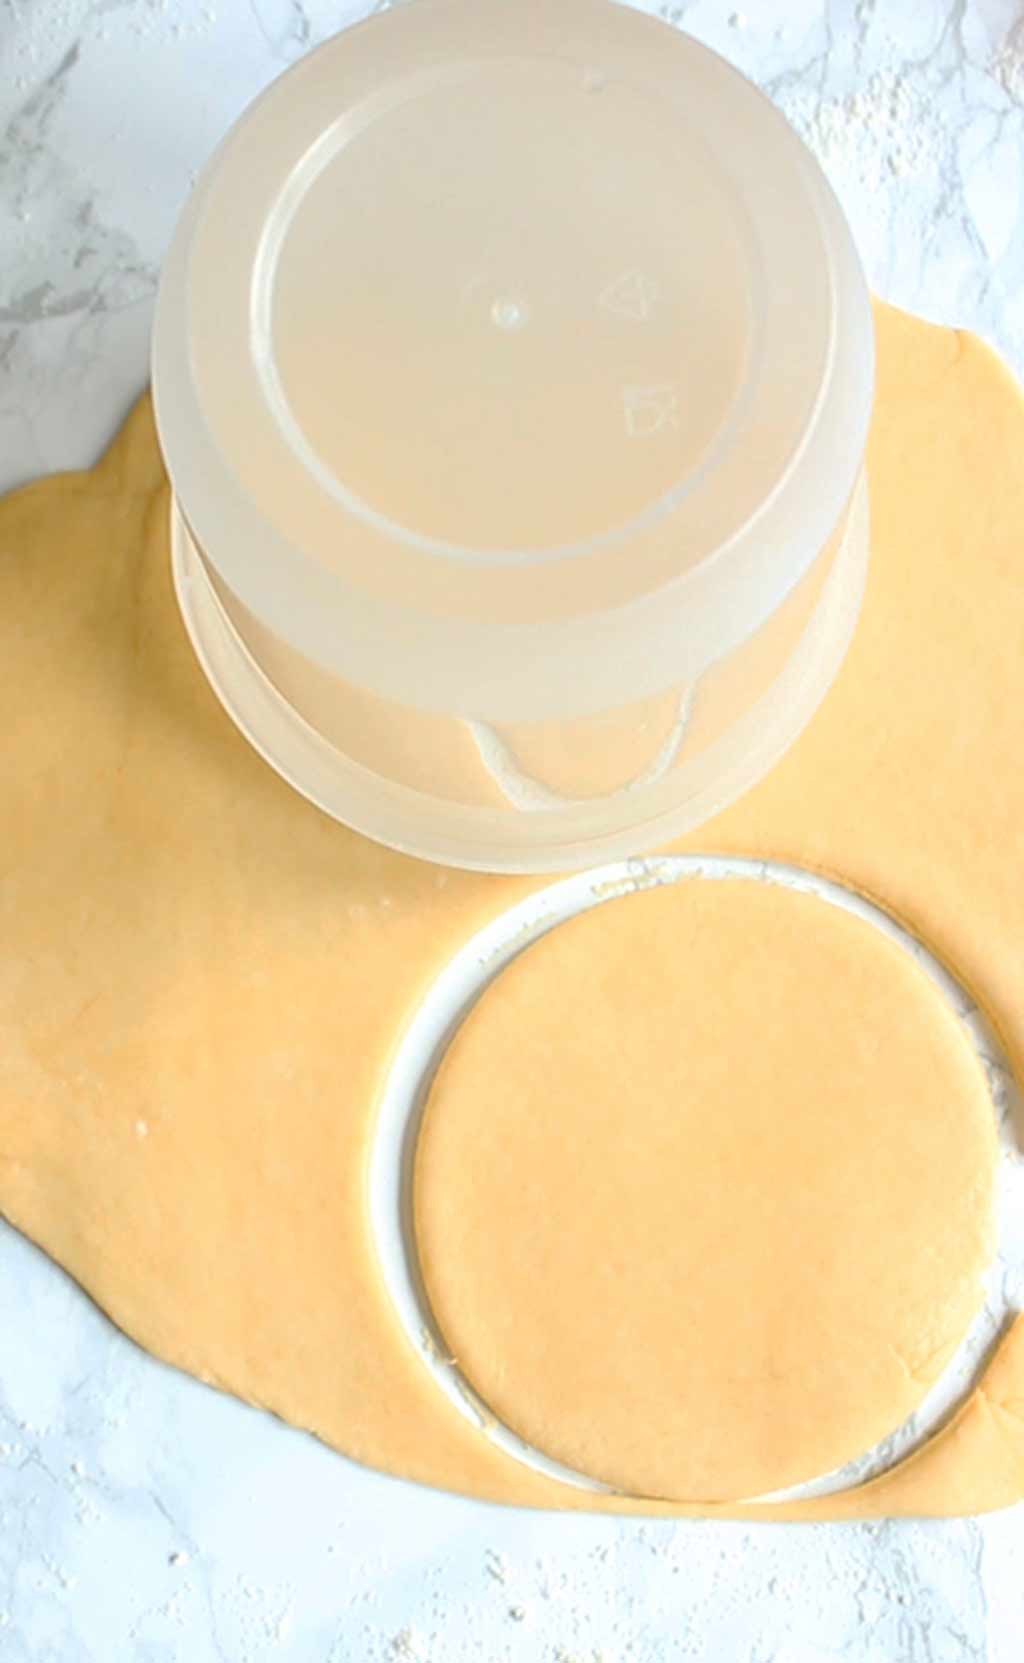
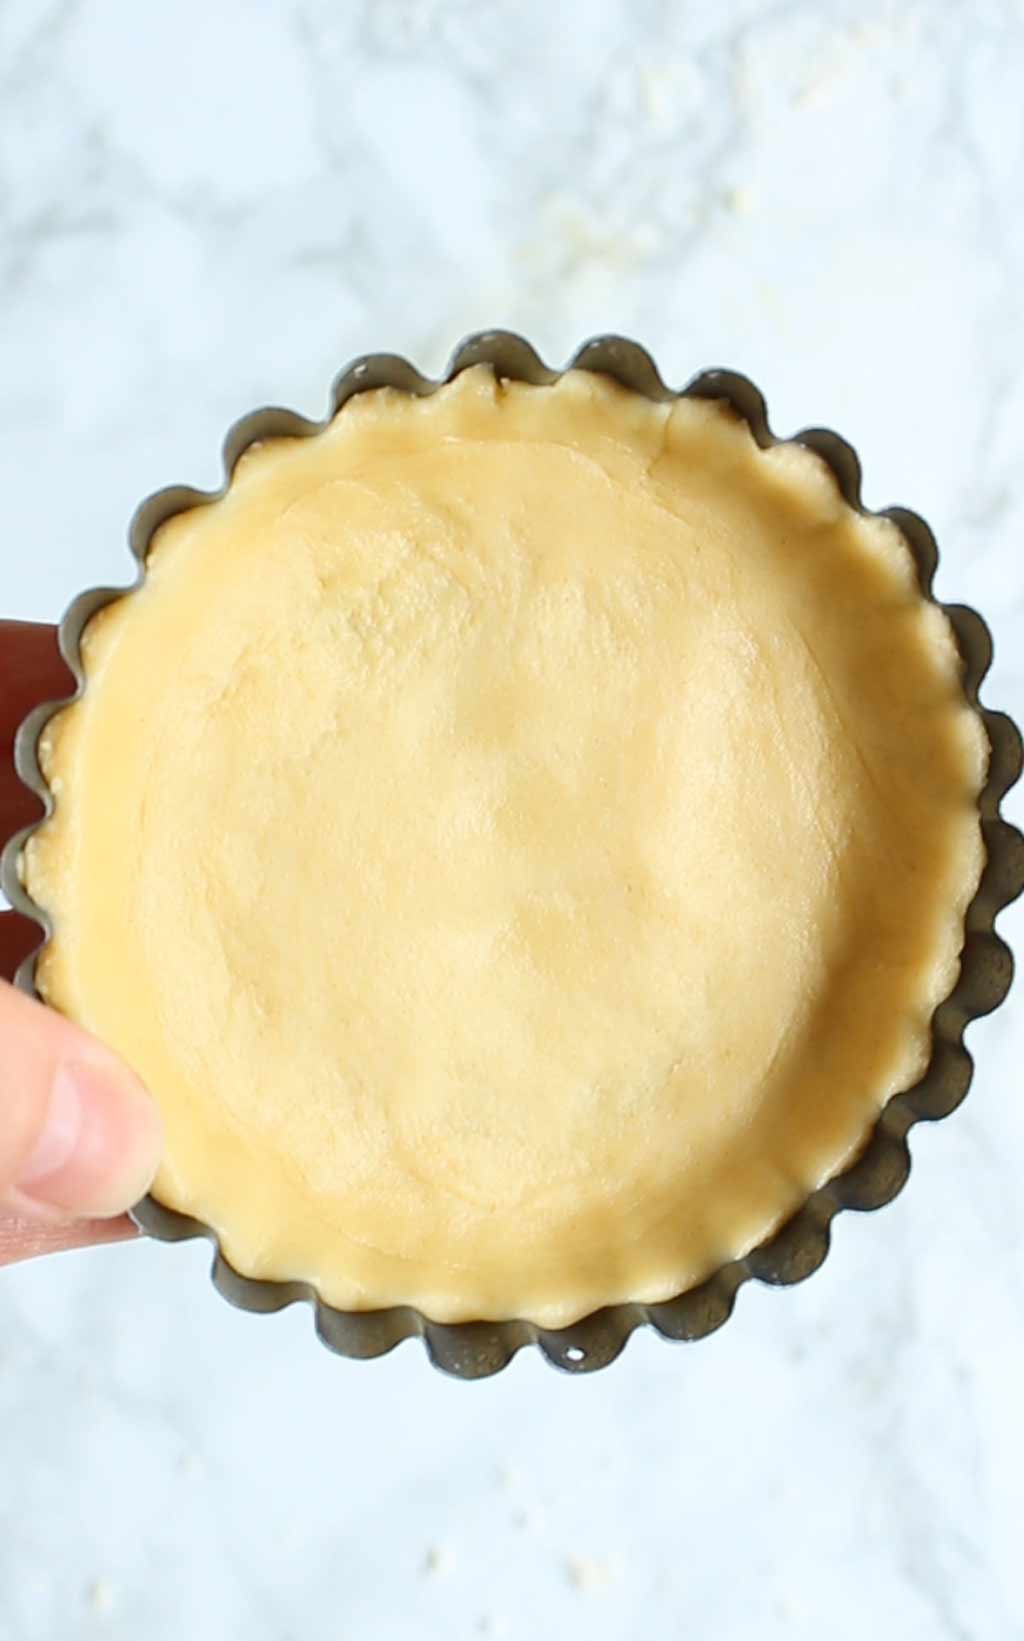
Once your dough has chilled for 30 minutes, roll it out on a lightly floured surface until it’s about 1/2 cm thick.
Cut out circles that are just slightly bigger than your tartlet tins. I personally didn’t have a cookie cutter that big so I used the bottom of a round Tupperware box instead which worked perfectly.
Reroll the leftover pieces of dough and cut out more circles until you have 6 of them.
Step 5:
Lightly spray the tartlet tins with cooking spray, place a circle of dough into each one then use your fingers to gently press the dough evenly into the bottom and up the sides. Dock the bottom of the pastry dough with a fork, which will allow air to escape as it bakes and prevent it from puffing up.

Bake the mini tarts in the oven for 20 minutes. They should be nice and firm, and ever so slightly golden brown. Allow them to cool completely before moving onto the next step.
Step 6:
Time prepare the strawberry glaze topping!
Wash, de-hull and roughly chop 10 medium-sized strawberries. Place them into a small pot with 55g of caster sugar and two teaspoons of lemon juice.
Place them onto the hob over a medium-high heat for around 5 minutes until they become softer. Use a fork or a potato masher to mash the strawberries completely.
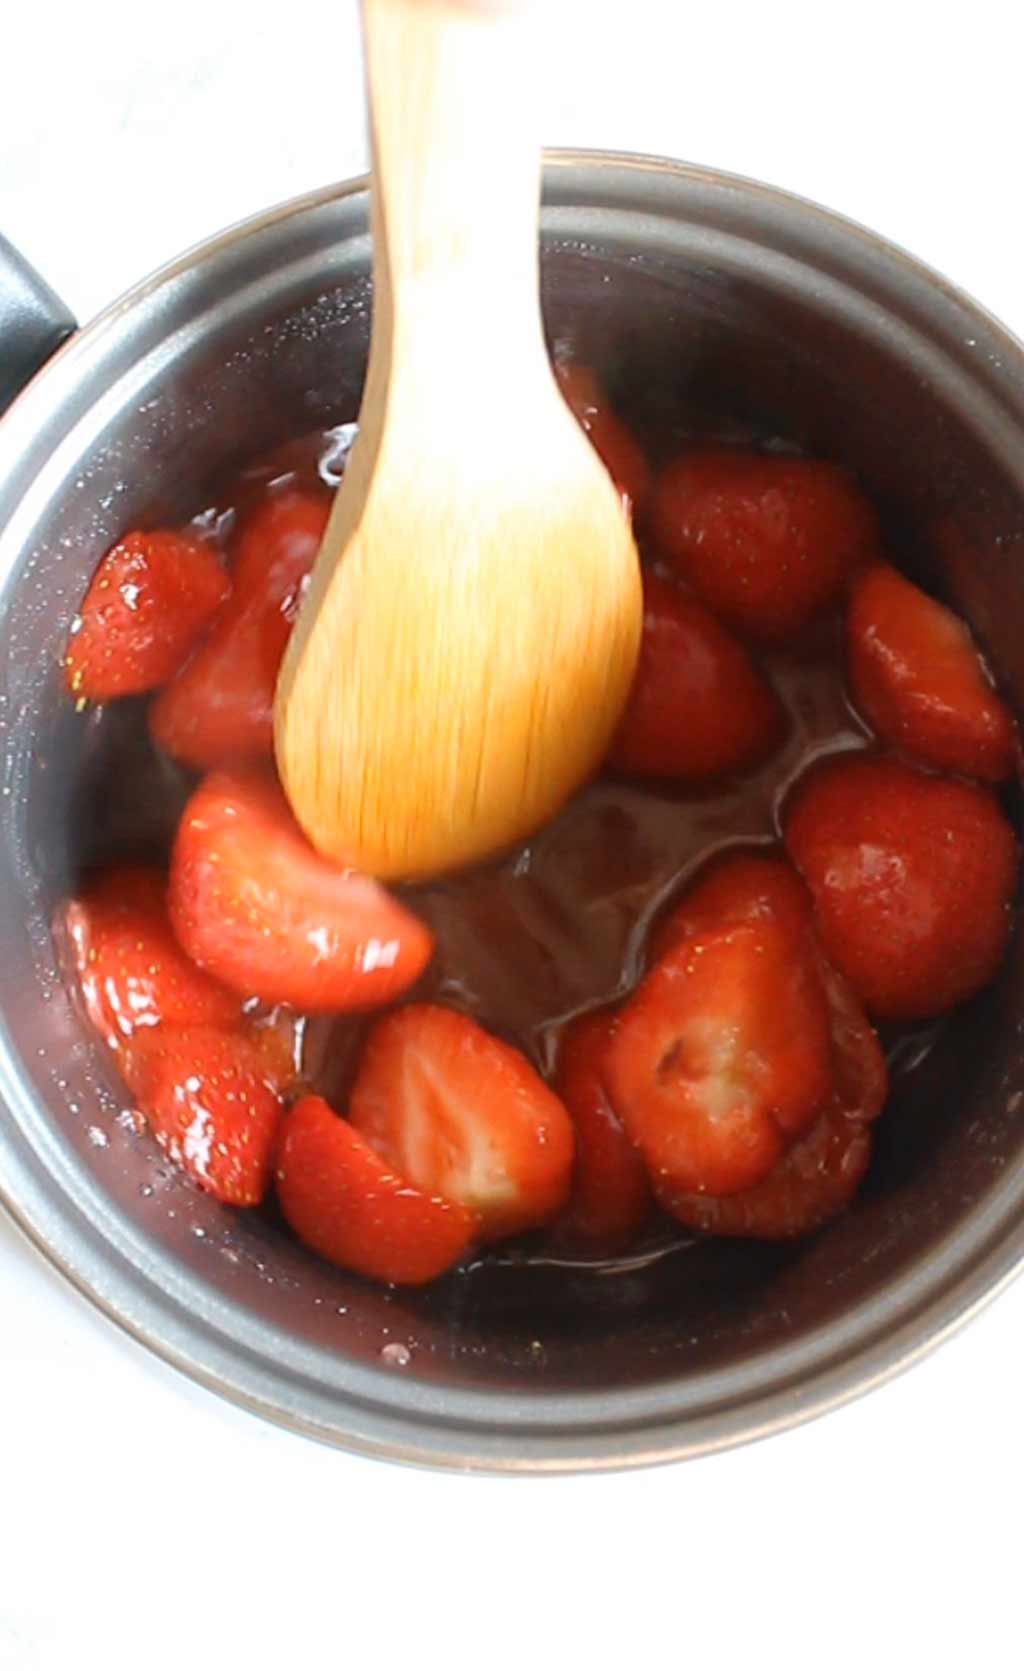
Turn the heat down to medium-low and allow the mixture to simmer for another 5-10 minutes until it becomes nice and thick. It will look a little bit like jam.
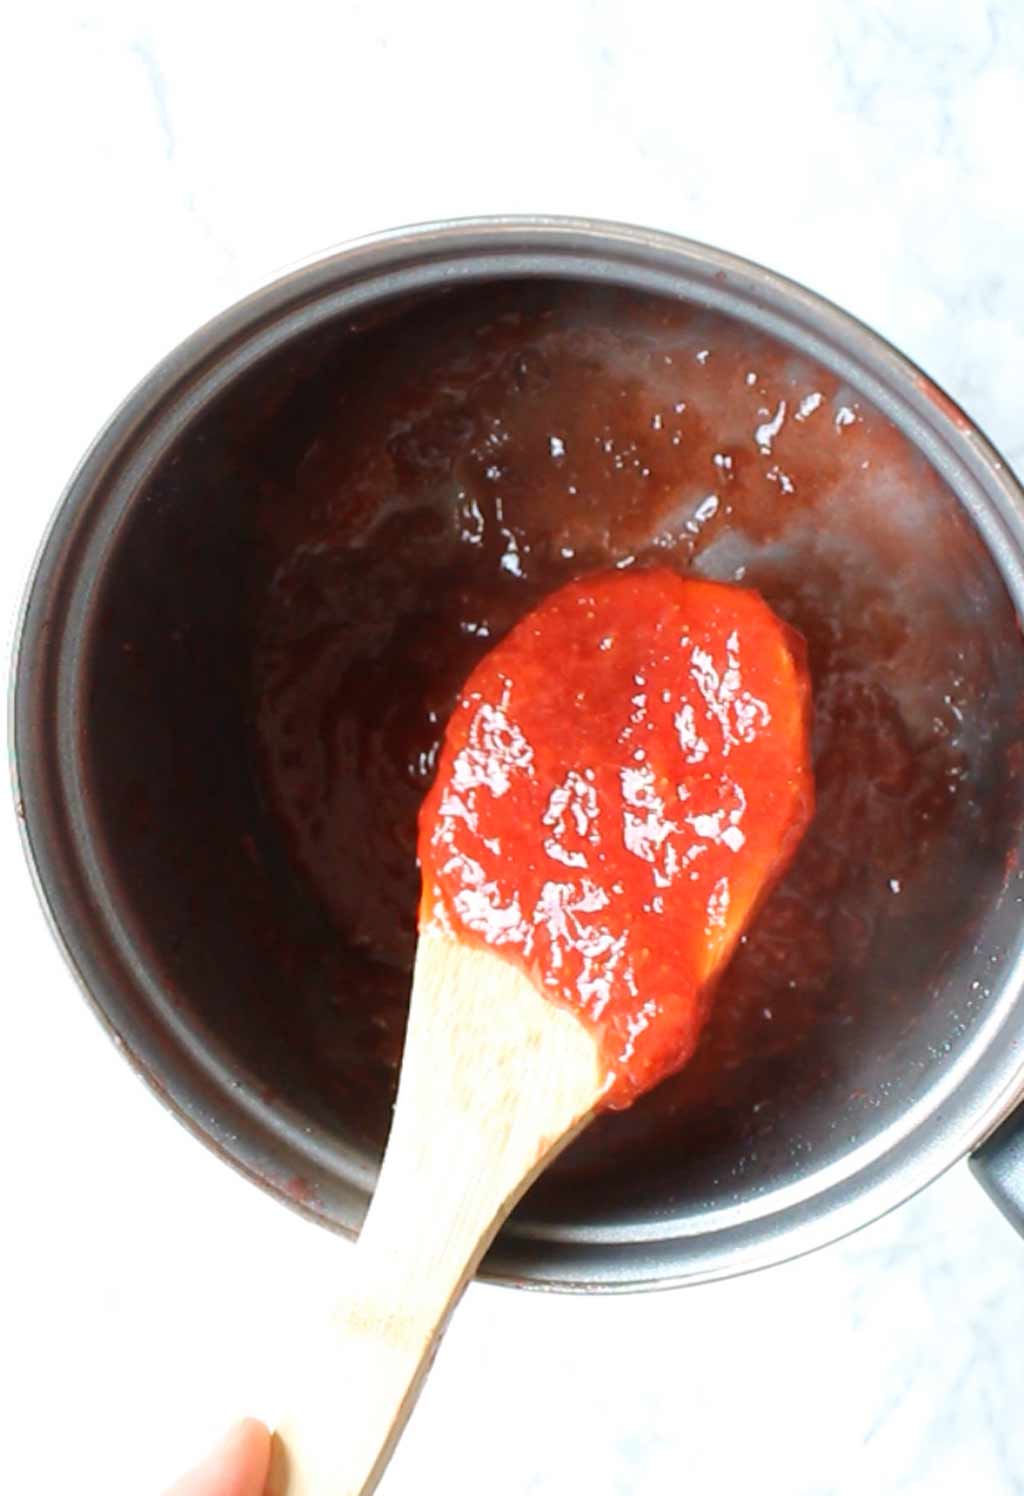
Remove the pot from the heat and allow the strawberry glaze to cool down.
Step 7:
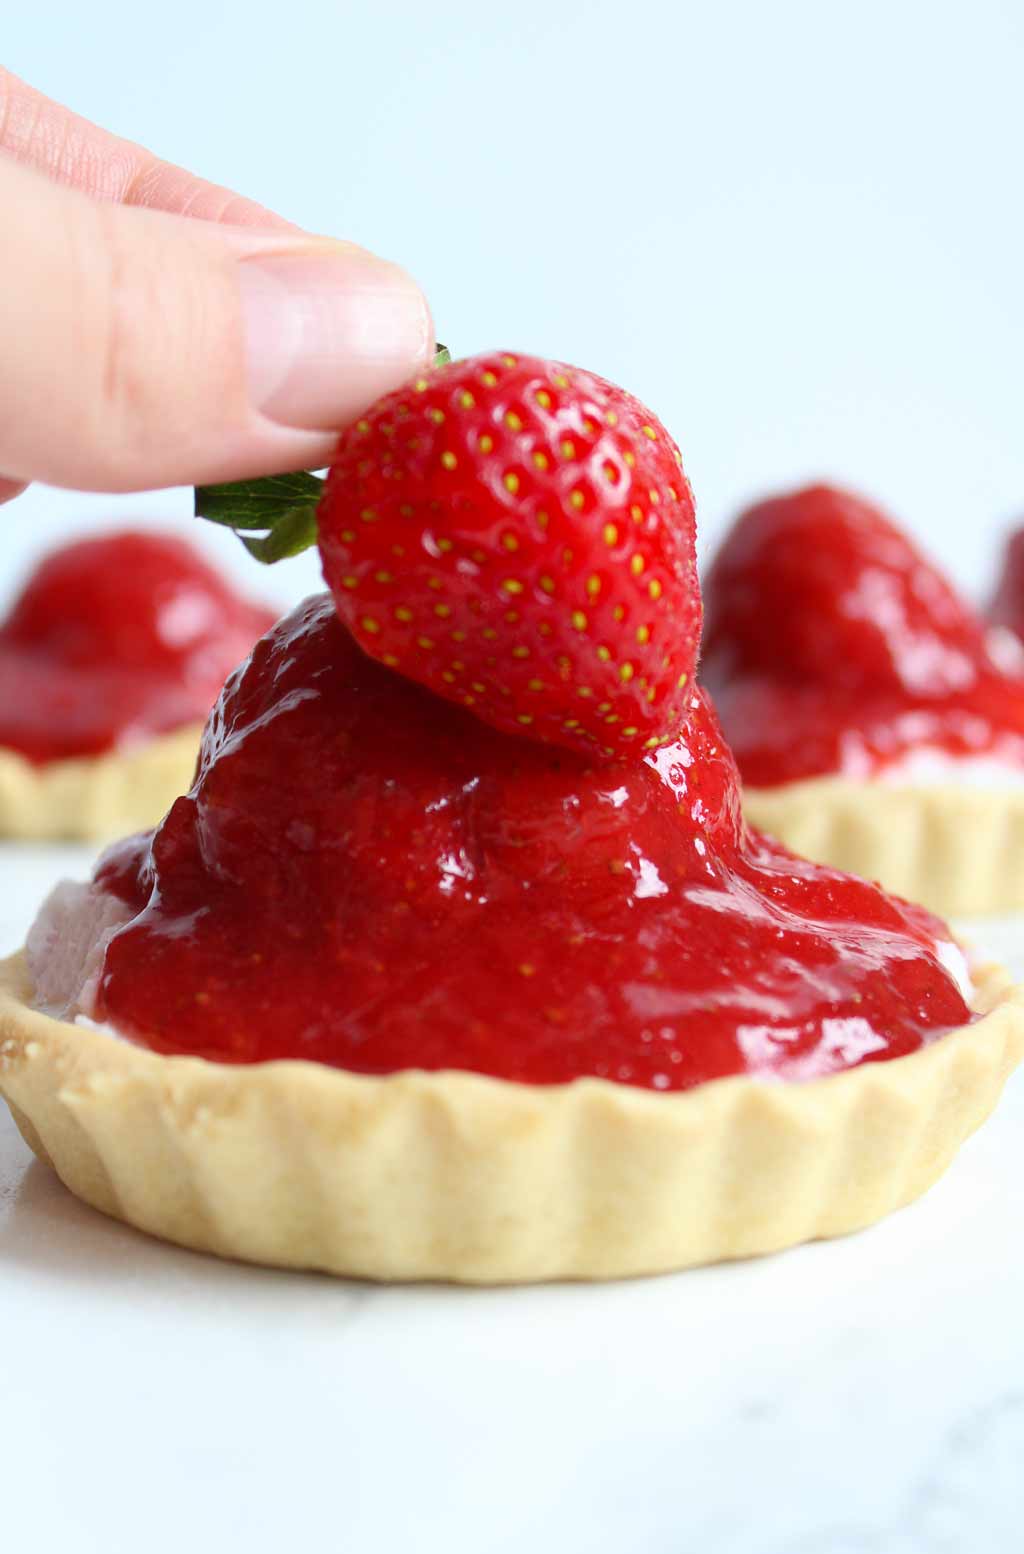
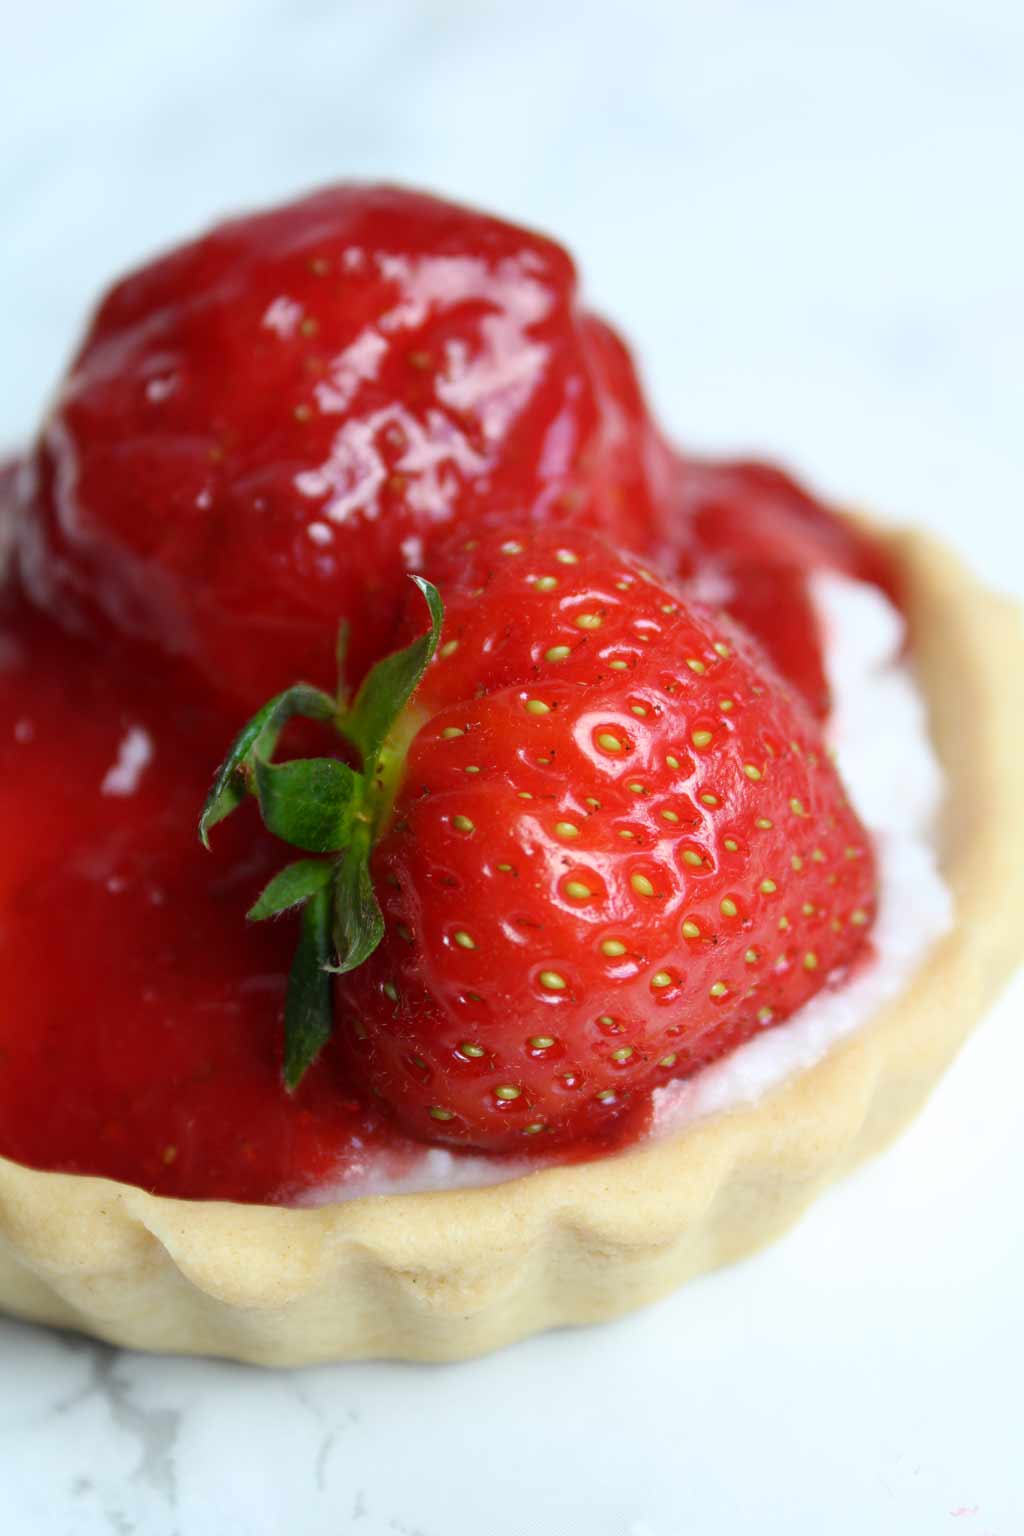
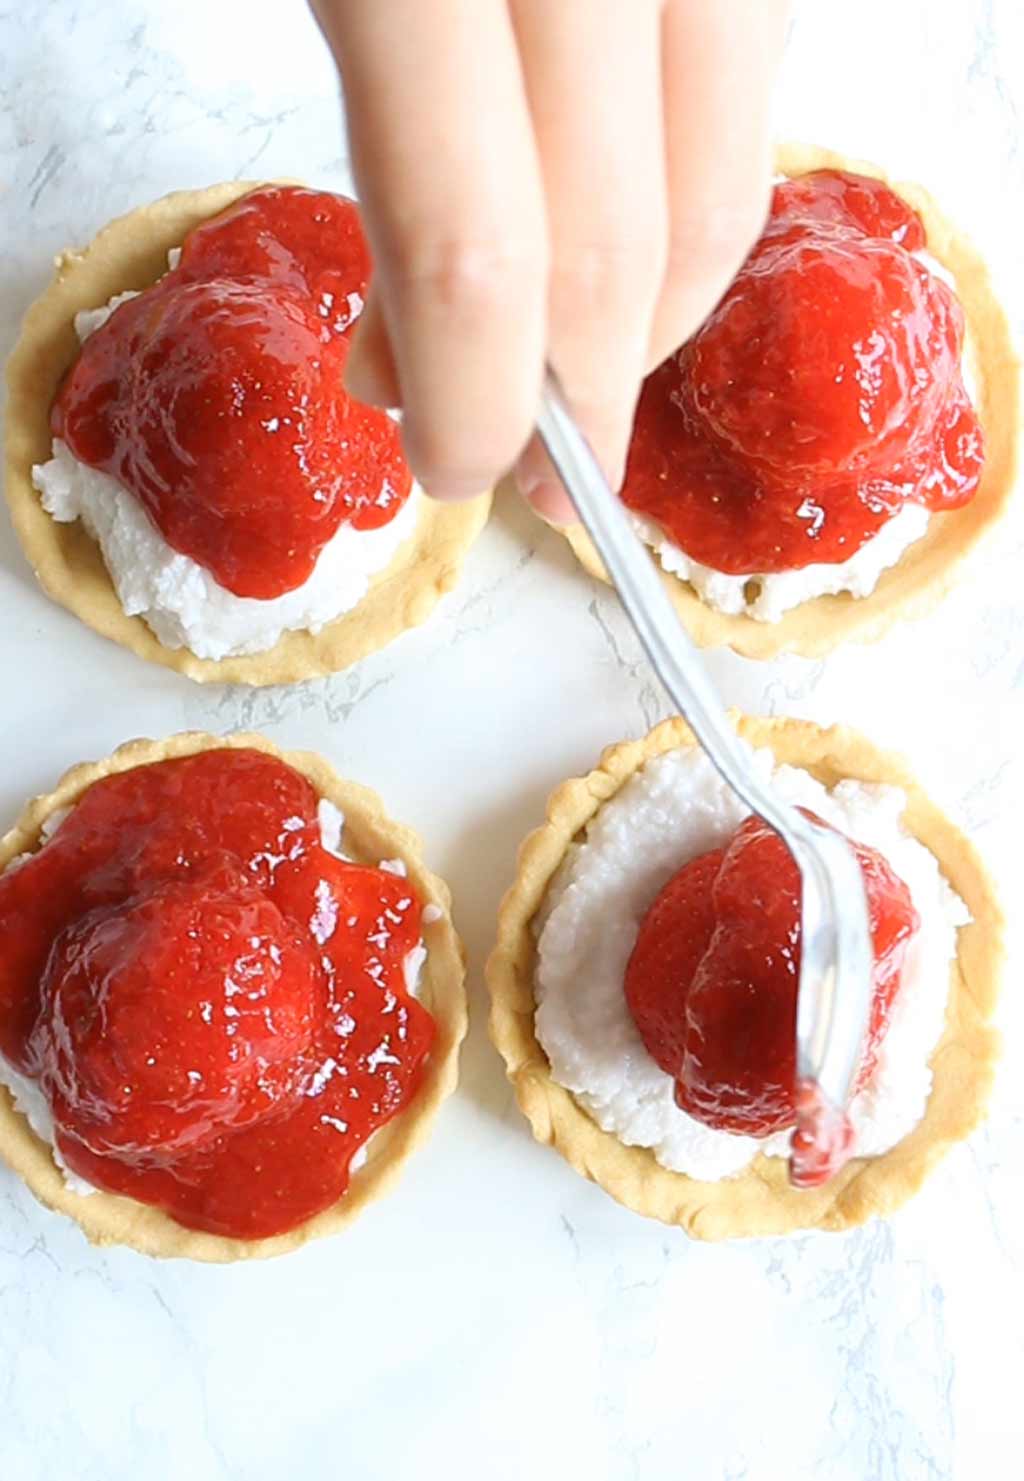
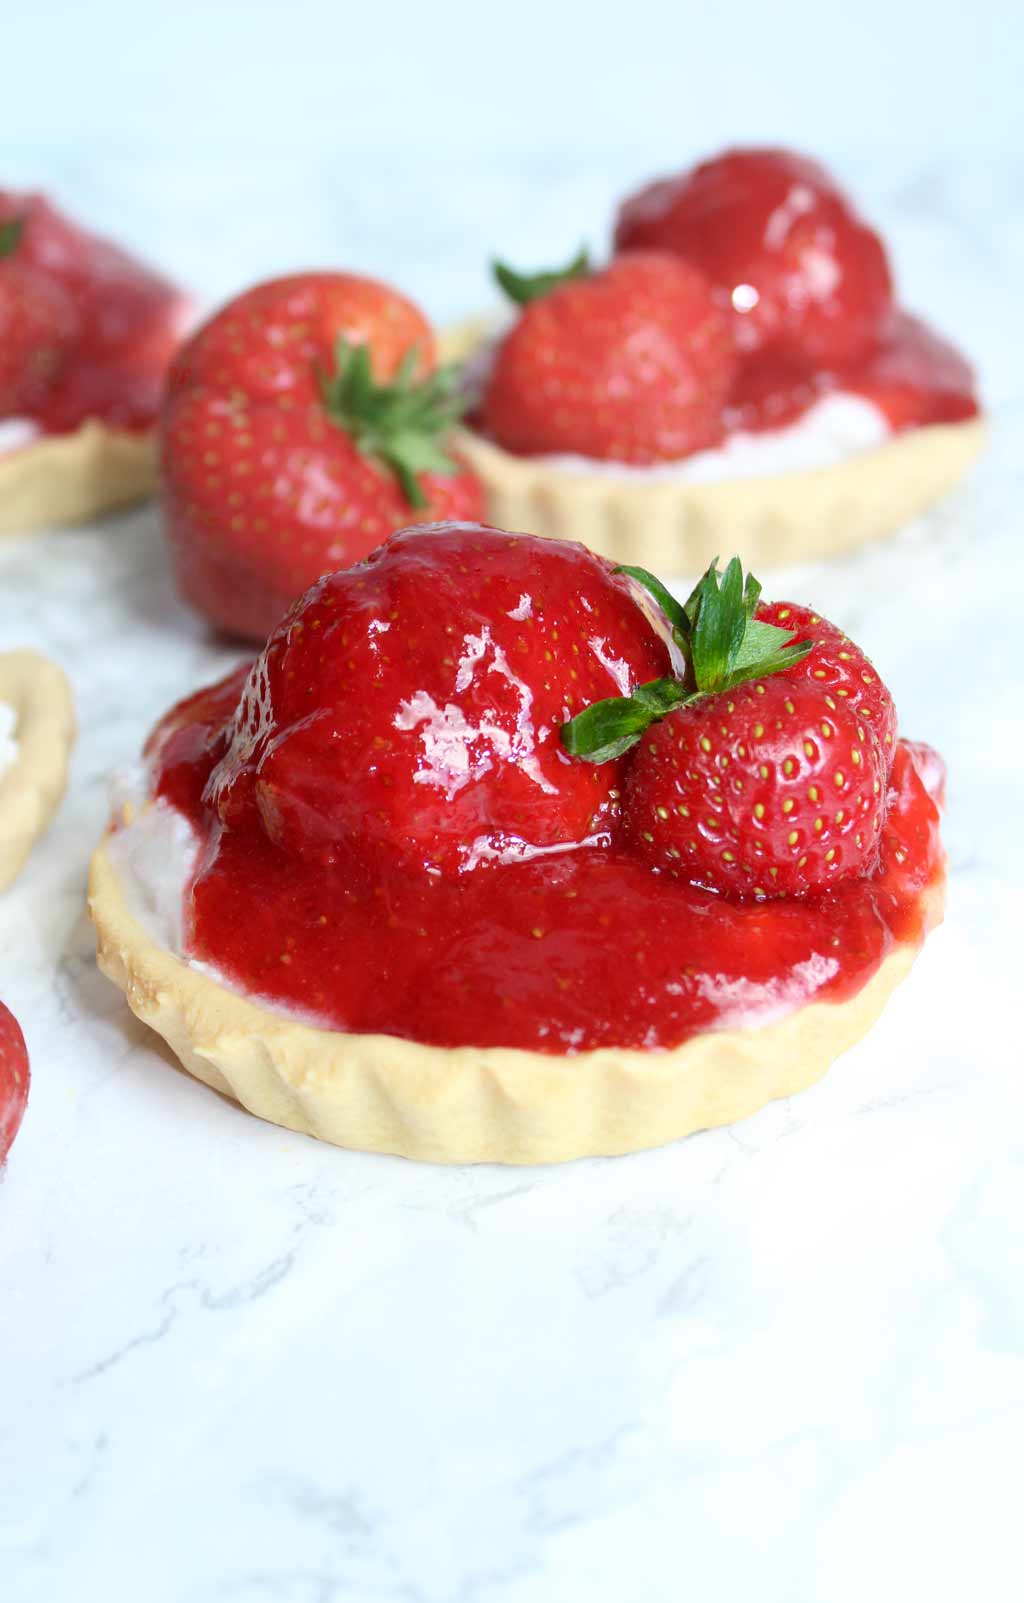
Scoop 1-2 tablespoons of dairy-free whipped cream into the middle of each (cooled) mini pastry case. Place a whole, de-hulled strawberry facing upside-down into the centre of the whipped cream on each tart.
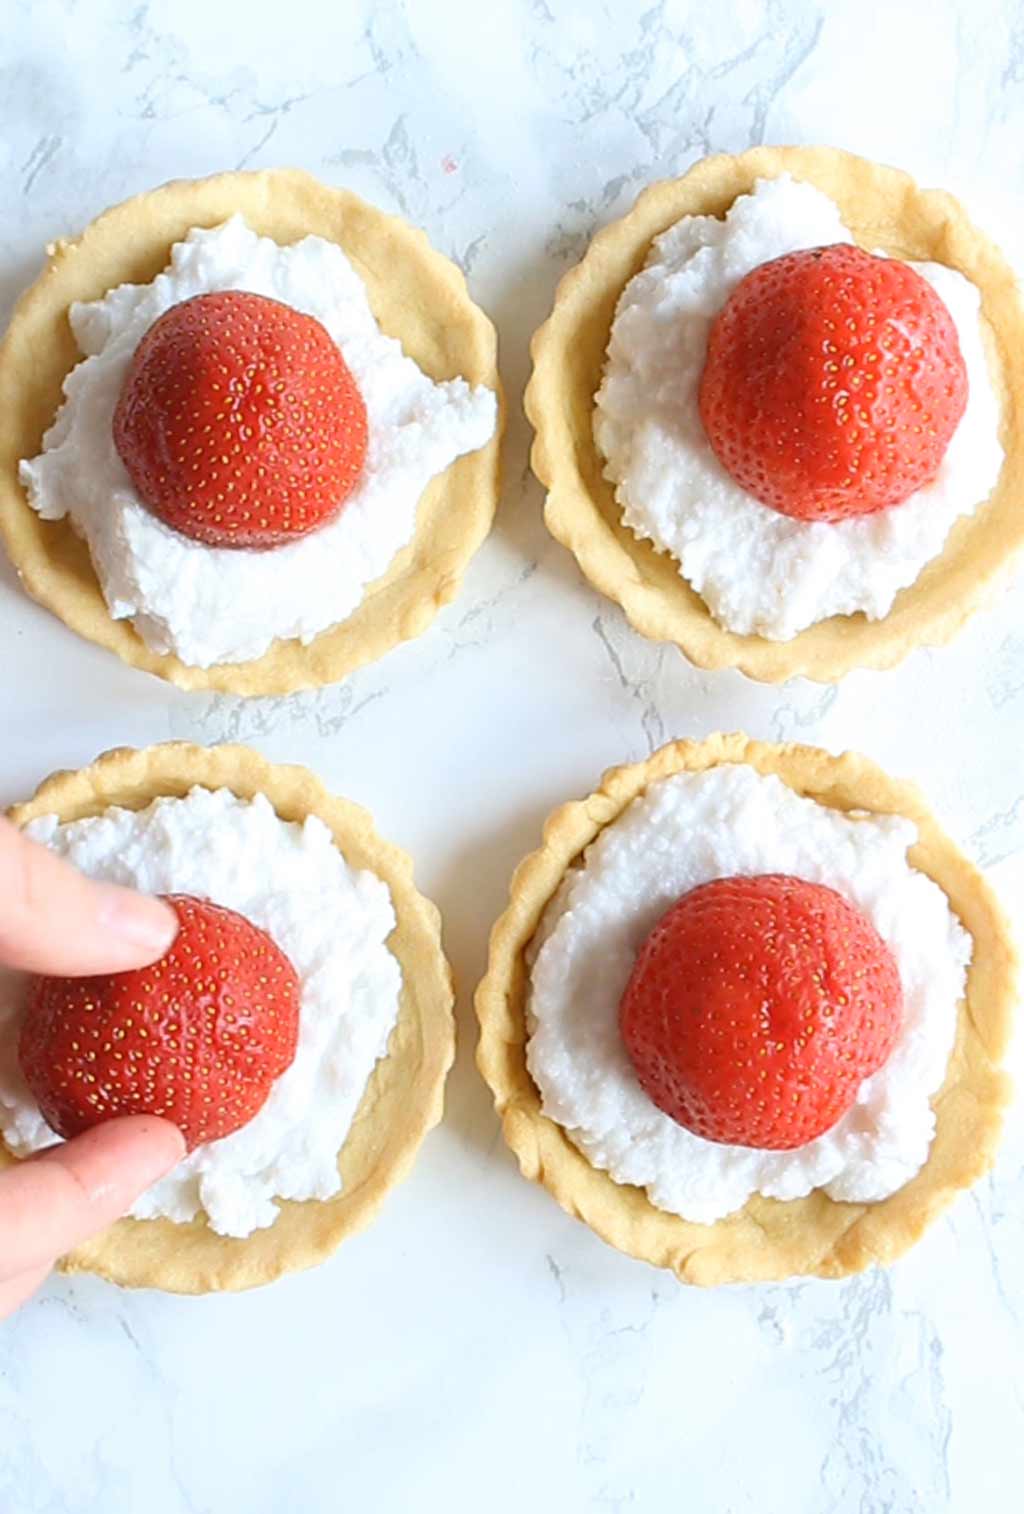
Carefully drizzle 1-2 tablespoons of your cooled strawberry glaze mixture on top of the strawberries. You can also add additional sliced strawberries on top for decoration if you wish to.
Step 8:
Enjoy these delicious mini strawberry tarts! You can store them in the fridge ready-made for up to 12 hours.
Can I Make Mini Strawberry Tarts Ahead of Time?
These tartlets unfortunately won’t last very long due to the cream. After a while, it will begin to seep into the pastry and make it a bit soggy.
You can, however, make the mini pastry cases in advance. They will last for around 2 days, wrapped in plastic wrap, in the fridge.
If you really want to, you can even freeze the baked pastry cases then defrost them on the day you want to serve them with the filling and strawberry toppings.
To freeze the cases, wrap them in plastic wrap and pop them in the freezer for up to two months. To defrost, unwrap them and allow them to sit at room temperature for 2-3 hours. Make sure they’re fully thawed before preparing your filling.
I hope you like this veganised Scottish dessert recipe. If you try them yourself, please leave me a comment or a rating below to let me know how it goes. Happy baking! xo

Mini Strawberry Tarts (Vegan)
A dairy-free and egg-free version of traditional Scottish strawberry tarts.
Ingredients
For the pastry cases:
- 215 g Plain flour
- 135 g Dairy-free margarine*
- 15 g Icing sugar (1 tablespoon)
- 1 Tablespoon Ice cold water
For the strawberry glaze topping:
- 10 Medium-sized strawberries (washed and de-hulled)
- 55 g Caster sugar (¼ cup)
- 2 Teaspoons Lemon juice
For the filling:
- 10-12 Tablespoons Vegan whipped cream (I used coconut cream)
To top:
- 6-10 Medium-sized strawberries
Instructions
For the pastry:
-
Before you begin, make sure you have 6 tartlet tins to hand.
-
Add the plain flour and vegan margarine into a medium-sized bowl. Rub the margarine into the flour until you have a mixture that resembles breadcrumbs. Stir in the icing sugar.
-
Add the cold water into the bowl and stir until everything starts to stick together. Then use your hands to gently press it into a ball. It'll seem crumbly at first but will come together.
-
Place the dough in the fridge to chill for 30 minutes. While you're waiting, preheat your oven to 200°C/400°F (or 180°C/350°F if using a fan oven).
-
Remove the chilled dough from the fridge then roll it onto a floured surface until around ¼ of an inch thick. Rotate after each roll and add more flour as needed to prevent it from sticking. Cut out circle shapes that are slightly bigger than your tartlet tins. Re-roll the leftover pieces of dough and repeat until you have 6 large circles.
-
Lightly spray your tartlet tins with some cooking spray. Place a circle of dough into each tin and use your fingers to mould the dough into place, making sure to press it up the sides of the tins. Dock the dough a few times, using a fork, all along the bottom of each one.
-
Bake for 20 minutes until ever-so-slightly golden brown. Allow the tart cases to cool completely then remove them from the tins.
To make the strawberry glaze topping:
-
Add the strawberries, sugar and lemon juice into a small pot or pan and place over a medium-high heat for 5 minutes, stirring every so often.
-
After 5 minutes, the strawberries should be a little softer. Use a fork or a potato masher to mash the strawberries down as much as possible.
-
Turn the heat down to medium-low and simmer the mixture for a further 5-10 minutes until it becomes thick. Set aside to cool completely.
To assemble:
-
Spoon 1-2 tablespoons of whipped cream into each tart case. Top each one with a whole strawberry facing downwards.
-
Spoon 1-2 tablespoons of your strawberry glaze onto each tart. You can choose to cover the cream completely if you wish but I also love how it looks with a little cream showing!
-
If desired, add an extra slice of strawberry on top for decoration.
Recipe Video
Recipe Notes
- *Use the spreadable kind of vegan butter/margarine, not the blocky style.
- Coconut cream can be subbed for any plant-basedwhipping cream such as Soyatoo, or Elmlea Plant.
- These tartlets are best enjoyed immediately but can be stored in the fridge for up to 24 hours.


Linda Spensley
Sunday 10th of September 2023
Love your recipes, very simple with beautiful results
Chloe
Sunday 10th of September 2023
Thank you so much 😊
Louise
Wednesday 31st of July 2019
They look yummy!! THe coconut flavour in vegan desserts is quite strong for my liking however. Do you know of anything else I can use? Would soy whip work do you think?
Chloe
Thursday 1st of August 2019
Hi Louise! I've never actually experimented with soy whip myself but I don't see why it wouldn't work! If you try it, let me know how you get on :)
Peg Nemoff
Monday 15th of July 2019
How well would this recipe work if I were to substitute raspberries for the strawberries?
Chloe
Tuesday 16th of July 2019
Oooh that sounds great! I've never tried it myself but I think it will work well. The only thing is, you might need to add a little more sugar to the topping as raspberries are a little sourer. Let me know if you try it and how it goes!