This super moist, rich vegan red velvet cake will wow your friends and family! It’s sandwiched and covered with dairy-free cream cheese frosting and is a decadent dessert that everyone will love.
Red velvet.
I don’t know about you, but up until I started this blog, I’d always seen this as a strictly American “flavour”.
Although I’m pretty sure it did originate from the USA, I only recently realised that the UK supermarkets have loads of red velvet dessert options too!
Of course, not many of them are vegan (yet), so today I’m sharing my take on it.
What Makes It Red?
Traditionally, this cake produced its red colour from a chemical reaction in the ingredients.
The acidity of the vinegar in the buttermilk is supposed to react with the anthocyanin-rich cocoa powder to bring out its red undertones.
Nowadays, most people use red food colouring to enhance the redness to make it more visually appealing. So I followed suit.
Want more vegan cake recipes? Try these:
When I first created this recipe in 2019, I used ground up flax seeds as my vegan egg replacer, as I did with many of my recipes back then!
But my vegan baking journey has come a long way and I’ve since perfected a sponge cake recipe without flax seeds (or any other type of seeds for that matter).
It’s a super easy, simple recipe with basic ingredients.
How To Make Vegan Red Velvet Cake
Step 1:
Before anything else, preheat your oven to 180°C/350°F (or 160°C/350°F if you’re using a fan or convection oven).
Grease, flour and line two 7-inch round cake tins. This cake is quite small so I don’t recommend using larger tins unless you increase the quantity of the ingredients too.
Step 2:
In a large bowl, mix together 260g of self-raising flour (2 cups), 1/2 a teaspoon of baking soda, 1 tablespoon of unsweetened cocoa powder and 150g (3/4 cup) of caster sugar.
Step 3:
Next, measure out 135g of vegan butter (1/2 cup + 1 tablespoon). Melt it gently in microwave or on the stove.
Add it to the bowl along with 240ml of unsweetened soy milk (1 cup), 2 teaspoons of vanilla extract and 1 teaspoon of vinegar. I used apple cider vinegar but you can substitute white vinegar.
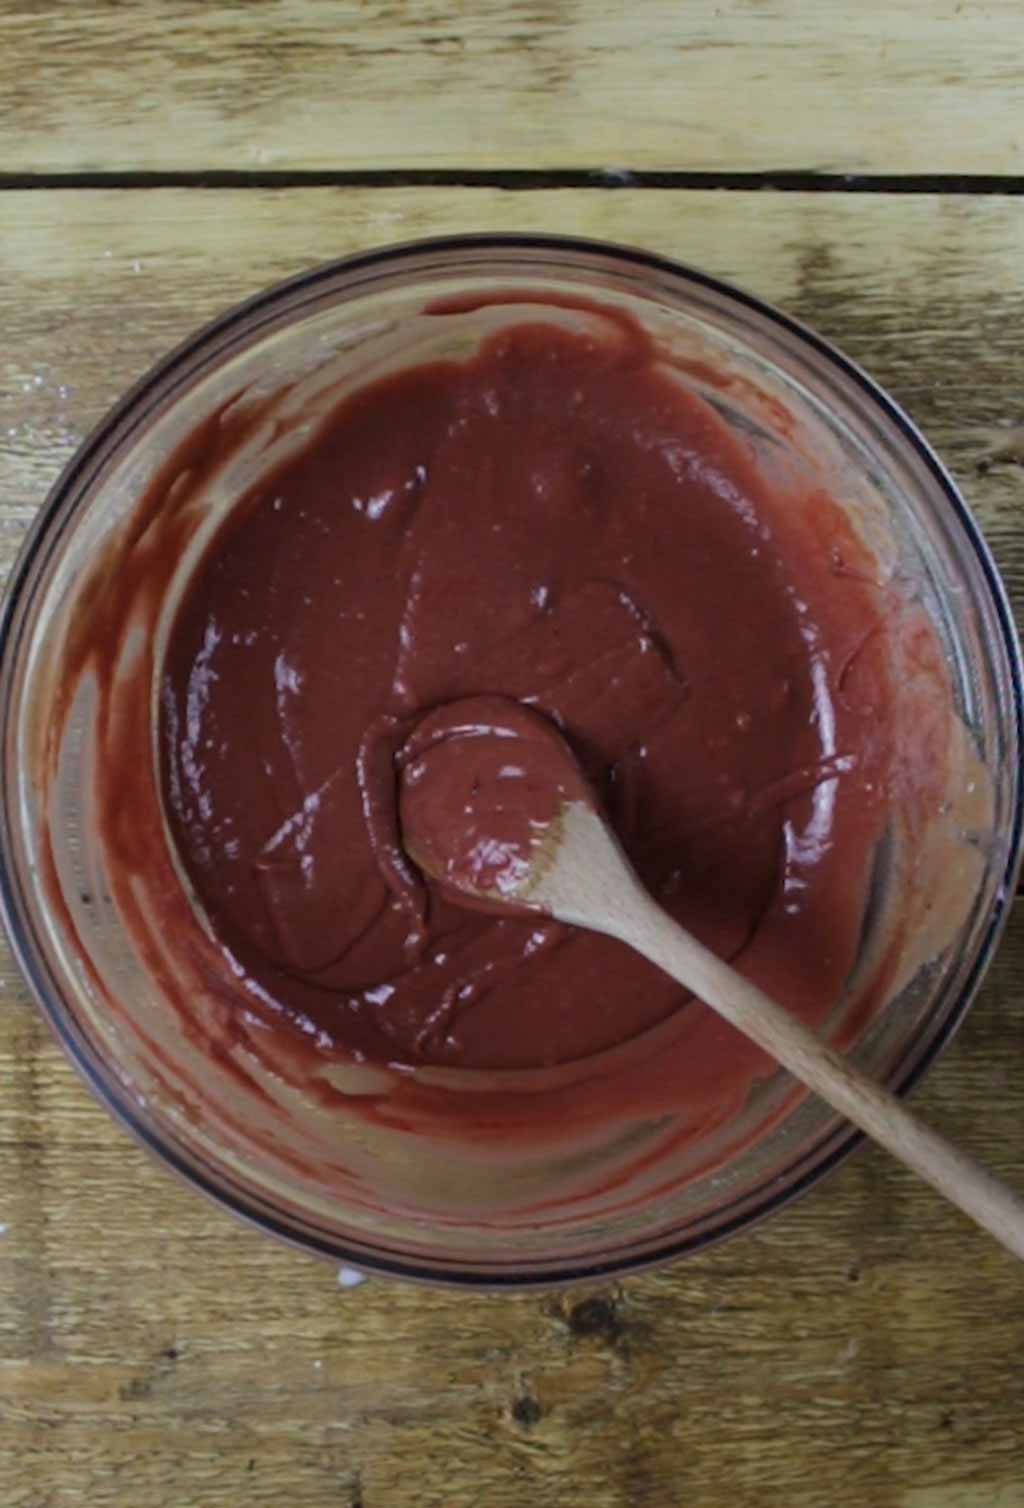
Mix everything together really well until you have a smooth cake batter. Make sure you’ve scraped the bottom and sides of the bowl to get any dry bits that may be stuck.
Step 4:
Now it’s time to add the red food colouring.
One thing to note is that quite a lot of the red food colourings out there contain E120 which is not vegan-friendly as it’s made from insects (weird, I know).
PME have great vegan-friendly gel colourings and I would highly recommend them.
I used around 1/4 of a teaspoon in this recipe which gave a beautiful colour.
I have also tried making this cake with liquid red food colouring, and again with beetroot juice, but the colour didn’t hold very well when it was baking. The cake actually just ended up with an odd brownish tint to it!
I’d personally recommend using a gel or a paste if possible, but I’ve also seen other recipes that use beetroot powder rather than juice for the colour. That’s always an option if you prefer natural colourings.
Step 5:
Divide the cake batter between your two cake tins.
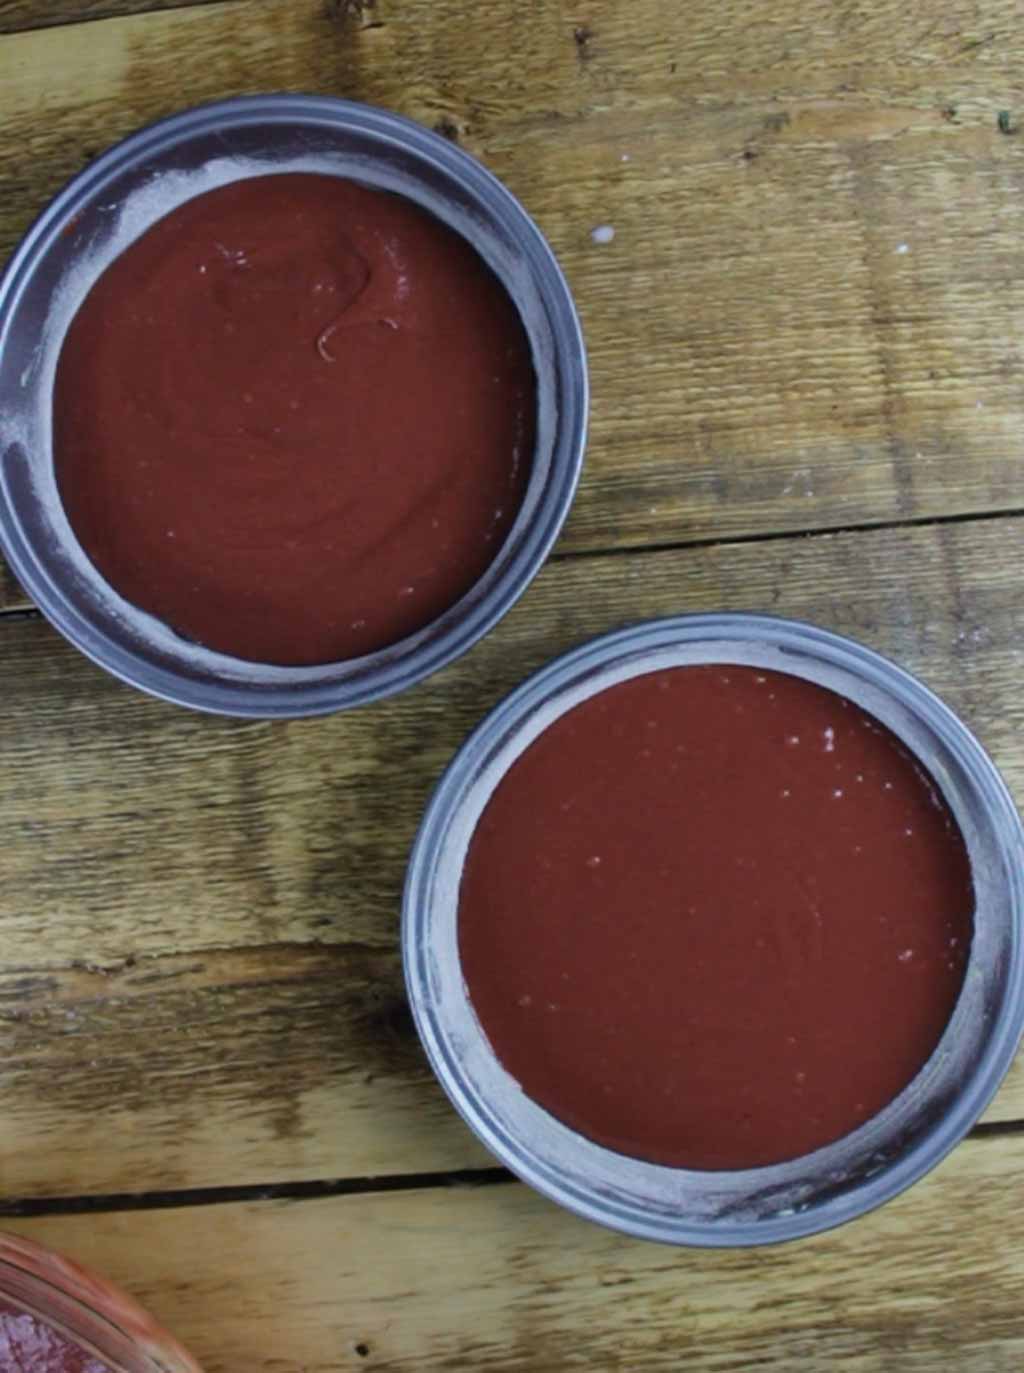
Pop them in the oven and bake for 15 minutes.
You can insert a toothpick into the middle of one cake and if it comes out clean, then you’ll know they are fully baked.
Leave the cakes in their pans for around 10 minutes before flipping them out onto a wire rack. Peel off the baking paper and leave them to cool completely.
Step 6:
If you prefer to make homemade cream cheese frosting, I recommend doing this in advance because it needs to chill for a while before you put it onto the cake.
The homemade frosting is quite runny immediately after making it, so it needs time to firm up in the fridge. Otherwise, the cakes will slide around as you stack them.
I used 1 tub of Betty Crocker’s cream cheese frosting for quickness because it doesn’t require chilling.
I also wanted to give a cheaper option for those who don’t want to go out and buy vegan cream cheese to use only a small amount. Because that stuff is EXPENSIVE!
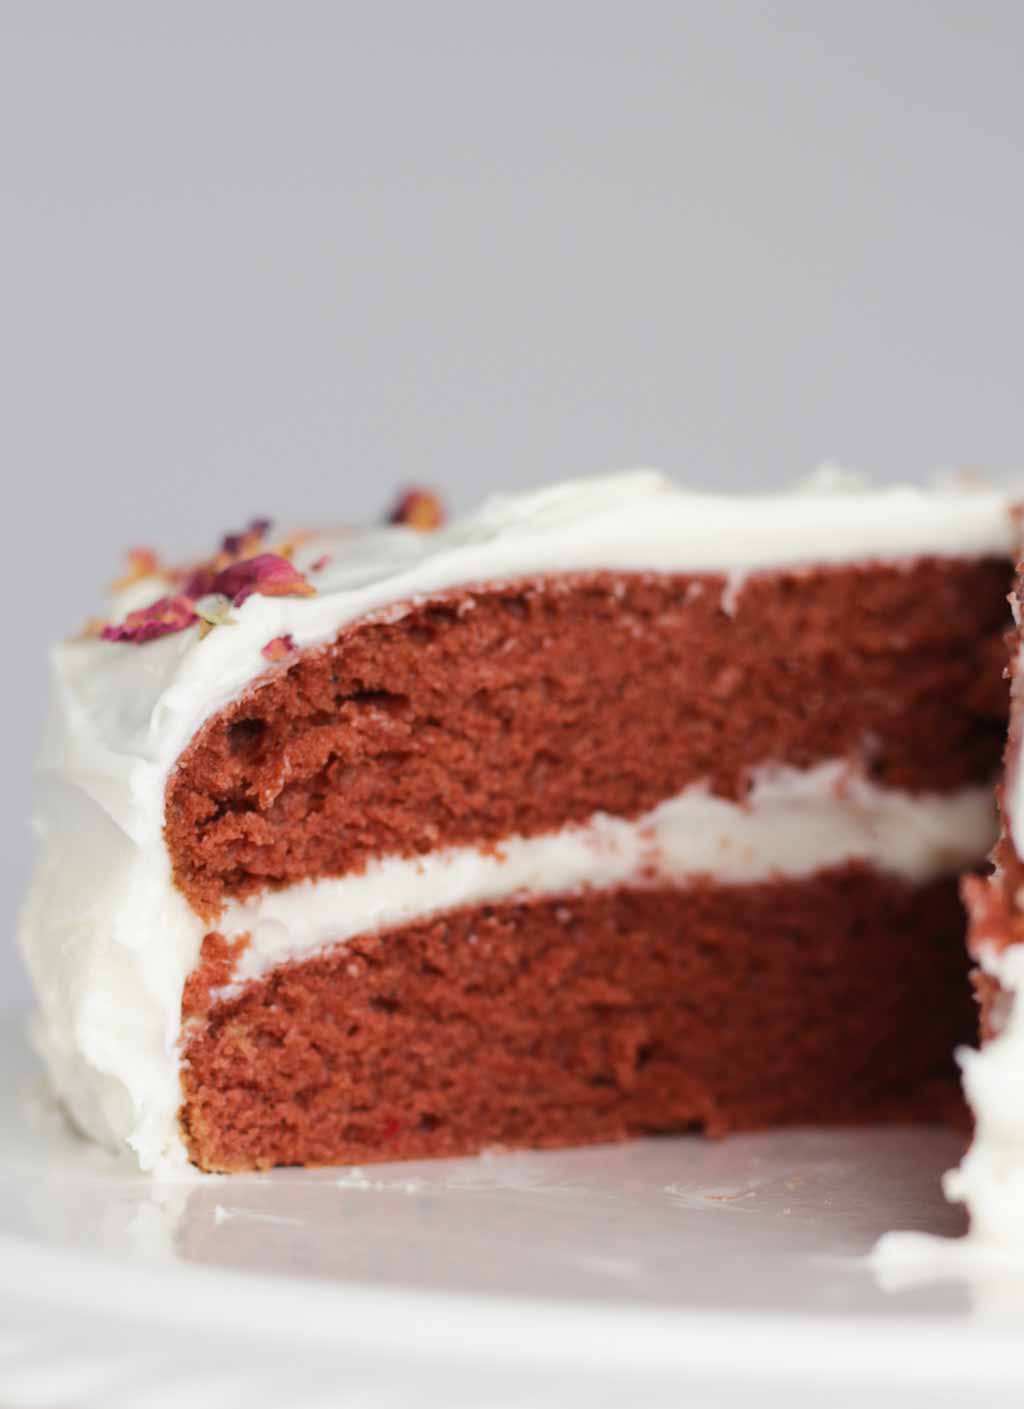
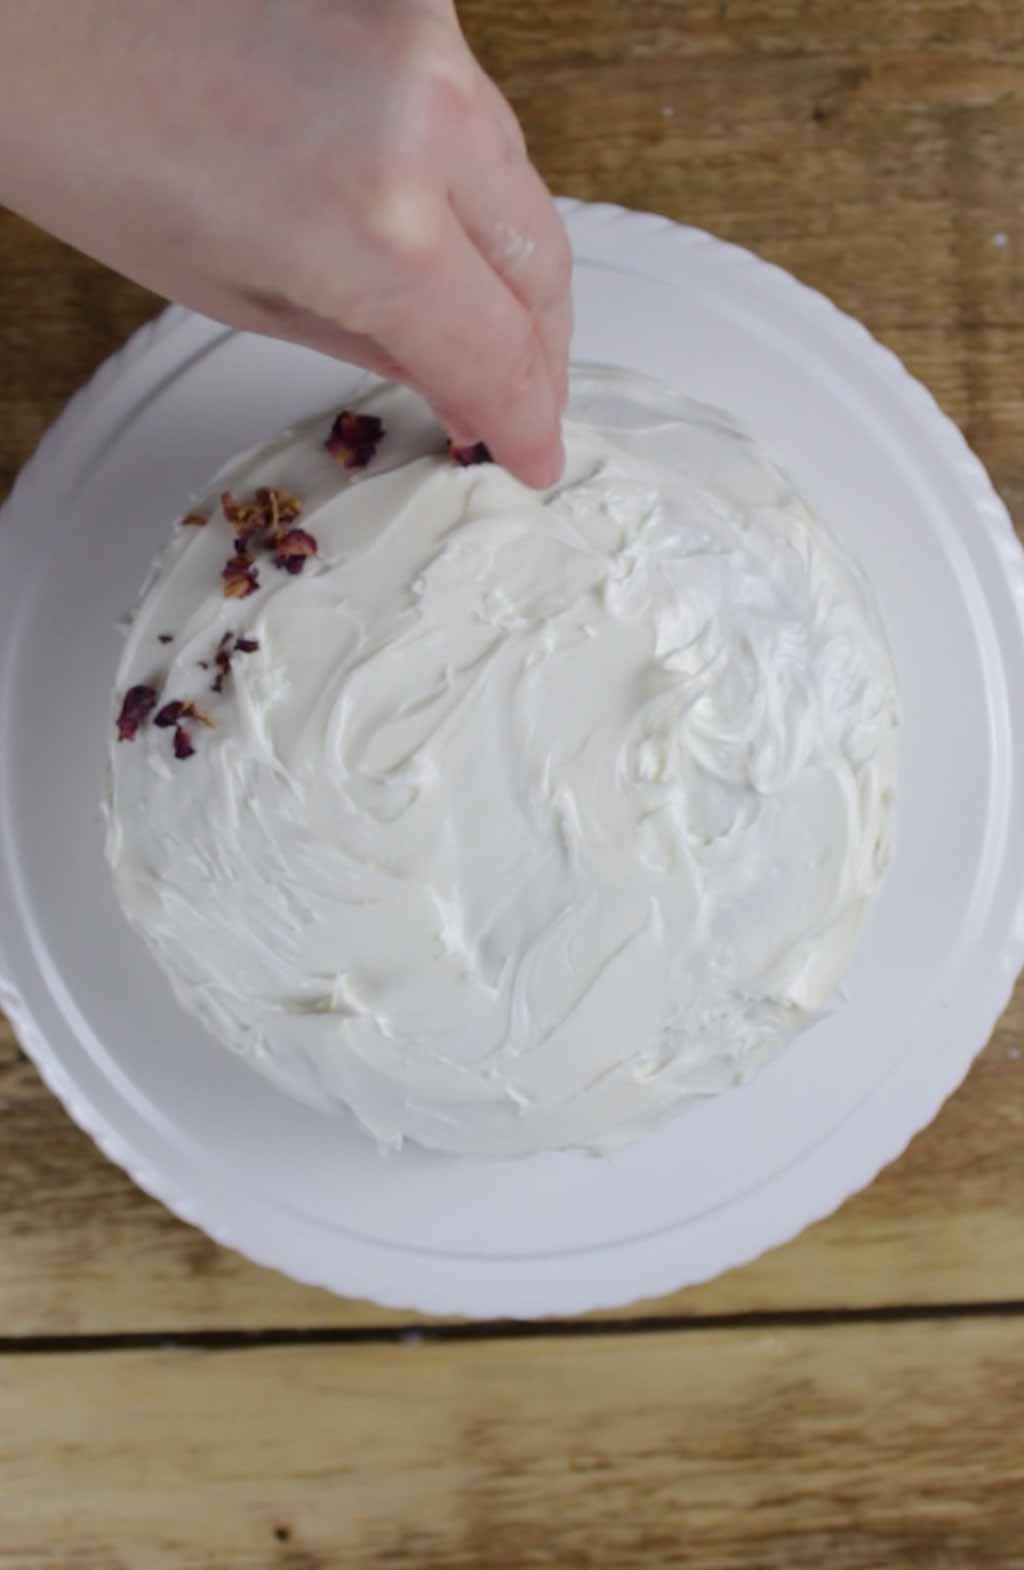
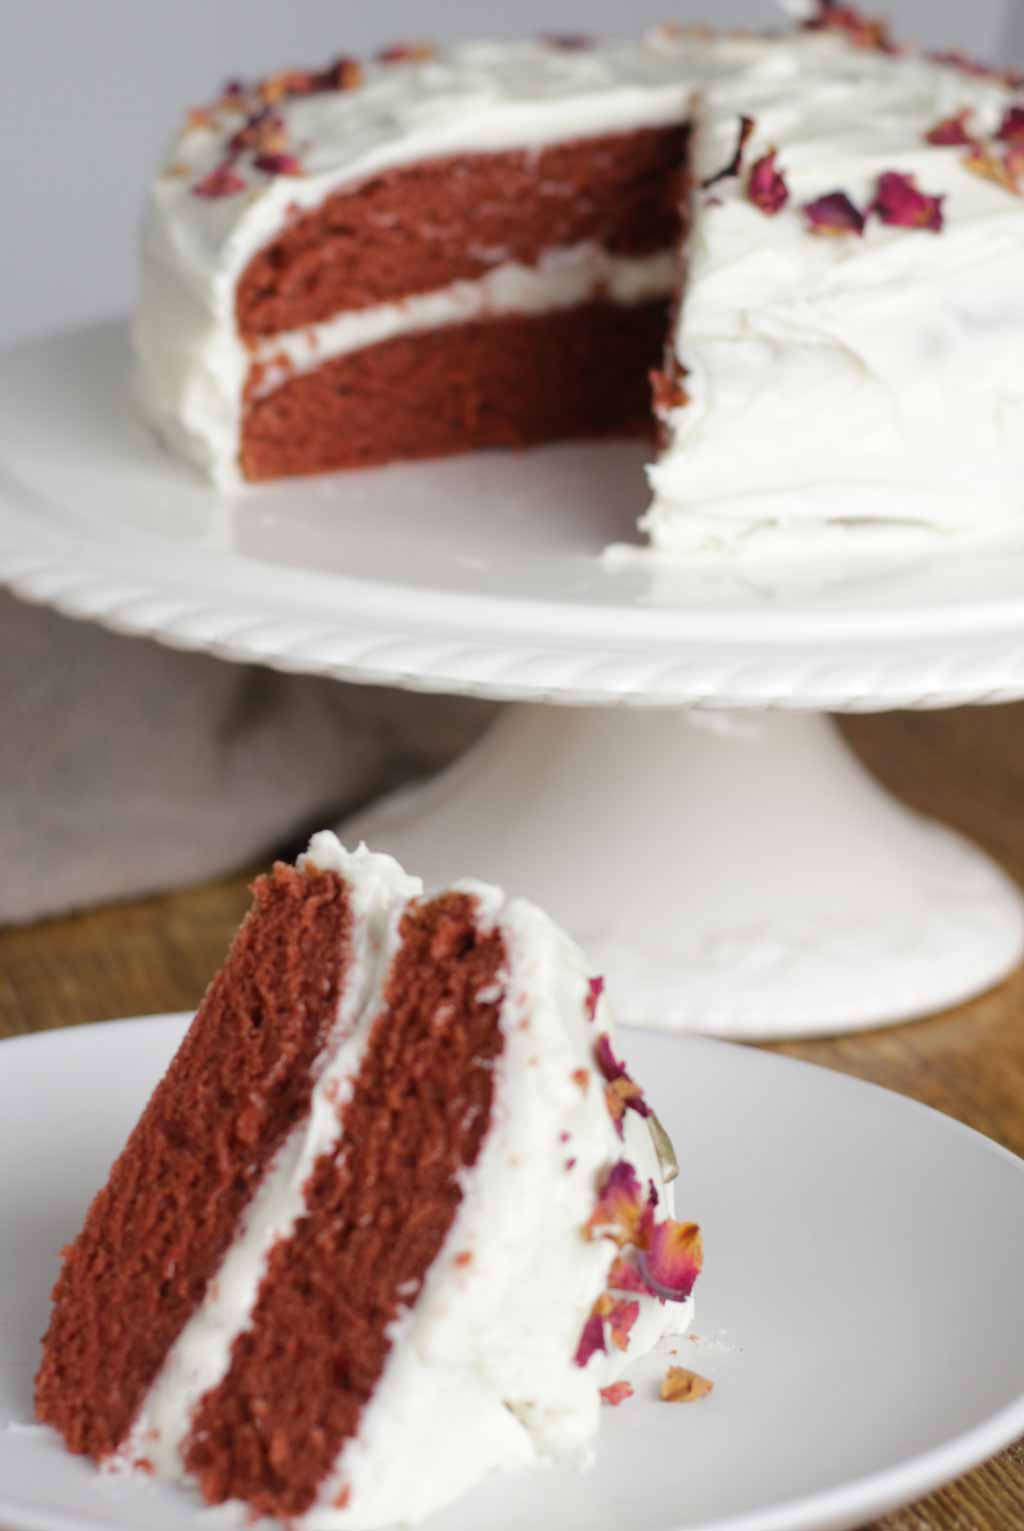
Place one of your cakes onto a plate or cake board, then spread some frosting all over it. Place your second cake on top and repeat.
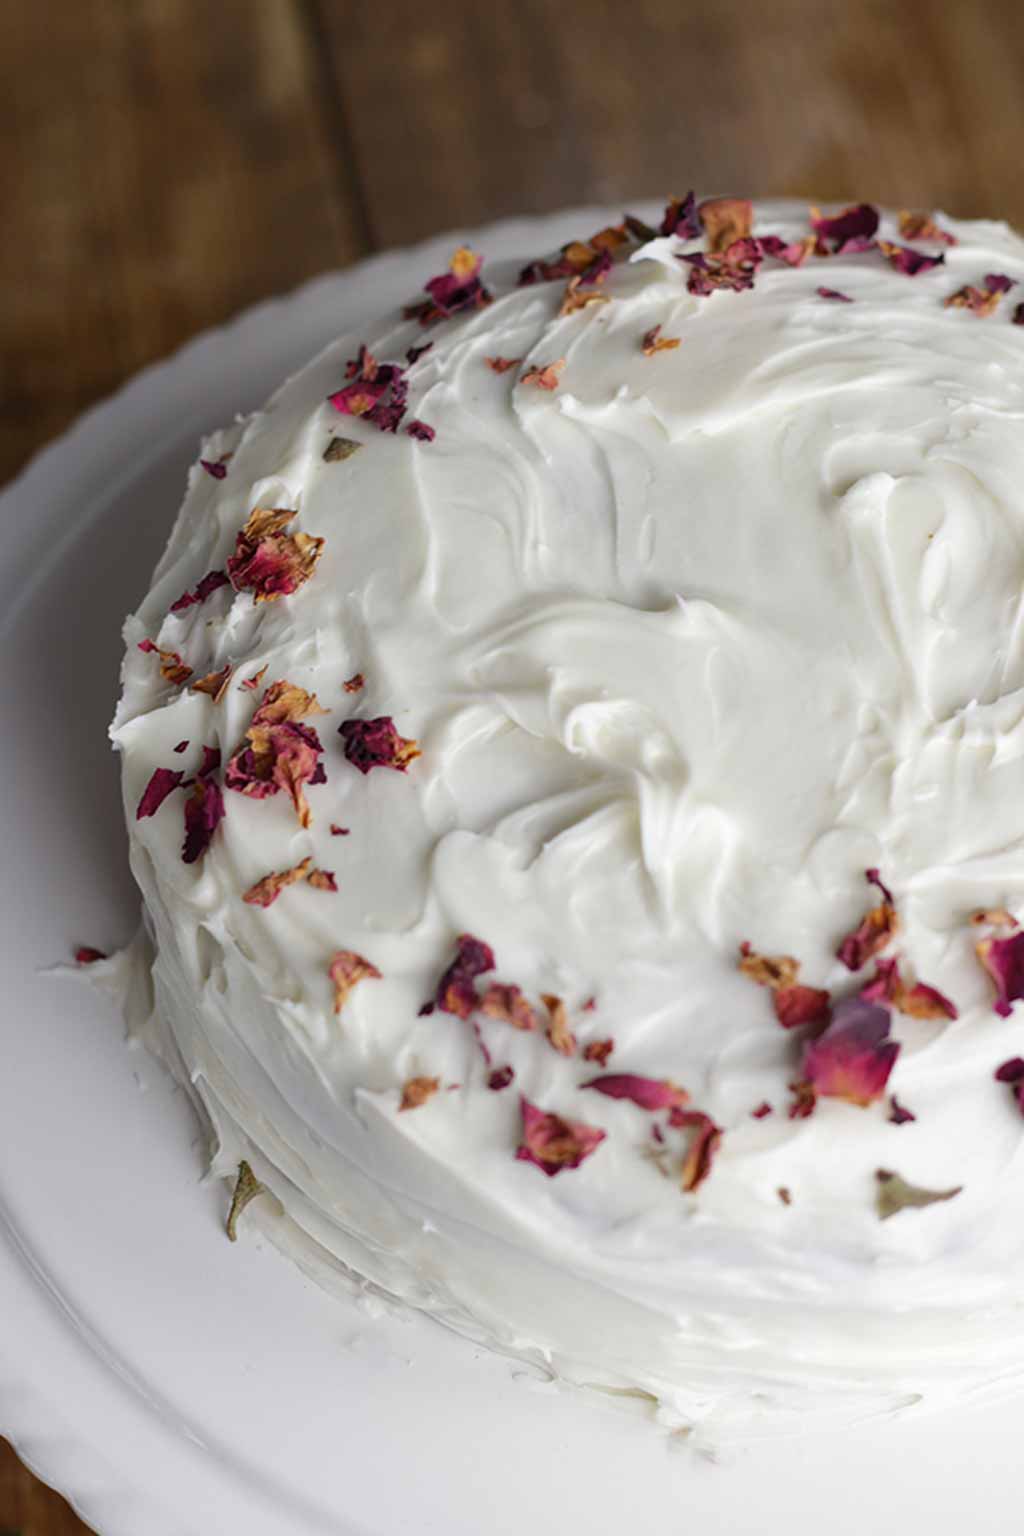
You can leave it like this or you can spread it around the edges too, like I did.
To make it extra pretty, I added some edible flower petals around the edges of my cake. Feel free to add whichever decorative touches you like.
Step 7:
Let the cake sit at room temperature or pop it in the fridge until the frosting has set. Then, cut into slices and enjoy!
FAQ:
Yes. I prefer to use butter for the flavour and because it makes the cakes more sturdy but it can be substituted for oil.
I recommend using a neutral-tasting oil such as rapeseed or sunflower. Oils such as coconut or olive would be too overpowering for this recipe.
In the fridge is best, especially if you’ve used homemade frosting! Keep it covered too, either in an airtight container or on a covered cake stand.
It’ll stay delicious for around 4-5 days if stored correctly.
Yes! I would recommend freezing the cake in slices, in airtight containers for up to 1 month. You can freeze it with the frosting on.
To defrost, just transfer the slices onto a plate and leave them at room temperature for around 2 hours until they are completely thawed.
I hope you love this cake as much as my family and I did. Please leave a review or comment below, or tag me on Instagram @bakedbyclo if you make it yourself!
Happy baking! xo

Vegan Red Velvet Cake
An eggless, dairy-free take on the Victorian classic!
Ingredients
For the cake:
- 260 g Self-raising flour (2 cups)
- ½ Teaspoon Baking soda
- 1 Tablespoon Unsweetened cocoa powder
- 150 g Caster sugar (¾ cup)
- 135 g Vegan butter, melted after measuring (½ cup + 1 tablespoon)
- 240 ml Unsweetened soy milk (1 cup)
- 2 Teaspoons Vanilla extract
- 1 Teaspoon Apple cider vinegar (sub white vinegar)
- ¼ Teaspoon Red gel food colouring* (I use PME as it's vegan-friendly)
To frost:
- 1 Tub Betty Crocker cream cheese style frosting
- OR 1 Batch Vegan cream cheese frosting
Instructions
-
Preheat your oven to 180°C/350°F (160°C/325°F if you're using a fan or convection oven). Grease, flour and line two 7-inch round cake tins with parchment paper. If using larger tins, you'll need to increase the ingredient quantities too as this is a fairly small cake.
-
In a large bowl, mix together the flour, baking soda, cocoa powder and sugar.
-
Add in the melted butter, soy milk, vanilla and vinegar. Mix well until you have a smooth batter.
-
Stir in the food colouring. You can add a little more if you want a stronger colour.
-
Divide the batter between your cake tins and bake for 15 minutes. Make sure that the cakes are cooked all the way through by inserting a toothpick through the centre. It will come out clean if the cakes are done.
-
Leave the cakes in their pans for 10 minutes to cool a little, then flip them onto a wire rack. Peel off the baking paper and let them cool completely.
-
Sandwich and cover the cakes with the cream cheese frosting. Let the frosting set before cutting into slices.
Recipe Video
Recipe Notes
- *I highly recommend using a food gel colour instead of liquid.
- This cake can be kept covered in the fridge for up to 5 days.
Jill Ramey
Thursday 24th of October 2024
Hello! Can I use almond milk instead of soy in this recipe?
Chloe
Thursday 24th of October 2024
Hi I've never tried it but I think it will work :)
T-Flor
Tuesday 29th of June 2021
Can you make cupcakes with this recipe?
Chloe
Tuesday 29th of June 2021
Yes! Here's the written recipe for the cupcakes: http://34.138.169.189/vegan-red-velvet-cupcakes/
Ronak Mehta
Wednesday 16th of September 2020
Wow. It looks delicious. I love pineapple cakes. So, I will try to make it. Your recipe will help me. Thanks for sharing.
Mishkz
Thursday 19th of September 2019
Hi Clo, can you tell me the size of your tablespoons- are they US 15mls or Australian 20mls please?
Chloe
Thursday 19th of September 2019
Hello, the tablespoons I use are 15ml :)
Frances
Wednesday 18th of September 2019
Would this work if I doubled the qty and used 3x9" tins?
Chloe
Thursday 19th of September 2019
Hey Frances. Yes this would work fine- the cakes might need baked just a tad longer. :)